Peanut Butter Cup Cookies: The Ultimate Indulgence
Introduction
If you’re a fan of rich, creamy peanut butter and smooth, melty chocolate, then Peanut Butter Cup Cookies are your new favorite treat. These decadent cookies combine the best qualities of classic peanut butter cookies with the irresistible allure of peanut butter cups, creating a dessert that’s both nostalgic and luxurious. Whether you’re baking for a holiday, sharing at a potluck, or simply treating yourself after a long day, these cookies deliver comfort in every bite. With their soft, chewy centers, slightly crisp edges, and bursts of chocolate-peanut butter goodness, they’re sure to become a staple in your baking repertoire.
The History
The story of the Peanut Butter Cup Cookie begins with two beloved American treats: peanut butter and chocolate. Peanut butter itself became popular in the United States in the early 20th century, originally promoted as a nutritious protein source. By the 1920s, it was a pantry staple in many households. Around the same time, candy companies began experimenting with combining peanut butter and chocolate — a match made in flavor heaven. The iconic Reese’s Peanut Butter Cup, introduced in 1928 by H.B. Reese, revolutionized the candy world and inspired countless desserts.
Baking enthusiasts soon began incorporating whole peanut butter cups into cookie dough, leading to the creation of the Peanut Butter Cup Cookie. This fusion dessert gained popularity in home kitchens during the mid-to-late 20th century, particularly as part of holiday baking traditions and bake sales. Over time, bakers refined the recipe, balancing sweetness, texture, and richness. Today, the Peanut Butter Cup Cookie stands as a symbol of indulgent American comfort food — a perfect marriage of bakery-style cookies and candy bar delight.
Ingredients Breakdown
Every great cookie starts with quality ingredients. Here’s a detailed look at what goes into making perfect Peanut Butter Cup Cookies:
- All-Purpose Flour – Provides the structural base of the cookie. It gives just enough gluten development for a tender yet sturdy texture. For best results, spoon and level the flour to avoid dense cookies.
- Baking Soda – Acts as a leavening agent, helping the cookies rise slightly and develop a soft interior. Make sure it’s fresh for optimal lift.
- Salt – Enhances all the other flavors in the cookie, balancing sweetness and bringing out the nuttiness of the peanut butter.
- Unsalted Butter – Offers a rich, creamy mouthfeel and contributes to the cookie’s golden-brown edges. Using unsalted allows you to control the salt content precisely.
- Granulated Sugar – Adds sweetness and helps create a slightly crisp outer layer when baked.
- Brown Sugar – Contains molasses, which adds moisture, chewiness, and a subtle caramel-like depth.
- Peanut Butter – The star ingredient! Use a creamy, no-stir variety (like Jif or Skippy) for consistent texture. Avoid natural peanut butter with oil separation, as it can make the dough too greasy.
- Eggs – Bind the ingredients together and add structure and moisture. Large eggs at room temperature integrate more smoothly into the batter.
- Vanilla Extract – Adds warmth and complexity to the overall flavor profile.
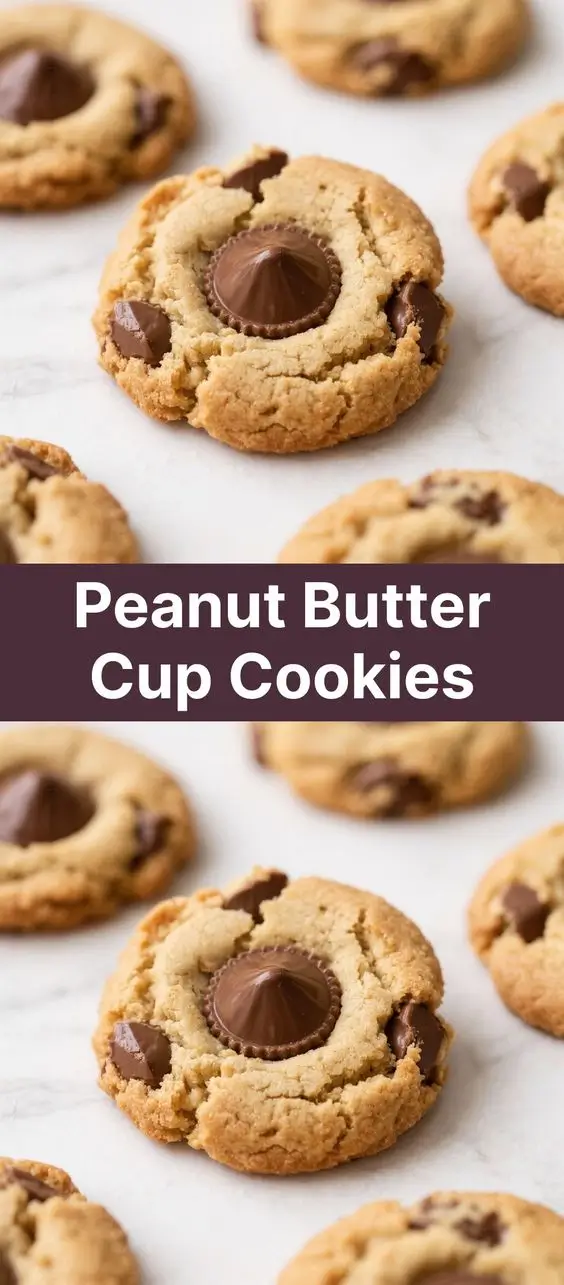
- Mini Peanut Butter Cups – These are folded into the dough and also pressed on top before baking. Mini versions distribute more evenly than full-sized cups. You can use store-bought or make your own if desired.
- Optional Add-ins – Chocolate chips, chopped peanuts, or even a sprinkle of sea salt on top can elevate the experience.
Step-by-Step Recipe
- Preheat Oven & Prepare Baking Sheets: Preheat your oven to 350°F (175°C). Line two large baking sheets with parchment paper or silicone baking mats to prevent sticking.
- Mix Dry Ingredients: In a medium bowl, whisk together 2 ¼ cups all-purpose flour, 1 teaspoon baking soda, and ½ teaspoon salt. Set aside.
- Cream Butter and Sugars: In a large mixing bowl, beat ¾ cup (1.5 sticks) softened unsalted butter with ¾ cup granulated sugar and ¾ cup packed brown sugar until light and fluffy, about 2–3 minutes using an electric mixer.
- Add Wet Ingredients: Beat in ½ cup creamy peanut butter until fully combined. Then add 1 large egg and 1 teaspoon vanilla extract, mixing until smooth and well incorporated.
- Incorporate Dry Ingredients: Gradually add the dry mixture to the wet ingredients, mixing on low speed until just combined. Do not overmix.
- Fold in Peanut Butter Cups: Gently fold in 1 ½ cups mini peanut butter cups using a spatula. Reserve a few for topping each cookie, if desired.
- Scoop Dough: Use a cookie scoop or tablespoon to portion out rounded balls of dough, about 1.5 tablespoons each. Place them 2 inches apart on prepared baking sheets.
- Add Tops: Press 1–2 additional mini peanut butter cups gently onto the top of each dough ball for visual appeal and extra gooeyness.
- Bake: Bake for 10–12 minutes, or until the edges are lightly golden but the centers still appear soft. They will continue to set as they cool.
- Cool: Let the cookies cool on the baking sheet for 5 minutes before transferring them to a wire rack to cool completely.
Tips
- Butter Temperature is Key: Use butter that’s softened but not melted. It should yield slightly when pressed but hold its shape. This ensures proper creaming and texture.
- Don’t Overbake: Remove the cookies from the oven while they still look underdone in the center. They firm up as they cool, resulting in a soft, chewy texture.
- Chill the Dough (Optional): For thicker cookies with less spread, chill the dough for 30–60 minutes before baking.
- Use Quality Peanut Butter: Stick to shelf-stable brands like Jif or Skippy for consistency. Natural peanut butter can alter texture due to oil content.
- Uniform Sizing: Use a cookie scoop to ensure even baking and consistent appearance.
- Rotate Pans: If baking multiple batches, rotate the baking sheet halfway through for even browning.
- Storage Tip: Store cooled cookies in an airtight container at room temperature for up to 5 days. For longer storage, freeze for up to 3 months.
Variations and Customizations
While classic Peanut Butter Cup Cookies are delicious on their own, there are endless ways to customize this recipe to suit your taste or occasion:
- Double Chocolate Version: Add ½ cup cocoa powder to the dry ingredients and mix in chocolate chips along with the peanut butter cups for a chocolate-peanut butter explosion.
- Gluten-Free Option: Substitute the all-purpose flour with a 1:1 gluten-free baking blend. Be sure to check that your peanut butter cups are also gluten-free.
- Vegan Adaptation: Use vegan butter, flax eggs (1 tbsp ground flax + 3 tbsp water per egg), and dairy-free peanut butter cups (such as Enjoy Life brand).
- Crunchy Twist: Fold in ½ cup chopped roasted peanuts or pretzel pieces for added texture and saltiness.
- Stuffed Cookies: Create a surprise center by placing a whole mini peanut butter cup inside a ball of dough, then sealing it closed before baking.
- Holiday Themes: Top with festive sprinkles, drizzle with white chocolate, or use seasonal-colored candy coatings on the peanut butter cups.
- Spiced Version: Add ½ teaspoon cinnamon or a pinch of cayenne for a warm, unexpected kick.
- Cookie Bars: Press the dough into a greased 8×8-inch baking pan and bake for 20–25 minutes for easy-cut bars.
Health Considerations and Nutritional Value
While Peanut Butter Cup Cookies are undeniably indulgent, understanding their nutritional profile can help you enjoy them mindfully:
A typical serving (one medium cookie, ~40g) contains approximately:
- Calories: 180–210
- Total Fat: 11–13g (mostly from butter and peanut butter)
- Saturated Fat: 5–6g
- Cholesterol: 20–25mg
- Sodium: 120–150mg
- Total Carbohydrates: 20–23g
- Sugars: 12–15g
- Protein: 3–4g
Positive Notes:
- Peanut butter provides healthy monounsaturated fats, protein, and small amounts of vitamins like niacin and vitamin E.
- Dark chocolate versions of peanut butter cups offer antioxidants and may support heart health in moderation.
Considerations:
- High in added sugars and saturated fat, so best enjoyed occasionally as part of a balanced diet.
- Not suitable for those with peanut allergies unless adapted with sunflower seed butter and allergy-safe candies.
- Contains gluten and dairy by default; substitutions required for allergen-sensitive diets.
To make a slightly healthier version, consider reducing sugar by ¼ cup, using reduced-fat peanut butter (though texture may change), or increasing fiber by adding oats or whole wheat flour.
Ingredients
- 2 ¼ cups (280g) all-purpose flour
- 1 teaspoon baking soda
- ½ teaspoon salt
- ¾ cup (1.5 sticks / 170g) unsalted butter, softened
- ¾ cup (150g) granulated sugar
- ¾ cup (165g) packed brown sugar
- ½ cup (130g) creamy peanut butter (not natural)
- 1 large egg, room temperature
- 1 teaspoon vanilla extract
- 1 ½ cups mini peanut butter cups, plus extra for topping
Directions
- Preheat oven to 350°F (175°C). Line baking sheets with parchment paper.
- In a medium bowl, whisk together flour, baking soda, and salt. Set aside.
- In a large bowl, beat butter, granulated sugar, and brown sugar until light and fluffy (2–3 minutes).
- Beat in peanut butter until smooth. Add egg and vanilla; mix until combined.
- Gradually add dry ingredients to wet, mixing on low until just incorporated.
- Fold in 1 ½ cups mini peanut butter cups.
- Scoop dough into 1.5-tablespoon balls and place on baking sheets, 2 inches apart.
- Gently press 1–2 extra peanut butter cups on top of each cookie.
- Bake for 10–12 minutes, until edges are golden but centers are soft.
- Cool on baking sheet for 5 minutes, then transfer to wire rack to cool completely.
FAQ
Can I use natural peanut butter?
It’s not recommended. Natural peanut butter often contains oils that separate, which can make the dough too greasy and cause spreading issues.
Can I freeze the dough?
Yes! Portion the dough into balls and freeze on a tray. Once solid, transfer to a freezer bag. Bake straight from frozen, adding 1–2 minutes to the baking time.
How long do these cookies last?
Store in an airtight container at room temperature for up to 5 days. Freeze for up to 3 months.
Can I make them without eggs?
Yes, substitute with a flax egg (1 tbsp ground flaxseed + 3 tbsp water, let sit 5 minutes) or commercial egg replacer.
Why did my cookies spread too much?
Possible causes include butter that was too soft, not enough flour, or skipping the cooling period on the baking sheet. Chilling the dough before baking can help.
Can I use regular-sized peanut butter cups?
Yes, but chop them into smaller pieces for even distribution. Alternatively, use one half per cookie as a topping.
Are these cookies gluten-free?
Not by default, but you can use a gluten-free flour blend. Confirm that your peanut butter cups are also certified gluten-free.
Can I add chocolate chips?
Absolutely! Semi-sweet, milk, or dark chocolate chips pair wonderfully with the peanut butter flavor.
Summary
Peanut Butter Cup Cookies are the ultimate fusion of chewy peanut butter cookies and melty candy-filled bliss — a must-try for any dessert lover.
Easy to make, endlessly customizable, and always a crowd-pleaser, these cookies bring joy with every bite.