Oreo Icebox Cake: A No-Bake Dessert Classic That Never Fails to Impress
Introduction
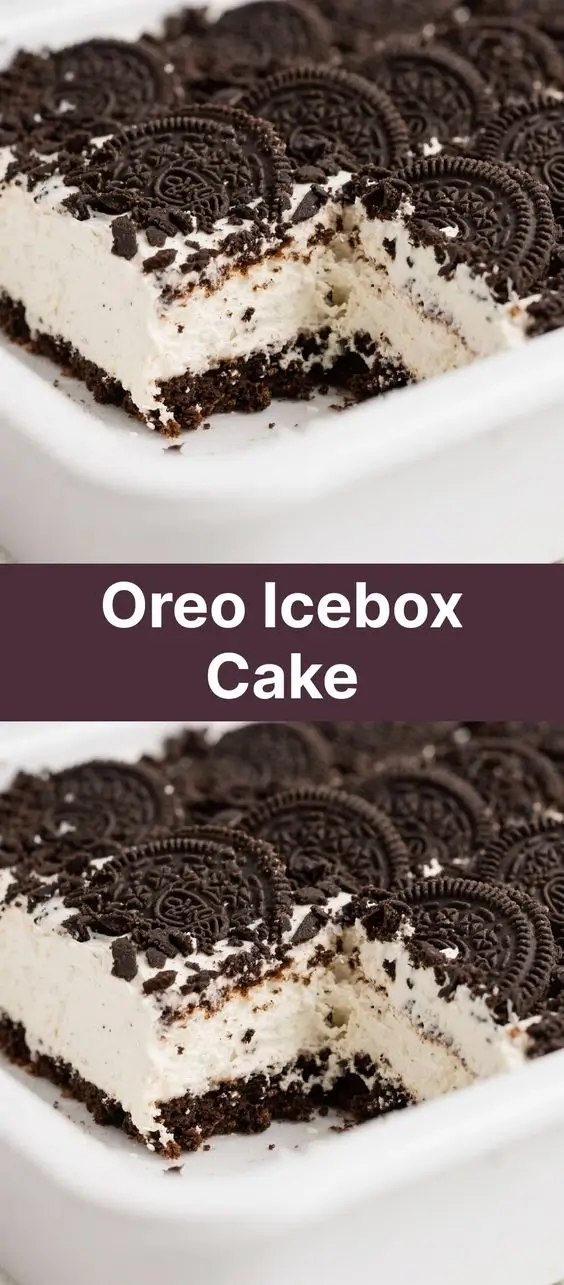
The Oreo Icebox Cake is a timeless, no-bake dessert that has delighted generations with its creamy texture, rich chocolate flavor, and effortless preparation. Perfect for summer gatherings, holiday parties, or just a sweet treat on a lazy afternoon, this cake requires no oven, no complicated techniques—just simple ingredients layered and chilled to perfection. Its name harks back to an era when iceboxes were the primary means of refrigeration, but today, it thrives in modern kitchens as a beloved staple of American dessert culture. Whether you’re hosting a crowd or simply craving something indulgent, the Oreo Icebox Cake delivers satisfaction with minimal effort and maximum flavor.
The History
The origins of the icebox cake trace back to the early 20th century, long before the advent of electric refrigerators. In households across America, “iceboxes” were insulated cabinets cooled by blocks of ice, used to preserve perishable foods. It was within these rudimentary cooling units that inventive home cooks began layering cream-filled cookies with whipped dairy to create a chilled, custard-like dessert that set over time. While variations existed with graham crackers or vanilla wafers, the Oreo version gained popularity in the mid-1900s as Nabisco’s iconic chocolate sandwich cookie became a household favorite.
By the 1950s and 60s, cookbooks and women’s magazines frequently featured icebox cake recipes, often using raw eggs or uncooked custards—methods later refined for safety. The modern version typically uses stabilized whipped cream or instant pudding mix for consistency and food safety. Over the decades, the Oreo Icebox Cake evolved from a frugal, resourceful dessert into a nostalgic comfort food celebrated for its simplicity and decadence. Today, it remains a go-to recipe for busy parents, novice bakers, and dessert enthusiasts alike, symbolizing both culinary ingenuity and the joy of sharing homemade treats.
Ingredients Breakdown
The magic of the Oreo Icebox Cake lies in its minimal yet impactful ingredients. Each component plays a crucial role in achieving the perfect balance of crunch, creaminess, and sweetness:
- Oreo Cookies: The star of the show. These crisp chocolate wafers with sweet white creme filling provide structure, flavor, and texture. You can use classic Oreos or experiment with flavored varieties like Double Stuf, Mint, Golden, or Peanut Butter for unique twists.
- Heavy Whipping Cream: Used to make freshly whipped cream, this ingredient adds lightness and richness. When properly whipped to stiff peaks, it binds the layers and creates a mousse-like consistency as the cake chills.
- Instant Vanilla Pudding Mix: This helps stabilize the whipped cream, prevents weeping, and enhances the creamy texture. It also adds a subtle vanilla note that complements the chocolate cookies.
- Sweetened Condensed Milk: Often used in place of granulated sugar, this thick, sweet milk enriches the filling, deepens the flavor, and contributes to a smooth, velvety mouthfeel.
- Vanilla Extract: A touch of pure vanilla extract enhances the overall aroma and balances the sweetness of the other ingredients.
- Optional Add-ins: Some recipes include cream cheese for tanginess, mascarpone for extra richness, or a splash of coffee or liqueur (like Baileys) for depth.
All ingredients should be cold—especially the cream and mixing bowl—for optimal whipping results. Room temperature cream won’t whip properly, so chilling your tools beforehand is a pro tip worth following.
Step-by-Step Recipe
- Prepare Your Tools: Chill a large mixing bowl and beaters (or whisk attachment) in the freezer for at least 15 minutes. This helps the cream whip faster and hold its shape longer.
- Whip the Cream: Pour 2 cups of cold heavy whipping cream into the chilled bowl. Using an electric mixer, beat on medium-high speed until soft peaks form. Be careful not to over-whip.
- Add Sweetened Condensed Milk and Pudding Mix: In a separate bowl, combine one 3.4 oz package of instant vanilla pudding mix with one cup of sweetened condensed milk. Mix until smooth and thickened. Gently fold this mixture into the whipped cream until fully incorporated and no streaks remain.
- Incorporate Flavorings: Stir in 1–2 teaspoons of pure vanilla extract. For a tangier profile, you can also fold in 4 oz of softened cream cheese at this stage.
- Layer the First Base: In a 9×13 inch glass dish or trifle bowl (for presentation), arrange a single layer of whole Oreo cookies, breaking some as needed to fill gaps. The goal is a tight, even layer.
- Add the Cream Mixture: Spread one-third of the cream mixture evenly over the Oreos using a spatula. Smooth it into a flat layer.
- Repeat Layers: Add another layer of Oreos, then another third of the cream. Repeat once more so that you end up with three layers of cookies and three layers of cream.
- Top Layer: Finish with a final generous layer of the cream mixture. Use the back of a spoon or an offset spatula to create decorative swirls on top.
- Garnish: Crush a few extra Oreos and sprinkle them over the top for visual appeal and added crunch.
- Chill: Cover the dish with plastic wrap and refrigerate for at least 6 hours, preferably overnight. This allows the cookies to soften and absorb moisture from the cream, transforming into a cake-like texture.
- Serve: Slice with a sharp knife dipped in warm water for clean cuts. Serve chilled.
Tips
- Use Cold Equipment: Chilling your bowl and beaters ensures the cream whips efficiently and holds its volume.
- Don’t Over-Whip Cream: Stop beating once stiff peaks form. Over-whipping turns cream into butter.
- Let It Set Overnight: While 6 hours works, letting the cake chill for 8–12 hours yields superior texture—creamy, cohesive, and sliceable.
- Line the Pan (Optional):strong> For easy removal and neat slicing, line your dish with parchment paper overhanging the edges.
- Prevent Sogginess: If making ahead, wait to add the top garnish until just before serving to maintain crunch.
- Seal Tightly: Always cover with plastic wrap touching the surface of the cream to prevent skin formation and odor absorption.
- Serve Straight from Fridge: This dessert is best enjoyed cold. Letting it sit out too long may cause the layers to slump.
Variations and Customizations
The beauty of the Oreo Icebox Cake is its versatility. With a few tweaks, you can transform it into dozens of different desserts:
- Double Stuf Version: Use Double Stuf Oreos for an even creamier bite.
- Golden Oreo Cake: Swap chocolate Oreos for Golden Oreos to create a vanilla-forward version, sometimes called a “vanilla wafer icebox cake.”
- Mint Chocolate Chip: Use mint-flavored Oreos and add a few drops of green food coloring to the cream. Fold in mini chocolate chips for extra texture.
- Peanut Butter Cup: Alternate Oreos with peanut butter cookies or crushed Reese’s Cups. Add a layer of melted peanut butter to the cream mixture.
- Coffee or Mocha: Add 1–2 teaspoons of instant espresso powder to the cream mixture and use chocolate cookies with a mocha twist.
- Fruity Twist: Layer in fresh strawberries or raspberries between the cookies for a fruity contrast.
- Boozy Version: Add 2–3 tablespoons of Kahlua, Baileys, or bourbon to the cream mixture for an adult-only treat.
- Dairy-Free/Vegan: Use coconut cream instead of heavy cream, vegan Oreos, and dairy-free pudding mix. Sweeten with coconut condensed milk.
- Gluten-Free: Substitute gluten-free chocolate sandwich cookies (available in many supermarkets).
- Mini Jars: Make individual servings in mason jars or parfait glasses for a portable, gift-ready option.
- Seasonal Themes: Use seasonal Oreos (e.g., pumpkin spice for fall, red & green for holidays) to match celebrations.
Health Considerations and Nutritional Value
While undeniably delicious, the Oreo Icebox Cake is a high-calorie, sugar-dense dessert best enjoyed in moderation. A typical serving (1/12 of a 9×13 pan) contains approximately:
- Calories: 350–450
- Total Fat: 20–25g (mostly from cream and cookies)
- Saturated Fat: 12–15g
- Carbohydrates: 40–50g
- Sugars: 30–35g
- Protein: 4–6g
- Sodium: 200–300mg
The cake is low in fiber, vitamins, and essential nutrients. It contains processed sugars, hydrogenated oils (in traditional Oreos), and lacks significant protein or healthy fats. However, it can be adapted for better nutrition:
- Use reduced-fat whipped topping (though texture may suffer).
- Opt for low-sugar or sugar-free pudding mix and cookies.
- Replace half the cream with Greek yogurt for added protein and tang.
- Use natural sweeteners like monk fruit blend in homemade versions.
For those with dietary restrictions, always check labels for allergens such as wheat, dairy, soy, and palm oil. Diabetics should consume sparingly and consider sugar-free alternatives. Pregnant women should ensure all dairy products are pasteurized and avoid raw eggs if used in non-standard recipes.
Ingredients
- 2 cups heavy whipping cream (cold)
- 1 (3.4 oz) package instant vanilla pudding mix
- 1 cup sweetened condensed milk
- 1–2 teaspoons pure vanilla extract
- 2–3 sleeves of Oreo cookies (about 40–50 cookies)
- Optional: 4 oz cream cheese, softened
- Additional crushed Oreos for garnish
Directions
- Chill a large mixing bowl and beaters in the freezer for 15 minutes.
- In the chilled bowl, whip the heavy cream on medium-high speed until soft peaks form.
- In a separate bowl, whisk together the instant pudding mix and sweetened condensed milk until smooth and thick.
- Fold the pudding mixture into the whipped cream gently until fully combined.
- Add vanilla extract (and optional cream cheese) and continue folding until smooth and uniform.
- In a 9×13 inch glass dish, lay a single layer of whole Oreo cookies, breaking some to fit gaps.
- Spread one-third of the cream mixture over the cookies.
- Repeat the layering: Oreos, then cream, two more times.
- Finish with a final layer of cream, smoothing the top with a spatula.
- Sprinkle crushed Oreos over the top for garnish.
- Cover with plastic wrap, pressing it directly onto the surface to prevent drying.
- Refrigerate for at least 6 hours, preferably overnight.
- Before serving, let sit in the fridge for 10 minutes. Slice with a warm knife for clean portions.
FAQ
Can I make Oreo Icebox Cake ahead of time?
Yes! This dessert is ideal for making 1–2 days in advance. In fact, longer chilling improves texture.
Can I freeze Oreo Icebox Cake?
Technically yes, but freezing may alter texture. The cream can become grainy upon thawing. Best kept refrigerated.
Why is my icebox cake runny?
This usually happens if the cream wasn’t whipped enough, the pudding wasn’t fully mixed, or the cake wasn’t chilled long enough. Always use stiff peaks and allow at least 6 hours to set.
Can I use Cool Whip instead of whipping cream?
Yes. Substitute 1 large tub (8 oz) of whipped topping for the homemade whipped cream. Fold in pudding and condensed milk as directed.
How long does it last in the fridge?
Up to 5 days when tightly covered. After that, the cookies may become overly soft or the cream may separate.
Can I make it without pudding mix?
Yes, but the texture will be less stable. Use extra sweetened condensed milk and a bit of cornstarch or gelatin to help firm it up.
Are there egg-free versions?
Absolutely. Traditional recipes don’t require eggs. Just ensure your pudding mix is egg-free (most are).
Can kids help make this?
Definitely! This is a great family-friendly recipe. Kids can crush cookies, layer ingredients, and decorate the top.
Summary
The Oreo Icebox Cake is a no-bake masterpiece that combines crisp chocolate cookies with luscious vanilla cream in a make-ahead dessert that wows every time. Simple, satisfying, and endlessly customizable, it’s the ultimate comfort treat for any occasion.