Introduction
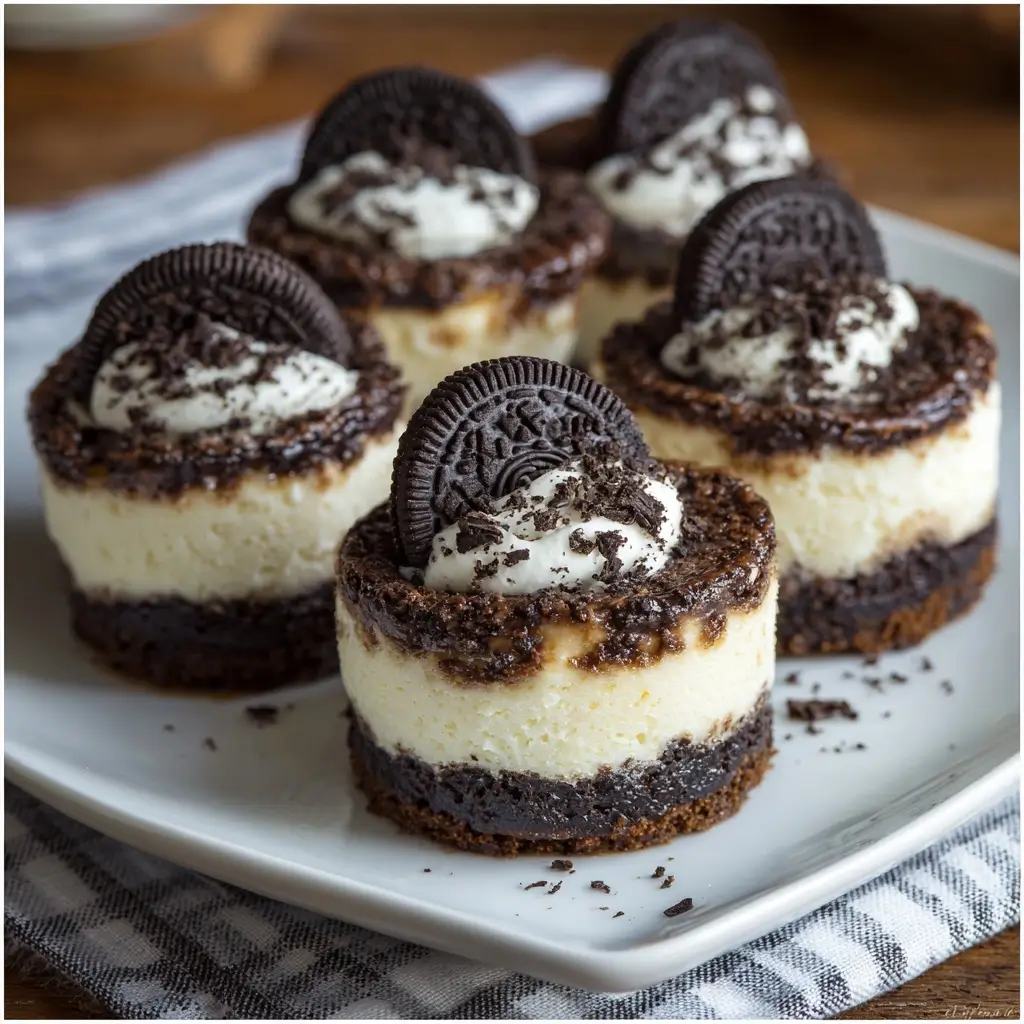
Mini Oreo Cheesecakes are the perfect bite-sized indulgence—creamy, rich, and irresistibly nostalgic. These individual-sized desserts combine the classic tangy-sweet balance of New York–style cheesecake with the iconic crunch and cocoa-forward flavor of Oreo cookies. Whether you’re preparing for a holiday gathering, a classroom treat, a bridal shower dessert table, or simply satisfying a late-night craving, these miniature marvels deliver maximum flavor in minimal footprint. Their elegant appearance belies their approachable preparation—no water bath required, no complicated equipment needed, and absolutely no compromise on texture or taste. With a buttery Oreo crust, a velvety no-bake or baked filling (depending on your preference), and optional garnishes that elevate presentation, Mini Oreo Cheesecakes are as versatile as they are delicious—and endlessly shareable.
The History
The story of the Mini Oreo Cheesecake is one of culinary evolution, rooted in two American icons: the Oreo cookie and the cheesecake. The Oreo was first introduced by the National Biscuit Company (now Nabisco) in 1912—its distinctive chocolate wafers and sweet creme filling quickly captured the national imagination. Cheesecake, by contrast, traces its origins back over 2,000 years to ancient Greece, where it was served to athletes at the first Olympic Games in 776 BCE; it later traveled through Roman adaptations and European variations before landing in America via Jewish immigrants in the late 19th and early 20th centuries. The modern New York–style cheesecake—with its dense, creamy, slightly tangy profile—emerged from delis in Brooklyn and the Lower East Side in the early 1900s.
The fusion of these two legends began gaining traction in the 1980s and ’90s, as home bakers experimented with Oreo-infused desserts—from Oreo brownies to Oreo ice cream cakes. The miniaturization trend accelerated in the 2000s with the rise of food blogs, Pinterest, and Instagram—where portion-controlled, photogenic treats thrived. Mini Oreo Cheesecakes became a viral sensation around 2013–2014, propelled by viral recipe videos showcasing their stunning layered cross-sections and effortless elegance. Today, they appear on menus at high-end bakeries, gourmet cupcake shops, and even fine-dining dessert carts—testament to how a humble snack cookie and a centuries-old dessert can unite to create something wholly new, culturally resonant, and deeply comforting.
Ingredients Breakdown
Understanding each component is key to mastering this recipe—not just for replication, but for confident customization. Below is a detailed functional and sensory breakdown of every ingredient:
Oreo Cookie Crust
- Oreo Cookies (Full-Size or Double Stuf): Provide structure, sweetness, cocoa depth, and signature crunch. The creme filling adds natural fat and emulsifiers that help bind the crust without excessive butter. Note: “Regular” Oreos contain 3.3g sugar per cookie; Double Stuf increases sweetness and richness—but may require slight butter reduction to avoid greasiness.
- Unsalted Butter (Melted): Acts as the binding agent and flavor enhancer. Melted butter coats each crumb evenly, promoting cohesion during pressing and baking (if applicable). Clarified butter may be used for higher smoke point in baked versions, while browned butter introduces nutty complexity.
- Pinch of Sea Salt (Optional but Recommended): Balances sweetness and intensifies chocolate notes—a subtle but transformative touch.
Cheesecake Filling
- Cream Cheese (Full-Fat, Room Temperature): The backbone of texture and tang. Must be truly softened (65–70°F)—cold cream cheese causes lumps; overheated or microwaved cheese leads to curdling. Philadelphia-brand is widely tested and reliable due to consistent moisture and fat content.
- Granulated Sugar: Sweetens and stabilizes the protein matrix in cream cheese. Confectioners’ sugar may be substituted for ultra-smooth texture (especially in no-bake versions), but adds cornstarch which can mute flavor.
- Sour Cream or Full-Fat Greek Yogurt: Adds acidity, moisture, and tenderizing lactic acid—critical for preventing rubberiness and enhancing brightness. Sour cream yields richer mouthfeel; Greek yogurt offers slight tang and added protein.
- Heavy Cream or Full-Fat Coconut Cream (for dairy-free): Introduces fluid fat that improves scoopability, freeze-thaw stability (for make-ahead versions), and luxurious melt-in-mouth quality. Never substitute with half-and-half or milk—the lower fat will destabilize the emulsion.
- Vanilla Extract (Pure, Not Imitation): Deepens warmth and rounds out sharp dairy notes. Madagascar bourbon vanilla is ideal; Mexican or Tahitian vanillas offer floral or fruity nuance.
- Fresh Lemon Juice & Zest (Optional but Highly Recommended): A teaspoon of juice and ½ tsp finely grated zest cut through richness, brighten cocoa undertones, and prevent cloying sweetness. Acid also helps preserve freshness in refrigerated versions.
- Pinch of Fine Sea Salt: Reinforces all flavors—especially important when scaling up batches or using lower-sodium ingredients.
Garnishes & Finishing Touches
- Crushed Oreos (Reserve ¼ cup): For textural contrast and visual appeal—add just before serving to maintain crunch.
- Whipped Cream (Stabilized with powdered sugar + cornstarch or gelatin): Offers airy contrast; pipe in rosettes or dollops.
- Oreo Thins or Mini Oreos: Perfect for perching atop each mini cake—adds height and whimsy.
- Chocolate Drizzle (Dark, Milk, or White): Use tempered chocolate for shine and snap—or microwave-safe ganache for ease.
- Edible Gold Leaf or Luster Dust: For upscale occasions—applies effortlessly with a soft brush.
- Fresh Raspberries or Mint Leaves: Provides vibrant color, aromatic lift, and palate-cleansing acidity—ideal for summer or bridal events.
Step-by-Step Recipe
This comprehensive method covers both the baked (oven-set, ultra-firm, long shelf-life) and no-bake (chill-set, ultra-creamy, faster prep) versions—so you can choose based on time, equipment, and desired texture. Yields 24 standard mini cheesecakes (using a 24-cup regular muffin tin) or 36 mini-mini (using a 36-cup nonstick mini muffin pan).
Equipment Checklist
- 24-cup standard muffin tin OR 36-cup mini muffin tin
- Parchment paper or silicone muffin liners (highly recommended for easy removal)
- Food processor or heavy-duty blender (for ultra-fine crumbs)
- Stand mixer or hand mixer with whisk/beater attachments
- Large mixing bowls (heatproof if baking)
- Small saucepan (for melting butter or tempering chocolate)
- Offset spatula or small angled icing spatula
- Cooling rack
- Refrigerator (for chilling) and/or oven (for baking)
Step 1: Prepare the Oreo Crust
- Place 30 regular Oreos (or 24 Double Stuf) in a food processor. Pulse 15–20 times until reduced to fine, sand-like crumbs—no visible shards. Scrape down sides halfway through.
- In a medium bowl, stir together crumbs and 6 tbsp (85g) melted unsalted butter until fully saturated and resembling wet sand. Add a generous pinch of flaky sea salt and mix again.
- Evenly divide mixture among lined muffin cups—about 1 heaping tablespoon per standard cup (¾ tsp for mini). Use the flat bottom of a shot glass, small measuring cup, or tamper to press firmly and evenly into the bottom and slightly up the sides (¼” height). Pro tip: Chill crusts for 15 minutes before filling to prevent butter bleed.
Step 2A: Baked Version — Prepare & Bake Filling
- Preheat oven to 325°F (163°C). Position rack in center. Line a rimmed baking sheet with parchment (to catch drips if using foil liners).
- In a large bowl, beat softened cream cheese (24 oz / 680g) with an electric mixer on medium speed for 2 minutes until completely smooth and glossy—scraping bowl thoroughly.
- Add granulated sugar (⅔ cup / 135g) and beat 2 more minutes until lightened and lump-free.
- Beat in sour cream (½ cup / 120g), heavy cream (¼ cup / 60g), vanilla (2 tsp), lemon juice (1 tsp), zest (½ tsp), and salt (¼ tsp) on low speed until just combined—do not overmix.
- Using a rubber spatula, gently fold in 12 crushed Oreos (reserve remaining for garnish) until evenly distributed—avoid overfolding to prevent streaking.
- Fill each chilled crust to ~⅞ full (about 3 tbsp per standard cup). Smooth tops with damp offset spatula.
- Bake 18–22 minutes for standard size (14–17 for mini)—until edges are set and centers have only a slight jiggle (like Jell-O). Avoid overbaking—carryover heat will finish them.
- Turn off oven, crack door open 2″, and let cool inside for 30 minutes. Then transfer to wire rack to cool completely (~1 hour), then refrigerate uncovered for minimum 6 hours—or preferably overnight—to fully set and develop flavor.
Step 2B: No-Bake Version — Prepare & Chill Filling
- In a large bowl, beat cold cream cheese (24 oz) with mixer on medium until smooth (~1 min).
- Add powdered sugar (1¼ cups / 150g), sour cream (½ cup), heavy cream (⅓ cup), vanilla (2 tsp), lemon juice (1 tsp), zest (½ tsp), and salt (¼ tsp). Beat on medium-high for 3–4 minutes until thick, glossy, and ribbon-stage consistency—when lifted, batter falls slowly and holds shape for 3 seconds.
- Fold in 12 crushed Oreos (plus extra for swirls, if desired).
- Spoon into prepared crusts—fill to top. Tap pan sharply on counter 3x to release air bubbles.
- Refrigerate uncovered for minimum 8 hours—or ideally 12–24 hours—for optimal firmness and flavor melding.
Step 3: Unmold & Garnish
- Run a thin, flexible offset spatula or butter knife around the outer edge of each cheesecake to loosen.
- If using parchment liners: Gently lift each cup upward and peel liner down from sides. If using silicone: Press up from bottom while holding sides—cakes should release cleanly.
- Top each with a dollop of stabilized whipped cream, a sprinkle of reserved crushed Oreos, a mini Oreo, and optional drizzle or fresh garnish.
- Serve chilled. Store covered in refrigerator for up to 5 days (baked) or 4 days (no-bake).
Tips
- Room Temperature Is Non-Negotiable: Cream cheese, sour cream, and eggs (if using in baked version) must be at true room temperature—not just “out of the fridge for 30 minutes.” Place sealed blocks in warm (not hot) water bath for 10 minutes, then dry thoroughly before use.
- Scrape Religiously: Stop mixer every 30 seconds during cream cheese beating to scrape bowl and beater—lumps hide in corners and under the paddle.
- Chill Your Tools: Chill mixing bowl and beaters for 10 minutes before whipping cream or making no-bake filling—cold tools = stable emulsions.
- Crumb Consistency Matters: Too coarse → crumbly crust. Too fine → pasty, dense base. Aim for uniform, grainy-sand texture—not flour-fine.
- Don’t Skip the Chill Before Baking: Cold crust prevents butter from melting into the batter mid-bake, causing greasy pooling and uneven rise.
- Use a Timer—and Set It Twice: First timer for bake time, second for cooling-in-oven time. This prevents accidental overbaking.
- Freeze for Long-Term Storage: Wrap individually in plastic wrap, then place in airtight freezer bag. Freeze up to 3 months. Thaw overnight in fridge—not at room temperature—to preserve texture.
- Fix Split Filling Instantly: If batter appears curdled or broken (usually from cold ingredients or overmixing), add 1 tbsp hot heavy cream and mix on low 10 seconds—emulsion will re-form.
- Uniform Sizing Ensures Even Baking: Use a 3-tablespoon cookie scoop or #20 disher for precise, professional-looking portions.
- Label Your Liners: Write “baked” or “no-bake” on parchment tabs with edible marker—prevents mix-ups when prepping multiple batches.
- Wipe Your Pan Between Uses: Residual grease attracts dust and affects crust adhesion—always clean muffin tin with warm soapy water and dry fully before reuse.
- Scale With Confidence: This recipe scales flawlessly up to triple batch—just ensure mixer capacity and oven space allow for even air circulation.
Variations and Customizations
These aren’t just substitutions—they’re inspired reinterpretations designed to honor the spirit of the original while expanding its versatility across dietary needs, seasons, and celebrations:
Dietary Adaptations
- Dairy-Free: Use Kite Hill almond milk cream cheese, coconut-based sour cream (Wildwood or Forager Project), full-fat coconut cream (chilled, solid part only), and vegan butter (Miyoko’s or Earth Balance). Add 1 tsp apple cider vinegar to mimic tang.
- Gluten-Free: Substitute certified GF chocolate sandwich cookies (such as Glutino or Kinnikinnick) — verify creme filling is GF, too. Add 1 tsp xanthan gum to crust for binding.
- Lower-Sugar/Keto: Replace Oreos with homemade keto chocolate cookies (almond flour + cocoa + erythritol), use full-fat cream cheese, sour cream, heavy cream, Swerve confectioners’, and 1 tsp liquid stevia. Add 1 tbsp unflavored collagen peptides for structure.
- Vegan: Combine soaked cashews (1½ cups), coconut cream, maple syrup, lemon juice, vanilla, and salt. Blend until silky (5+ mins), then pour into GF crust and chill 12+ hrs.
Flavor Twists
- Peanut Butter Swirl: Warm ½ cup smooth peanut butter with 1 tbsp heavy cream; spoon dollops over filled cups and drag with toothpick before baking/chilling.
- Strawberry Cheesecake: Fold in ⅓ cup seedless strawberry jam + 2 tbsp freeze-dried strawberry powder. Top with fresh hulled berries.
- Espresso Oreo: Dissolve 2 tsp instant espresso powder in 1 tbsp hot water; cool, then add with vanilla. Garnish with cocoa nibs.
- Mint Chocolate Chip: Add ½ tsp peppermint extract + green food gel; fold in ¼ cup chopped Andes mints or mini chocolate chips.
- Golden Oreo: Use Golden Oreos for crust and filling—swap cocoa for extra vanilla and add 1 tbsp caramel sauce to batter.
- Spiced Chai: Infuse heavy cream with 2 chai tea bags (Tazo or David’s) for 15 mins, strain, cool—then use in filling. Garnish with crystallized ginger.
Occasion-Specific Styling
- Wedding/Anniversary: Pipe white chocolate ganache in concentric rings; top with gold-dusted raspberries and edible violets.
- Halloween: Dip chilled cakes halfway in black candy coating; drizzle with orange and purple; add candy spider or bat topper.
- Christmas: Press crushed candy cane into top before chilling; dust with powdered sugar “snow”; serve on red velvet cupcake liners.
- Baby Shower: Use pastel-colored sprinkles, pale pink whipped cream, and monogrammed sugar cookies as bases.
- Super Bowl Party: Make football-shaped molds (silicone), fill with brownie batter base + cheesecake layer, top with mini pretzel “laces.”
Health Considerations and Nutritional Value
While Mini Oreo Cheesecakes are undeniably a treat—not a health food—their portion-controlled format makes mindful enjoyment possible. Here’s a balanced, evidence-informed perspective:
Nutritional Snapshot (Per Standard Mini Cheesecake — Baked Version)
- Calories: ~185 kcal
- Total Fat: 12g (7g saturated)
- Carbohydrates: 17g (12g sugars, 0.5g fiber)
- Protein: 3g
- Calcium: 25mg (2% DV)
- Sodium: 110mg (5% DV)
Key Considerations
- Sugar Awareness: One mini contains ~3 teaspoons of added sugar—within the American Heart Association’s recommended daily limit (6 tsp women / 9 tsp men)… but only if no other added sugars are consumed that day. Opt for reduced-sugar Oreos or natural sweeteners in custom versions.
- Saturated Fat Context: While high in sat fat, recent meta-analyses (e.g., Annals of Internal Medicine, 2014) suggest no significant association between dietary sat fat and heart disease when replacing refined carbs—not trans fats. Moderation remains central.
- Probiotic Potential: Full-fat sour cream and cultured cream cheese contain live microbes—if unpasteurized post-culturing (check labels). These may support gut microbiome diversity, though quantity is modest.
- Calcium & Vitamin D Synergy: Pair with vitamin D–rich foods (salmon, egg yolks, fortified milk) to enhance calcium absorption—especially beneficial for bone health in aging adults.
- Gluten & Allergen Notes: Traditional Oreos contain wheat, soy, and dairy. Always verify allergen statements—even “gluten-free” Oreos may be processed in shared facilities.
- Portion Psychology: The mini format supports intuitive eating—smaller visual cues reduce overconsumption. Studies show people eat 23% less when served in smaller containers (Wansink & van Ittersum, 2013).
- Mindful Indulgence Framework: Enjoying dessert intentionally—sitting down, savoring aroma and texture, chewing slowly—triggers satiety hormones more effectively than distracted eating. That’s where real wellness lives.
Ingredients
Makes 24 mini cheesecakes
For the Crust
- 30 regular Oreo cookies (or 24 Double Stuf), finely crushed (about 1½ cups crumbs)
- 6 tablespoons (85g) unsalted butter, melted
- ¼ teaspoon fine sea salt
For the Cheesecake Filling (Baked Version)
- 24 ounces (680g) full-fat brick-style cream cheese, room temperature
- ⅔ cup (135g) granulated sugar
- ½ cup (120g) full-fat sour cream
- ¼ cup (60g) heavy cream
- 2 teaspoons pure vanilla extract
- 1 teaspoon fresh lemon juice
- ½ teaspoon finely grated lemon zest
- ¼ teaspoon fine sea salt
- 12 Oreo cookies, finely crushed (for folding in)
For the Cheesecake Filling (No-Bake Version)
- 24 ounces (680g) full-fat brick-style cream cheese, cold
- 1¼ cups (150g) powdered sugar, sifted
- ½ cup (120g) full-fat sour cream
- ⅓ cup (80g) heavy cream
- 2 teaspoons pure vanilla extract
- 1 teaspoon fresh lemon juice
- ½ teaspoon finely grated lemon zest
- ¼ teaspoon fine sea salt
- 12 Oreo cookies, finely crushed (for folding in)
For Garnish (Choose As Desired)
- ¼ cup reserved crushed Oreos
- 1 cup stabilized whipped cream (1 cup cold heavy cream + 2 tbsp powdered sugar + ½ tsp unflavored gelatin bloomed in 1 tsp cold water)
- 24 mini Oreos or Oreo Thins
- ¼ cup dark chocolate, melted and cooled slightly
- Fresh raspberries or mint leaves
Directions
- Make the Crust: In a food processor, pulse Oreos until finely ground (15–20 pulses). Transfer to a bowl; stir in melted butter and salt until mixture resembles wet sand. Divide evenly among 24 parchment-lined muffin cups (about 1 heaping tbsp each). Press firmly into bottoms and slightly up sides using a small glass or tamper. Refrigerate 15 minutes.
- Prepare Filling: For baked: Preheat oven to 325°F (163°C). Beat cream cheese until smooth; gradually add sugar and beat 2 minutes. Add sour cream, heavy cream, vanilla, lemon juice, zest, and salt; beat on low until combined. Fold in crushed Oreos. Fill crusts ⅞ full. Bake 18–22 minutes until edges are set and centers jiggle slightly. Cool in oven 30 min, then on rack 1 hour. Refrigerate uncovered ≥6 hours. For no-bake: Beat cold cream cheese 1 minute. Add powdered sugar, sour cream, heavy cream, vanilla, lemon juice, zest, and salt; beat 3–4 minutes until thick and glossy. Fold in crushed Oreos. Fill crusts to top. Refrigerate uncovered ≥8 hours.
- Unmold & Decorate: Run a thin knife around edges. Lift from liners or pop from silicone. Top with whipped cream, crushed Oreos, mini Oreos, chocolate drizzle, and/or fresh fruit.
- Serve & Store: Serve chilled. Store covered in refrigerator: baked up to 5 days, no-bake up to 4 days. Freeze up to 3 months—wrap tightly in plastic, thaw overnight in fridge.
FAQ
- Can I use low-fat cream cheese?
- No—low-fat or neufchâtel varieties contain more moisture and less fat, resulting in poor structure, weeping, and grainy texture. Full-fat is essential for stability and mouthfeel.
- Why did my cheesecakes crack?
- Cracking most often occurs from rapid temperature change (cooling too fast), overmixing (incorporating too much air), or overbaking. Always cool gradually in the oven with door ajar, avoid opening oven door early, and never overbeat after adding liquids.
- Can I make these ahead for a party?
- Absolutely! Baked versions keep beautifully refrigerated for 3–5 days. No-bake versions peak at 24–48 hours but remain delicious up to 4 days. Freeze unbaked crusts and pre-portioned