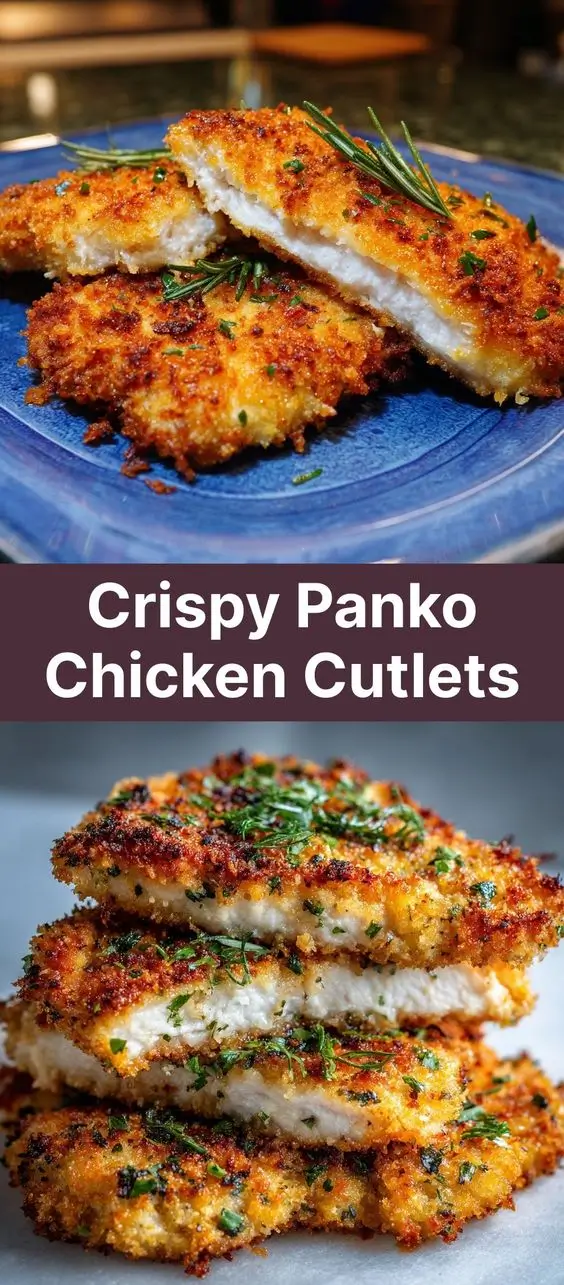
Crispy Panko Chicken Cutlets: The Ultimate Guide to Golden, Crunchy Perfection
Introduction
Crispy Panko Chicken Cutlets are a culinary delight that brings together the tenderness of chicken with the irresistible crunch of perfectly fried breading. Loved across cultures and kitchens worldwide, this dish is a favorite for weeknight dinners, elegant gatherings, or even meal prep due to its versatility and crowd-pleasing appeal. Whether served alongside a fresh salad, tucked into a sandwich, or paired with creamy mashed potatoes, these golden-brown cutlets offer a satisfying texture contrast and rich flavor profile that’s hard to resist. In this comprehensive guide, we’ll take you through everything you need to know—from the history of the dish to mastering the perfect crisp—so you can create restaurant-quality Panko chicken at home with confidence.
The History
The origins of breaded and fried cutlets trace back centuries and span multiple continents. The concept of coating meat in breadcrumbs and frying it likely began in Europe, with early versions appearing in Italian cuisine as “cotoletta” and in Austrian cooking as “Wiener Schnitzel”—traditionally made with veal. Japanese chefs adopted and adapted this technique during the Meiji era (late 19th century), introducing their own version called “tonkatsu,” which used pork and eventually incorporated a unique type of breadcrumb known as panko. Unlike traditional breadcrumbs, panko is made from crustless white bread that’s processed into light, airy flakes and then dried. This innovation created a lighter, crispier crust that didn’t absorb as much oil, revolutionizing fried foods in Japan and later around the world. Today, Panko Chicken Cutlets reflect a beautiful fusion of Eastern and Western culinary traditions, combining European-style preparation with Japanese ingredients to deliver an exceptionally crunchy and delicate result.
Ingredients Breakdown
Creating the perfect Crispy Panko Chicken Cutlets starts with understanding each ingredient’s role in building flavor, texture, and structure. Here’s a detailed breakdown:
- Chicken Breast (boneless, skinless): The star of the dish. Opt for evenly sized breasts to ensure consistent cooking. You can also use chicken thighs for a juicier, more flavorful alternative.
- Panko Breadcrumbs: These Japanese-style breadcrumbs are coarser and flakier than regular breadcrumbs, resulting in a lighter, airier, and extra-crispy crust. They brown beautifully without becoming soggy.
- All-Purpose Flour: Used in the first dredging layer, flour helps dry the chicken surface and creates a base for the egg to adhere to, promoting even breading.
- Eggs: Beaten eggs act as a binding agent, forming a sticky layer that allows the panko to cling securely to the chicken.
- Salt and Black Pepper: Essential seasonings that enhance the natural flavor of the chicken. Freshly cracked pepper adds a subtle heat and aroma.
- Garlic Powder and Onion Powder: These add depth and savory complexity to the breading without overpowering the dish.
- Paprika (optional): Adds a warm, slightly sweet smokiness and gives the crust a golden hue.
- Cooking Oil: Use a high smoke-point oil like vegetable, canola, avocado, or peanut oil for frying. These oils can withstand high temperatures without breaking down, ensuring a crispy exterior without burning.
- Butter (optional): For pan-frying, combining butter with oil adds richness and enhances browning (clarified butter works best to prevent burning).
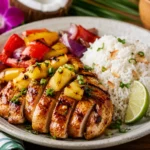
- Lemon Wedges: Serve on the side for a bright, acidic contrast that cuts through the richness.
- Fresh Herbs (parsley, thyme): Used for garnish and subtle aromatic notes.
Step-by-Step Recipe
- Prepare the Chicken: Place boneless, skinless chicken breasts on a cutting board. If they’re thick, slice them horizontally into two thinner cutlets. Alternatively, place them between two sheets of plastic wrap and gently pound to an even ½-inch thickness using a meat mallet or rolling pin. This ensures even cooking and tenderness.
- Season the Chicken: Pat the chicken dry with paper towels—this is crucial for crispiness. Season both sides with salt, black pepper, garlic powder, onion powder, and paprika if using.
- Set Up Your Breading Station: Prepare three shallow bowls:
- Bowl 1: All-purpose flour mixed with a pinch of salt and pepper.
- Bowl 2: 2–3 large eggs, beaten until smooth.
- Bowl 3: Panko breadcrumbs, optionally mixed with additional seasonings like dried herbs, Parmesan cheese, or more garlic powder for enhanced flavor.
- Dredge the Chicken: Working with one piece at a time:
- Dip the chicken into the flour, coating both sides. Shake off excess.
- Transfer to the egg mixture, turning to coat completely. Let any excess drip off.
- Finally, press the chicken into the panko, ensuring an even, generous layer. Press gently so the crumbs adhere well. Place on a wire rack or plate.
- Rest the Breaded Chicken: Allow the coated cutlets to rest for 10–15 minutes. This helps the coating set and reduces the chance of breading falling off during frying.
- Heat the Oil: In a large skillet, add enough oil to reach about ¼ inch deep. Heat over medium-high heat until it reaches 350°F (175°C). To test, drop a small piece of panko into the oil—if it sizzles immediately and floats, the oil is ready.
- Fry the Cutlets: Carefully place one or two chicken cutlets into the hot oil, being careful not to overcrowd the pan. Fry for 3–4 minutes per side, or until golden brown and the internal temperature reaches 165°F (74°C). Flip only once to preserve the crust.
- Drain and Rest: Transfer cooked cutlets to a wire rack set over a baking sheet (preferred) or a plate lined with paper towels. This keeps them crispy by allowing air circulation and prevents steaming.
- Serve Immediately: Garnish with lemon wedges and chopped parsley. Serve hot for maximum crunch.
Tips
- Use a Wire Rack: Placing breaded food on a wire rack after frying prevents moisture buildup and keeps the bottom crust crisp.
- Double-Bread for Extra Crunch: For an ultra-thick, crunchy crust, repeat the egg and panko steps after the first coating—dip again in egg, then press into more panko.
- Don’t Skip the Rest: Letting the breaded chicken sit before frying helps the layers bond, reducing shedding in the oil.
- Monitor Oil Temperature: Too cool, and the cutlets will absorb oil and become greasy; too hot, and the outside burns before the inside cooks. Use a thermometer for accuracy.
- Season Every Layer: Add a pinch of salt to the flour and egg wash, not just the chicken, for balanced seasoning throughout.
- Prevent Cross-Contamination: Use separate utensils or clean hands when handling raw chicken and coated pieces.
- Keep Oil Clean: Remove loose crumbs from the oil between batches to prevent burning and maintain clarity.
- Uniform Thickness = Even Cooking: Always pound chicken to consistent thickness for reliable results.
Variations and Customizations
The beauty of Crispy Panko Chicken Cutlets lies in their adaptability. Here are some creative twists to suit different tastes and dietary needs:
- Cheesy Panko: Mix finely grated Parmesan or Pecorino Romano into the panko for a savory, umami-rich crust.
- Herb-Crusted: Add chopped fresh parsley, thyme, oregano, or dill to the egg wash or breadcrumbs for a fragrant finish.
- Spicy Kick: Add cayenne pepper, chili flakes, smoked paprika, or a dash of hot sauce to the flour or egg mixture.
- Gluten-Free Option: Replace all-purpose flour with rice flour or gluten-free blend, and use certified gluten-free panko breadcrumbs.
- Oven-Baked Version: For a healthier twist, bake breaded cutlets on a wire rack at 425°F (220°C) for 20–25 minutes, lightly spraying with oil for browning.
- Air Fryer Method: Spray both sides with cooking oil and cook at 400°F (200°C) for 10–12 minutes, flipping halfway through.
- Panko & Nut Mix: Combine crushed almonds, pecans, or cornflakes with panko for added texture and nutty flavor.
- Mediterranean Style: Season breadcrumbs with lemon zest, oregano, and garlic, and serve with tzatziki sauce.
- Korean-Inspired: Serve with gochujang mayo or kimchi for a bold, spicy-savory combo.
- Sandwich Ready: Slice cooked cutlets and serve in a ciabatta roll with lettuce, tomato, and aioli for a gourmet chicken sandwich.
Health Considerations and Nutritional Value
While traditionally fried, Crispy Panko Chicken Cutlets can be adapted to fit various dietary goals. Here’s what you should know:
Nutritional Profile (per average cutlet, approx. 6 oz, pan-fried in vegetable oil):
- Calories: ~380–420
- Protein: ~35–40g (excellent source)
- Fat: ~18–22g (varies with oil absorption)
- Carbohydrates: ~25–30g (mostly from breading)
- Sodium: ~500–700mg (can be reduced with less salt)
Health Tips:
- Baking Instead of Frying: Reduces fat content by up to 50%. Use an oven-safe wire rack for airflow and crispiness.
- Lean Protein Benefits: Chicken breast is low in saturated fat and high in essential amino acids, supporting muscle repair and metabolism.
- Breading Choices: Whole wheat panko or adding ground flaxseed increases fiber content.
- Portion Control: Pair with large portions of vegetables or salad to balance the meal.
- Oil Selection: Choose heart-healthy oils like avocado or high-oleic sunflower oil to reduce trans fats.
- Limiting Sodium: Use low-sodium seasonings and avoid pre-seasoned breadcrumbs to control salt intake.
Ingredients
- 4 boneless, skinless chicken breasts (about 6 oz each)
- 1 cup all-purpose flour
- 1 tsp salt (divided)
- ½ tsp black pepper (divided)
- 1 tsp garlic powder
- ½ tsp onion powder
- ½ tsp paprika (optional)
- 3 large eggs
- 2 cups panko breadcrumbs
- ½ cup grated Parmesan cheese (optional, for cheesy crust)
- 1–2 tbsp chopped fresh parsley (optional)
- Vegetable, canola, or peanut oil (for frying, about 1–2 cups)
- Lemon wedges (for serving)
- Chopped parsley or thyme (for garnish)
Directions
- Place chicken breasts on a cutting board. If thick, slice horizontally or pound to ½-inch thickness. Pat dry with paper towels.
- Season both sides with ½ tsp salt, ¼ tsp pepper, garlic powder, onion powder, and paprika.
- In three separate shallow bowls, prepare:
- Bowl 1: Flour mixed with remaining salt and pepper.
- Bowl 2: Beaten eggs.
- Bowl 3: Panko breadcrumbs mixed with Parmesan and herbs (if using).
- Dredge each chicken piece in flour, shaking off excess. Dip into egg, letting excess drip off. Press firmly into panko to coat evenly.
- Place breaded cutlets on a wire rack and let rest for 10–15 minutes.
- Heat ¼ inch of oil in a large skillet over medium-high heat until it reaches 350°F.
- Fry 1–2 cutlets at a time for 3–4 minutes per side, until golden and internal temperature hits 165°F.
- Transfer to a wire rack to drain. Repeat with remaining cutlets.
- Garnish with lemon wedges and fresh herbs. Serve immediately.
FAQ
Can I make these ahead of time?
Yes! Bread and store uncooked cutlets on a tray in the fridge for up to 24 hours. For longer storage, freeze on a baking sheet, then transfer to a freezer bag. Cook from frozen—add 1–2 minutes per side.
Why did my breading fall off?
Common causes include wet chicken, skipping the flour step, not letting the coating set, or moving the cutlets too much while frying. Always pat chicken dry and avoid flipping more than once.
Can I bake instead of fry?
Absolutely. Preheat oven to 425°F. Place breaded cutlets on a greased wire rack over a baking sheet. Spray lightly with oil. Bake 20–25 minutes, flip halfway, until golden and cooked through.
Are panko breadcrumbs gluten-free?
Standard panko contains wheat. Look for gluten-free panko made from rice or potato starch if needed.
What can I serve with Panko chicken cutlets?
Excellent pairings include Caesar salad, roasted vegetables, garlic mashed potatoes, risotto, orzo, or a simple arugula salad with lemon vinaigrette.
Can I use chicken tenders?
Yes! Adjust cooking time to 2–3 minutes per side since they’re smaller.
How do I reheat leftovers without losing crispiness?
Avoid the microwave. Reheat in a 375°F oven or air fryer for 5–8 minutes until heated through and crisp.
Summary
Crispy Panko Chicken Cutlets combine tender, juicy chicken with a light, shatteringly crunchy coating, offering a perfect balance of texture and flavor. Easy to customize and suitable for frying, baking, or air frying, this dish is a versatile favorite for any occasion.