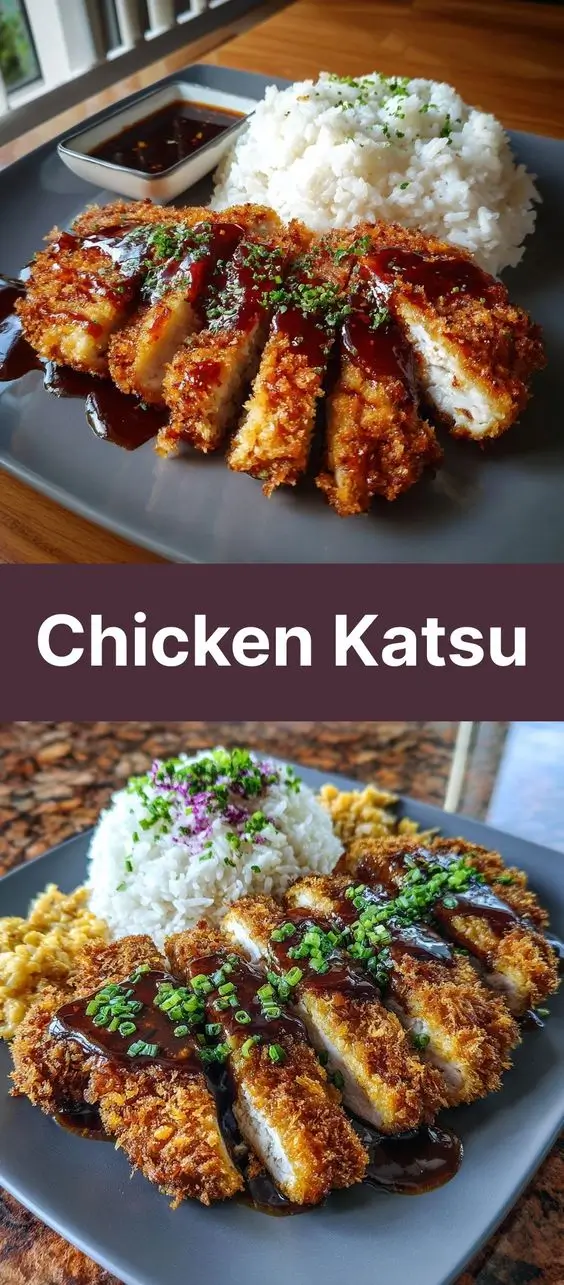
Chicken Katsu: A Crispy, Golden Japanese Delight
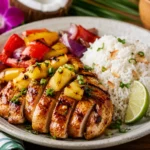
Chicken Katsu is a beloved Japanese dish that has captured the hearts and taste buds of food lovers around the world. Known for its golden, crunchy exterior and tender, juicy chicken inside, this dish exemplifies the perfect harmony between texture and flavor. Whether enjoyed at a traditional izakaya in Tokyo or recreated in home kitchens across continents, Chicken Katsu stands as a testament to the elegance of Japanese comfort food. Its popularity outside Japan has soared thanks to the global rise of Japanese cuisine, particularly dishes that are both satisfying and approachable to cook.
The History of Chicken Katsu
The origins of Chicken Katsu can be traced back to the late 19th century during the Meiji era, a time when Japan was rapidly modernizing and opening up to Western influences. The concept of breaded and deep-fried meat was inspired by European cooking techniques—specifically the French côtelette de volaille (breaded chicken cutlet) and the Austrian Schnitzel. However, the Japanese adapted these foreign dishes to suit local tastes, giving birth to what is now known as “katsu.”
The term “katsu” is actually a shortened form of “katsuretsu,” derived from the English word “cutlet.” While pork katsu (tonkatsu) came first, chicken katsu (torikatsu) emerged later as a lighter alternative that quickly gained widespread popularity. Unlike tonkatsu, which uses fatty cuts of pork, Chicken Katsu offered a leaner protein source without sacrificing flavor or crunch. Over time, it evolved into a staple of Japanese home cooking and restaurant menus alike, often served with shredded cabbage, rice, miso soup, and a rich, savory-sweet sauce.
Today, Chicken Katsu transcends borders. It appears in bento boxes, sushi rolls (like katsu don), sandwiches (katsu sando), and even fusion dishes such as katsu curry. Its versatility and universal appeal have solidified its place not just in Japanese cuisine but in the global culinary landscape.
Ingredients Breakdown: What Makes Chicken Katsu So Irresistible?
The magic of Chicken Katsu lies in its simplicity and the careful balance of ingredients used in each stage of preparation. Let’s break down the components that make this dish so uniquely delicious:
- Chicken Breast or Thigh: Boneless, skinless chicken breasts are most commonly used due to their size and ease of pounding. Some prefer chicken thighs for added juiciness and flavor, though they require more careful handling during frying.
- Salt and Pepper: Essential seasonings applied before any coating. They enhance the natural flavor of the chicken and ensure every bite is seasoned throughout.
- All-Purpose Flour: Acts as the base layer for adhesion. It helps the egg wash stick to the chicken and forms part of the crispy crust.
- Eggs: Beaten eggs serve as a binding agent between the flour and panko breadcrumbs. They create a smooth surface for the crumbs to latch onto.
- Panko Breadcrumbs: These Japanese-style breadcrumbs are light, airy, and larger than regular breadcrumbs. They’re key to achieving that signature shatteringly crisp texture when fried. Made from crustless white bread, panko absorbs less oil, resulting in a lighter, less greasy finish.
- Oil for Frying: Neutral oils with high smoke points like vegetable, canola, or peanut oil are ideal. They allow for even browning without imparting strong flavors.
- Katsu Sauce (Optional but Traditional): A tangy, slightly sweet brown sauce made from Worcestershire sauce, soy sauce, sugar, garlic, ginger, and fruit purees like apple or plum. Store-bought versions are common, but homemade sauce elevates the dish significantly.
- Accompaniments: Shredded cabbage, steamed white rice, pickled vegetables (like beni shoga or takuan), and lemon wedges round out the plate beautifully.
Step-by-Step Recipe: How to Make Perfect Chicken Katsu at Home
With the right technique, you can recreate restaurant-quality Chicken Katsu in your own kitchen. Follow these detailed steps for foolproof results every time.
Ingredients
- 2 boneless, skinless chicken breasts (about 6–7 oz each)
- ½ teaspoon salt
- ¼ teaspoon black pepper
- ½ cup all-purpose flour
- 2 large eggs
- 1 cup panko breadcrumbs
- Vegetable or canola oil, for frying (enough to fill a skillet ½ inch deep)
- Optional: 1 tablespoon cornstarch (mixed into flour for extra crispness)
Directions
- Prepare the Chicken: Place the chicken breasts on a cutting board and cover with plastic wrap. Using a meat mallet or rolling pin, gently pound them to an even thickness of about ¾ inch. This ensures uniform cooking and prevents dry spots. Trim any uneven edges for a neat appearance.
- Season: Sprinkle both sides of each breast with salt and pepper. Set aside while preparing the coating stations.
- Set Up Your Breading Station: Prepare three shallow bowls:
- Bowl 1: All-purpose flour (and optional cornstarch mixture)
- Bowl 2: Beaten eggs
- Bowl 3: Panko breadcrumbs
- Bread the Chicken:
- Dredge one chicken breast in the flour, shaking off excess.
- Dip into the beaten eggs, allowing any excess to drip off.
- Press firmly into the panko breadcrumbs, ensuring full coverage. Flip and repeat on the other side. Press gently to help the crumbs adhere.
- Place on a wire rack or plate and repeat with the second breast.
- Pro Tip: Let the breaded chicken rest for 5–10 minutes. This helps the coating set and reduces flaking during frying.
- Heat the Oil: In a large skillet over medium-high heat, add enough oil to reach a depth of ½ inch. Heat to 350°F (175°C). If you don’t have a thermometer, test by dropping a small piece of panko into the oil—if it sizzles immediately and rises to the surface, the oil is ready.
- Fry the Chicken:
- Carefully place one breaded chicken breast into the hot oil. Do not overcrowd the pan—fry one at a time if necessary.
- Fry for 3–4 minutes per side, or until golden brown and the internal temperature reaches 165°F (74°C).
- Flip only once using tongs or a slotted spatula to avoid dislodging the breading.
- Remove and drain on a wire rack set over a baking sheet (this keeps the bottom crisp; paper towels can trap steam).
- Repeat with the second breast, replenishing oil as needed.
- Slice and Serve: Once rested for 2–3 minutes, slice the chicken diagonally into strips. This makes it easier to eat and showcases the juicy interior. Serve immediately with steamed rice, shredded cabbage, and warm katsu sauce on the side.
Tips for Making the Best Chicken Katsu
To elevate your Chicken Katsu from good to exceptional, consider these professional tips:
- Use Cold Ingredients: Chill the breaded chicken for 10–15 minutes before frying. This helps the coating stay intact and promotes even browning.
- Maintain Oil Temperature: Keep the oil between 340–360°F. Too low, and the katsu will absorb oil and become greasy. Too high, and the outside burns before the inside cooks through.
- Double Breading (Optional): For an ultra-crisp crust, repeat the egg and panko step after the first coat. This creates a thicker, crunchier shell—ideal for katsu sandwiches.
- Don’t Skip the Resting Step: After frying, let the chicken rest for a few minutes. This allows juices to redistribute and prevents them from spilling out when sliced.
- Use a Wire Rack: Always drain fried foods on a wire rack instead of paper towels to preserve crispiness on all sides.
- Fresh Panko is Key: Stale panko loses its lightness. Store in an airtight container or freeze for long-term freshness.
- Make Your Own Katsu Sauce: Combine 3 tbsp Worcestershire sauce, 1 tbsp soy sauce, 1 tbsp ketchup, 1 tsp sugar, ½ tsp Dijon mustard, and a pinch of garlic powder. Simmer for 2 minutes and cool before serving.
Variations and Customizations
One of the joys of Chicken Katsu is how easily it adapts to different tastes and dietary needs. Here are some creative ways to customize the dish:
- Chicken Katsu Curry: Serve over rice with a ladle of rich Japanese curry sauce. The combination of crispy chicken and creamy curry is iconic.
- Katsu Sando (Sandwich): Slice the katsu thinner, place between soft milk bread (shokupan), and add lettuce, tonkatsu sauce, and a thin spread of Japanese mayonnaise.
- Baked Chicken Katsu: For a healthier version, bake at 425°F (220°C) for 20–25 minutes, flipping halfway. Spray lightly with oil for browning.
- Air Fryer Chicken Katsu: Lightly spray breaded chicken with oil and air fry at 380°F (190°C) for 10–12 minutes, flipping once. Results are impressively crisp with minimal oil.
- Gluten-Free Option: Use gluten-free flour and certified gluten-free panko breadcrumbs. Many brands now offer excellent GF alternatives.
- Spicy Katsu: Add chili flakes or cayenne pepper to the flour or mix sriracha into the egg wash for a kick.
- Plant-Based Katsu: Substitute chicken with firm tofu, seitan, or a vegan chicken alternative. Press tofu well before breading to remove moisture.
Health Considerations and Nutritional Value
While traditionally deep-fried, Chicken Katsu can be adapted to fit various dietary goals. Here’s a breakdown of its nutritional profile and ways to enjoy it mindfully:
Nutritional Overview (per serving, approx. 6 oz chicken breast with panko and fried in vegetable oil):
- Calories: ~400–500 kcal
- Protein: 35–40g
- Fat: 20–25g (mostly from frying oil)
- Carbohydrates: 25–30g
- Sodium: ~600–800mg (varies with seasoning and sauce)
Health Tips:
- Portion Control: One breast per person is sufficient. Pair with generous portions of fresh vegetables like cabbage salad to increase fiber and volume without excess calories.
- Choose Lean Cuts: Chicken breast is naturally low in fat and high in protein. Avoid dark meat if watching saturated fat intake.
- Reduce Oil Absorption: Fry at the correct temperature and drain on a rack. Blotting with paper towels can further reduce surface oil.
- Lower Sodium Options: Use reduced-sodium soy sauce in homemade katsu sauce and limit added salt during seasoning.
- Baking or Air Frying: These methods cut fat content by up to 70% compared to deep frying, making them excellent for heart-healthy diets.
- Balance the Meal: Serve with brown rice instead of white for added fiber, and include fermented sides like miso soup or pickled vegetables for gut health benefits.
FAQ: Frequently Asked Questions About Chicken Katsu
Q: Can I make Chicken Katsu ahead of time?
A: Yes, but it’s best served fresh. You can bread the chicken up to 2 hours in advance and refrigerate. Reheat in an oven or air fryer to restore crispness—avoid microwaving, as it makes the coating soggy.
Q: Why did my breading fall off during frying?
A: Common causes include not drying the chicken properly, skipping the flour step, moving the chicken too much in the oil, or frying at too low a temperature. Ensure each coating layer adheres well and maintain proper oil heat.
Q: Can I freeze Chicken Katsu?
A: Absolutely. Freeze uncooked, breaded chicken on a tray, then transfer to a freezer bag. Cook directly from frozen—add 1–2 minutes to frying time. Cooked katsu can also be frozen and reheated in the oven.
Q: Is panko the same as regular breadcrumbs?
A: No. Panko is made from crustless bread baked with electrical current, resulting in flaky, airy crumbs. It produces a lighter, crunchier texture than dense, fine regular breadcrumbs.
Q: What can I use instead of eggs for breading?
A: For egg-free versions, try plant-based milk mixed with a little flour, aquafaba (chickpea brine), or a commercial egg replacer. These work well with panko for vegan katsu.
Q: Can I use chicken tenders for katsu?
A: Yes! Chicken tenders make great mini-katsu bites. Adjust frying time to 2–3 minutes per side. Perfect for kids or appetizers.
Summary
Chicken Katsu is a crispy, golden Japanese masterpiece that combines tender chicken with a light, crunchy panko crust, delivering unmatched texture and flavor in every bite.
Whether served classic with rice and cabbage or reinvented in curries and sandwiches, it remains a timeless favorite loved for its simplicity, versatility, and satisfying crunch.