Introduction
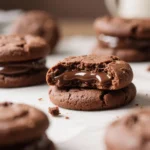
Indulging in a warm, rich, and decadent dessert doesn’t have to be complicated or time-consuming. Enter the Chocolate Lava Mug Cake—a single-serving chocolate cake that’s not only quick and easy to make but also delivers an irresistible molten chocolate center with every bite. Perfect for satisfying sudden chocolate cravings, this dessert can be ready in under 10 minutes using simple ingredients you likely already have in your pantry. Whether you’re treating yourself after a long day, hosting a cozy date night, or simply craving something sweet, the Chocolate Lava Mug Cake is your go-to solution. With its elegant presentation and restaurant-quality taste, it proves that small desserts can pack a big flavor punch.
The History
The concept of molten lava cake originated in the late 20th century, credited to French chef Jean-Georges Vongerichten. Legend has it that during a routine tasting at his New York restaurant, he accidentally underbaked a chocolate sponge cake, discovering that the slightly raw center created a luxurious, flowing chocolate core—what we now know as the “lava.” The dessert quickly gained popularity across fine dining establishments and eventually evolved into home-friendly versions. As microwaves became common kitchen appliances, creative bakers adapted the classic molten cake into a microwaveable mug version. The Chocolate Lava Mug Cake emerged as a modern staple for fast, personal desserts, combining the elegance of gourmet cuisine with the convenience of instant gratification. Today, it’s beloved by busy professionals, college students, and dessert lovers alike for its simplicity and rich indulgence.
Ingredients Breakdown
Understanding each ingredient helps ensure the perfect balance of texture and flavor in your Chocolate Lava Mug Cake:
- All-Purpose Flour: Provides structure to the cake. Too much can make it dense; too little and it won’t hold together.
- Granulated Sugar: Adds sweetness and contributes to a tender crumb. It also helps create a slightly crisp outer layer when microwaved.
- Cocoa Powder (Unsweetened): The heart of the chocolate flavor. Use high-quality Dutch-process or natural cocoa for best results.
- Baking Powder: A leavening agent that helps the cake rise slightly, creating a light and airy texture around the gooey center.
- Salt: Enhances all the flavors and balances the sweetness.
- Butter (Unsalted): Adds richness and moisture. Melted butter blends easily and creates a fudgy consistency.
- Milk: Helps hydrate the batter and improves texture. Whole milk works best, but any dairy or non-dairy alternative can be used.
- Vanilla Extract: Deepens the flavor profile with a warm, aromatic note.
- Large Egg: Binds the ingredients and adds structure while contributing to a soft, cake-like texture.
- Dark Chocolate (Chopped or Chips): This is the secret to the molten center. When melted inside the cake, it forms a luscious pool of liquid chocolate. Semisweet or bittersweet works best.
- Optional Add-ins: Mini chocolate chips, espresso powder, liqueur (like Grand Marnier or Baileys), or a pinch of cinnamon can elevate the flavor complexity.
Step-by-Step Recipe
- Gather Your Equipment: You’ll need a microwave-safe mug (at least 12 oz capacity), a small mixing bowl, a whisk or fork, and measuring spoons.
- Preheat Microwave (Optional): While not required, setting your microwave to medium-high (70% power) ensures even cooking without over-baking the edges.
- Mix Dry Ingredients: In the mug, combine 4 tablespoons all-purpose flour, 3 tablespoons granulated sugar, 2 tablespoons unsweetened cocoa powder, 1/4 teaspoon baking powder, and a pinch of salt. Stir until well blended.
- Add Wet Ingredients: Pour in 3 tablespoons of milk, 2 tablespoons of melted unsalted butter, 1 large egg, and 1/2 teaspoon vanilla extract. Whisk everything together until smooth and no lumps remain.
- Incorporate Chocolate: Stir in 2 tablespoons of chopped dark chocolate or chocolate chips. For an extra molten effect, place a square (about 1-inch) of solid chocolate in the center of the batter just before microwaving.
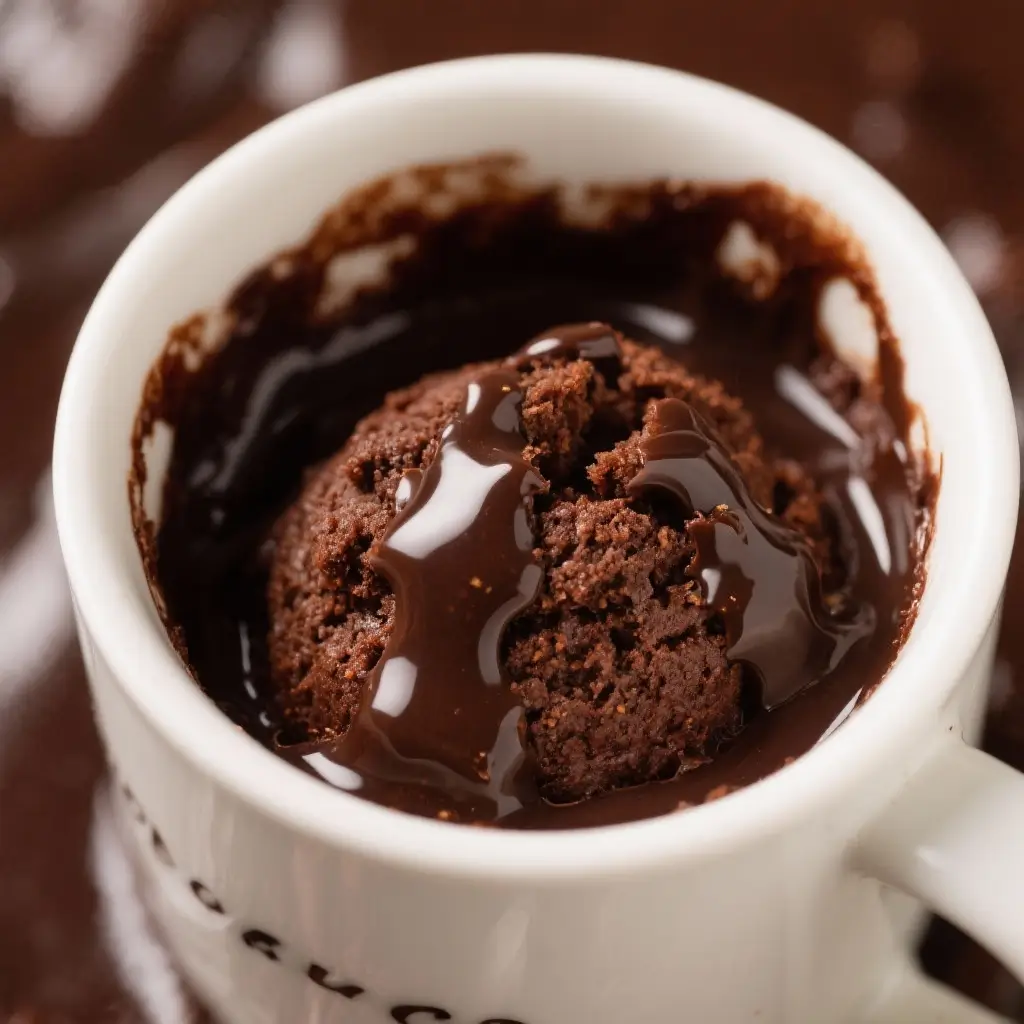
- Microwave: Place the mug in the microwave and cook on medium-high power for 60 to 90 seconds. Start checking at 60 seconds—the cake should look set on the edges but still slightly soft in the center. Overcooking will eliminate the lava effect.
- Rest Briefly: Let the mug cake sit for 1–2 minutes after microwaving. This allows the internal heat to continue cooking the outer portion while preserving the molten center.
- Serve Immediately: Carefully remove the mug (it will be hot!) and serve as-is or with toppings like powdered sugar, whipped cream, ice cream, or fresh berries.
Tips
- Use the Right Mug: Choose a microwave-safe mug that’s wide enough to allow even heating. Avoid narrow or decorative mugs that may heat unevenly.
- Don’t Overmix: Once the wet and dry ingredients are combined, mix just until smooth. Overmixing can develop gluten and lead to a tough cake.
- Watch Cooking Time Closely: Microwaves vary significantly. If your cake rises too much and then collapses, it’s likely overcooked. Adjust time in 5-second increments.
- Center Is Key: To guarantee a molten core, avoid stirring the chocolate completely into the batter. Let some chunks sink naturally or place a chocolate cube in the middle before cooking.
- Let It Rest: Resist the urge to dig in immediately. Allowing the cake to rest for a minute helps stabilize the structure and enhances the lava flow when you spoon into it.
- Double-Check Mug Safety: Never use mugs with metallic paint or trim in the microwave—they can spark or become dangerously hot.
- Enhance Flavor: A pinch of espresso powder (about 1/8 tsp) deepens the chocolate flavor without making it taste like coffee.
Variations and Customizations
The beauty of the Chocolate Lava Mug Cake lies in its versatility. Here are some creative twists to keep your dessert exciting:
- Peanut Butter Swirl: Add a tablespoon of peanut butter to the batter or swirl it on top before microwaving for a rich, nutty contrast.
- White Chocolate & Raspberry: Replace dark chocolate with white chocolate chips and fold in a few fresh raspberries for a tart-sweet combo.
- Cookie Dough Center: Place a small ball of edible cookie dough in the center before cooking for a surprise filling.
- Gluten-Free Version: Substitute all-purpose flour with a 1:1 gluten-free baking blend. Ensure cocoa powder and chocolate are certified gluten-free.
- Vegan Option: Use flax egg (1 tbsp ground flaxseed + 3 tbsp water), plant-based milk, vegan butter, and dairy-free chocolate. Skip the egg and adjust batter consistency.
- Spiced Chocolate: Add a dash of cinnamon, cayenne pepper, or pumpkin spice for a warm, aromatic kick.
- Liqueur-Infused: Mix in 1 teaspoon of Kahlua, Amaretto, or Chambord for an adult twist. Reduce milk slightly to maintain consistency.
- Salted Caramel Core: Pour a teaspoon of thick caramel sauce into the center before cooking, then top with sea salt after baking.
- S’mores Style: Add mini marshmallows and graham cracker crumbs to the batter, and finish with a chocolate square in the middle.
- Doubled for Two: Use a larger microwave-safe ramekin or bowl to make a shared version. Increase ingredients by 1.5x and cook 90–120 seconds.
Health Considerations and Nutritional Value
While undeniably delicious, the Chocolate Lava Mug Cake is a treat best enjoyed in moderation. Here’s a general nutritional breakdown per serving (based on standard recipe):
- Calories: ~350–400 kcal
- Fat: 18–22g (mostly from butter and chocolate)
- Saturated Fat: 10–12g
- Carbohydrates: 45–50g
- Sugars: 30–35g
- Protein: 6–8g (from egg and milk)
- Fiber: 2–3g (mainly from cocoa and flour)
- Iron & Antioxidants: Cocoa is rich in flavonoids, which have antioxidant properties and may support heart health.
Health Tips:
- Opt for dark chocolate with at least 70% cocoa to reduce added sugar and increase beneficial compounds.
- Use coconut sugar or maple syrup in reduced amounts as a natural sweetener alternative (note: may affect texture).
- Substitute half the flour with oat flour or almond flour for added fiber and protein (though texture will be denser).
- Use low-fat milk or unsweetened almond milk to cut calories.
- Avoid adding extra sugar if serving with ice cream or sweet toppings.
- This dessert is not ideal for those managing diabetes, high cholesterol, or calorie-restricted diets unless modified accordingly.
Ingredients
- 4 tablespoons all-purpose flour (or gluten-free substitute)
- 3 tablespoons granulated sugar (or coconut sugar)
- 2 tablespoons unsweetened cocoa powder
- 1/4 teaspoon baking powder
- Pinch of salt
- 3 tablespoons milk (dairy or plant-based)
- 2 tablespoons unsalted butter, melted (or coconut oil)
- 1 large egg (or flax egg for vegan)
- 1/2 teaspoon vanilla extract
- 2 tablespoons dark chocolate chips or chopped chocolate (plus 1 square for center)
- Optional: 1/8 teaspoon espresso powder, pinch of cinnamon, or 1 tsp liqueur
Directions
- In a microwave-safe 12-ounce mug, whisk together flour, sugar, cocoa powder, baking powder, and salt until no clumps remain.
- Add milk, melted butter, egg, and vanilla extract. Stir vigorously until the batter is smooth and glossy.
- Fold in chocolate chips, ensuring they’re evenly distributed. For maximum lava effect, press an additional square of chocolate into the center of the batter.
- Microwave on medium-high (70% power) for 60 to 90 seconds. The cake should rise and appear set on the edges but still soft in the center. Do not overcook.
- Allow the mug cake to rest for 1–2 minutes. The internal temperature will continue cooking the outer layers while keeping the center molten.
- Serve warm directly from the mug. Top with powdered sugar, a scoop of vanilla ice cream, fresh strawberries, or whipped cream for a complete dessert experience.
FAQ
Can I make this without a microwave?
Yes! Use an oven preheated to 350°F (175°C). Bake in a greased ramekin for 12–15 minutes until edges are set but center is soft.
Why didn’t my cake have a lava center?
Overcooking is the most common cause. Try reducing the time by 10 seconds or using a lower microwave power setting.
Can I prepare the batter ahead of time?
It’s best made fresh, but you can pre-mix dry ingredients in a jar and store for weeks. Just add wet ingredients and chocolate when ready.
Is it safe to eat with a runny center?
Yes, because the egg is partially cooked by steam and surrounding heat. For extra safety, use pasteurized eggs.
Can I double the recipe?
Not recommended in one mug—it won’t cook evenly. Use a larger ramekin or make two separate mug cakes.
How do I clean the mug after?
Let it cool slightly, then soak in warm soapy water. The chocolate residue will soften and wipe away easily.
Can I freeze leftover batter?
No, due to the egg content. This recipe is designed for immediate preparation and consumption.
What kind of cocoa powder should I use?
Either natural or Dutch-process works. Dutch-process is less acidic and gives a smoother, deeper chocolate flavor.
Summary
The Chocolate Lava Mug Cake is a rich, gooey, single-serving dessert that combines gourmet indulgence with lightning-fast preparation. Ready in under 10 minutes, it’s the perfect fix for any chocolate craving—warm, comforting, and irresistibly decadent.