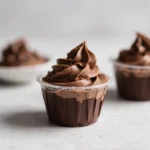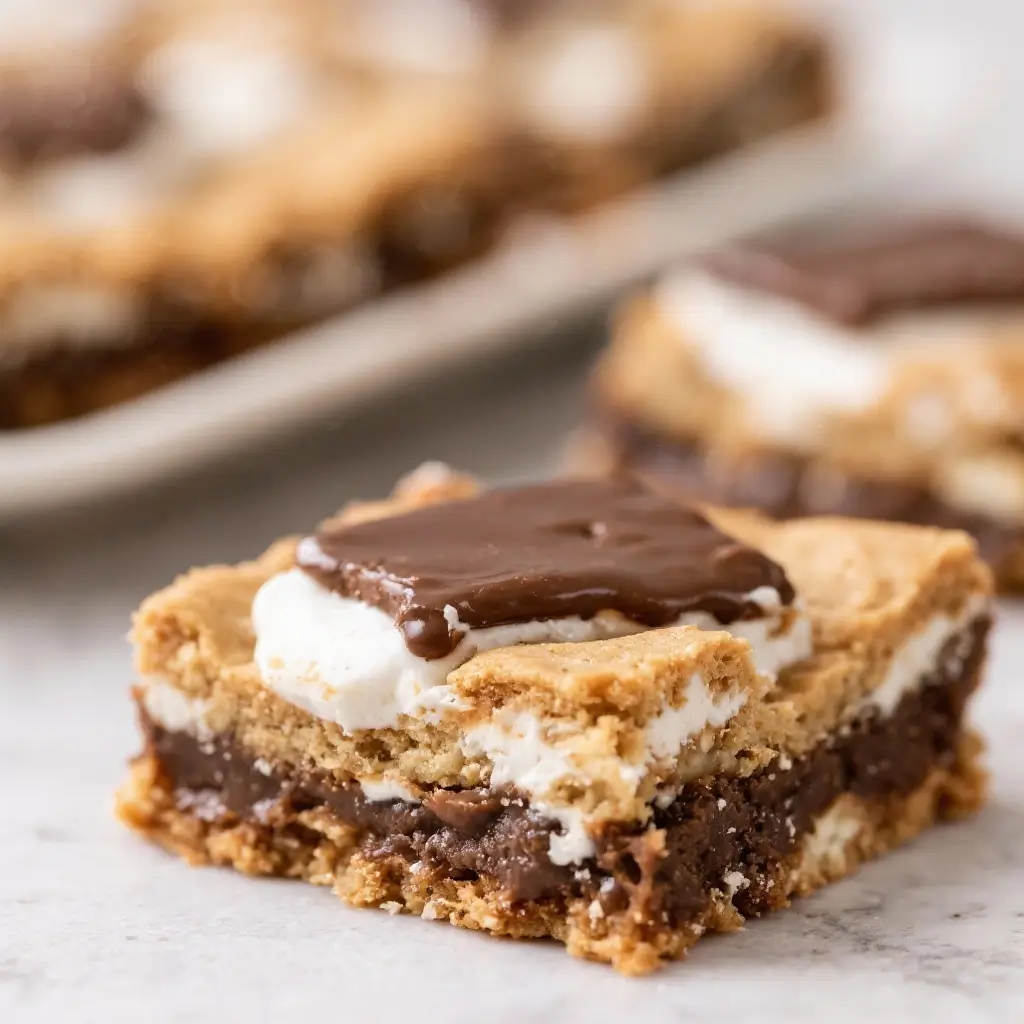
S’mores Cookie Bars: The Ultimate Campfire-Inspired Dessert
Introduction
If you’re a fan of gooey marshmallows, rich chocolate, and crunchy graham crackers, then S’mores Cookie Bars are your new favorite dessert. Combining the nostalgic flavors of classic campfire s’mores with the chewy texture of cookie bars, this indulgent treat brings all the joy of roasting marshmallows over an open flame—without needing a fire pit or skewer. Perfect for potlucks, bake sales, holiday gatherings, or cozy nights in, these decadent bars deliver a symphony of textures and flavors in every bite. Whether you’re introducing kids to the magic of s’mores or satisfying your own sweet tooth, these bars are easy to make, universally loved, and utterly irresistible.
The History
The story of the s’more begins in the early 20th century, rooted in American camping culture. The name “s’more” is a contraction of “some more,” reflecting how one bite always leads to a craving for another. The first known printed recipe for s’mores appeared in a 1927 Girl Scout publication called Tramping and Trailing with the Girl Scouts, where it was referred to as a “Graham Cracker Sandwich.” It typically consisted of a roasted marshmallow and a piece of chocolate sandwiched between two graham crackers.
As s’mores grew in popularity around campfires across North America, bakers began experimenting with ways to bring that beloved combination into the kitchen. Enter the S’mores Cookie Bar—a modern twist that transforms the handheld campfire treat into a baked, sliceable dessert. By blending graham cracker crusts, melty chocolate layers, and fluffy marshmallow toppings into a single pan, home cooks created a no-fuss version that captures the essence of s’mores while being far more convenient to serve and enjoy indoors. Today, S’mores Cookie Bars have become a staple in dessert cookbooks and online recipe collections, celebrated for their convenience, crowd-pleasing appeal, and delicious homage to outdoor nostalgia.
Ingredients Breakdown
The magic of S’mores Cookie Bars lies in their layered components, each contributing to the overall flavor, texture, and gooey goodness. Here’s a detailed look at what goes into making these dreamy treats:
- Graham Crackers – These form the base of the dessert, providing a slightly sweet, nutty crunch. They’re crushed and combined with butter to create a firm yet tender crust that holds everything together.
- Butter – Unsalted butter binds the crust and adds richness. When melted, it coats the graham cracker crumbs evenly, helping them set into a cohesive layer after baking.
- Brown Sugar – Adds moisture and deep caramel-like sweetness to the cookie layer, enhancing chewiness and complementing the graham flavor.
- Granulated Sugar – Works with brown sugar to sweeten the cookie base and help achieve a golden-brown top when baked.
- Eggs – Act as a binder and add structure to the cookie layer, ensuring the bars hold their shape while remaining soft inside.
- Vanilla Extract – Enhances the overall flavor profile, adding warmth and depth that ties the ingredients together.
- All-Purpose Flour – Provides the necessary gluten structure for the cookie layer, giving it substance without becoming cakey.
- Baking Soda – A leavening agent that helps the cookie layer rise slightly and develop a soft, airy crumb.
- Salt – Balances the sweetness and enhances all the other flavors, preventing the bars from tasting one-dimensionally sugary.
- Chocolate Chips or Chunks – Preferably semi-sweet or milk chocolate, these melt into pockets of goo during baking, mimicking the chocolate layer in traditional s’mores.
- Mini Marshmallows – The crowning glory! These puff up and toast lightly in the oven, creating a sticky, cloud-like topping that’s both chewy and melt-in-your-mouth tender.
- Optional Additions: Crushed graham crackers sprinkled on top before the final broil, chocolate drizzle after cooling, or even a layer of Nutella for a gourmet twist.
Step-by-Step Recipe
- Preheat the Oven: Begin by preheating your oven to 350°F (175°C). This ensures even baking and proper rise. Line a 9×13-inch baking pan with parchment paper, leaving an overhang on two sides for easy removal later. Lightly grease the paper and sides of the pan to prevent sticking.
- Prepare the Graham Cracker Crust: In a medium bowl, combine 1½ cups of finely crushed graham cracker crumbs with 6 tablespoons of melted unsalted butter and 2 tablespoons of granulated sugar. Mix until the mixture resembles wet sand. Press this evenly into the bottom of the prepared pan using a flat-bottomed glass or spatula. Bake for 8–10 minutes until lightly golden. Remove and set aside to cool slightly while preparing the cookie layer.
- Cream the Butter and Sugars: In a large mixing bowl, beat ¾ cup (1.5 sticks) of softened unsalted butter with ½ cup packed brown sugar and ¼ cup granulated sugar until light and fluffy (about 2–3 minutes with an electric mixer). Scrape down the sides as needed to ensure even mixing.
- Add Eggs and Vanilla: Beat in 1 large egg and 1 teaspoon of pure vanilla extract until fully incorporated. The mixture should be smooth and creamy.
- Mix Dry Ingredients: In a separate bowl, whisk together 1 cup all-purpose flour, ½ teaspoon baking soda, and ¼ teaspoon salt. Gradually add this dry mixture to the wet ingredients, mixing on low speed just until combined. Do not overmix.
- Incorporate Chocolate: Fold in 1 cup of semi-sweet chocolate chips or chunks using a spatula. Reserve a few extra chips to sprinkle on top later if desired.
- Spread the Cookie Layer: Carefully spread the cookie batter evenly over the pre-baked graham cracker crust. Use an offset spatula or the back of a spoon to smooth the top.
- Add the Marshmallows: Sprinkle 2 cups of mini marshmallows evenly over the entire surface of the cookie layer. Try to cover as much as possible for maximum gooeyness.
- Bake the Bars: Place the pan in the center of the preheated oven and bake for 20–25 minutes, or until the edges are golden brown and the center appears set. The marshmallows will begin to puff and turn golden at the edges.
- Optional Broil for Toasted Effect: For a true campfire experience, switch the oven to broil for the last 1–2 minutes. Watch closely! The marshmallows will quickly turn golden and slightly crisp on top. Remove immediately once toasted to your liking.
- Cool Completely: Allow the bars to cool in the pan on a wire rack for at least 1 hour. For clean cuts, chill in the refrigerator for 30 minutes before slicing.
- Serve: Use the parchment overhang to lift the bars out of the pan. Cut into squares or rectangles using a sharp knife dipped in hot water for neat edges.
Tips
- Don’t Overbake: The key to soft, chewy bars is removing them from the oven when the center still looks slightly underdone—it will continue to set as it cools.
- Use Fresh Marshmallows: Stale marshmallows won’t puff properly. Check the expiration date and store them in an airtight container before use.
- Chill Before Cutting: Refrigerating the cooled bars helps achieve clean, professional-looking slices without crumbling.
- Parchment Paper is Essential: It prevents sticking and makes lifting the entire slab out of the pan effortless.
- Watch Closely During Broiling: Marshmallows can go from golden to burnt in seconds. Stay nearby and keep your eyes on the oven.
- Double the Batch: These disappear fast! Consider making two pans—one to serve and one to hide.
- Room Temperature Ingredients: Ensure your butter and eggs are at room temperature to promote even mixing and a smoother batter.
Variations and Customizations
S’mores Cookie Bars are incredibly versatile. Once you master the basic recipe, feel free to experiment with creative twists:
- Double Chocolate S’mores: Use chocolate graham crackers for the crust and add cocoa powder to the cookie layer for a richer, fudgier bar.
- Peppermint Twist: Add ½ teaspoon peppermint extract to the batter and top with crushed candy canes after broiling—perfect for the holidays.
- Salted Caramel Swirl: Drizzle thick caramel sauce over the marshmallow layer before baking, or swirl it into the cookie batter for a sweet-and-salty surprise.
- Smoked Version: For a true campfire flavor, use smoked sea salt in the crust or add a few drops of liquid smoke to the batter (use sparingly!).
- Gluten-Free Option: Substitute gluten-free graham crackers and certified gluten-free flour to accommodate dietary needs.
- Vegan Adaptation: Use plant-based butter, flax eggs (1 tbsp ground flax + 3 tbsp water per egg), dairy-free chocolate, and vegan marshmallows (like Dandies brand).
- Nutty Crunch: Mix chopped pecans, walnuts, or almonds into the cookie layer for added texture and flavor.
- S’mores Dip Style: Skip the crust and make a skillet version—bake in a cast-iron pan and serve warm with graham cracker dippers.
- Mini Bars: Make smaller portions using a muffin tin—line cups with parchment liners, press in crust, fill with batter and marshmallows, and bake for 12–15 minutes.
- Fruity Fusion: Add dried raspberries or strawberries to the marshmallow layer for a tart contrast.
Health Considerations and Nutritional Value
While S’mores Cookie Bars are undeniably indulgent, it’s important to enjoy them mindfully. Here’s a general nutritional breakdown per serving (based on 12 servings):
- Calories: ~320–380 kcal
- Total Fat: 16–20g (mostly from butter and chocolate)
- Saturated Fat: 9–12g
- Cholesterol: 40–50mg
- Sodium: 150–200mg
- Total Carbohydrates: 45–50g
- Dietary Fiber: 1–2g
- Sugars: 28–32g (naturally high due to multiple sweeteners)
- Protein: 3–4g
Considerations:
- High in added sugars and saturated fats; best enjoyed occasionally as a treat.
- Low in fiber and protein, so pairing with a glass of milk or a side of fruit can balance the meal.
- Contains common allergens: wheat (gluten), dairy, eggs, and soy (depending on chocolate brand).
- To reduce sugar content, consider using dark chocolate with higher cocoa content and reducing the amount of added sugar in the crust or cookie layer.
- For portion control, cut smaller squares and serve on decorative napkins to encourage moderation.
Ingredients
- 1½ cups graham cracker crumbs (about 10 full sheets)
- 6 tablespoons unsalted butter, melted
- 2 tablespoons granulated sugar
- ¾ cup (1.5 sticks) unsalted butter, softened
- ½ cup packed brown sugar
- ¼ cup granulated sugar
- 1 large egg
- 1 teaspoon pure vanilla extract
- 1 cup all-purpose flour
- ½ teaspoon baking soda
- ¼ teaspoon salt
- 1 cup semi-sweet chocolate chips
- 2 cups mini marshmallows
Directions
- Preheat oven to 350°F (175°C). Line a 9×13-inch baking pan with parchment paper and grease lightly.
- In a bowl, mix graham cracker crumbs, 6 tbsp melted butter, and 2 tbsp sugar. Press firmly into the bottom of the pan. Bake for 8–10 minutes, then let cool.
- In a large bowl, cream ¾ cup softened butter with brown and granulated sugars until fluffy.
- Beat in egg and vanilla extract until smooth.
- In another bowl, whisk flour, baking soda, and salt. Gradually mix into wet ingredients until just combined.
- Fold in chocolate chips.
- Spread batter evenly over the cooled crust.
- Sprinkle mini marshmallows over the top in a single, even layer.
- Bake for 20–25 minutes until edges are golden and center is set.
- Optional: Broil for 1–2 minutes to toast marshmallows. Watch carefully!
- Cool completely in pan (1 hour), then chill for 30 minutes for cleaner slicing.
- Lift out using parchment, cut into bars, and serve.
FAQ
Can I make S’mores Cookie Bars ahead of time?
Yes! These bars keep well at room temperature in an airtight container for up to 3 days, or refrigerated for up to 5 days. You can also freeze them (individually wrapped) for up to 3 months. Thaw at room temperature before serving.
Why did my marshmallows melt into a sticky mess?
This is normal! The marshmallows will soften and meld together during baking. If they seem too runny, it may be due to high humidity or overbaking. Letting the bars cool fully helps them set.
Can I use regular marshmallows instead of mini?
You can, but minis distribute more evenly and create a uniform topping. If using large marshmallows, slice them into quarters and place them close together to avoid gaps.
How do I store leftovers?
Store in an airtight container at room temperature. If stacked, place wax paper between layers to prevent sticking. For longer storage, refrigerate or freeze.
Can I make these bars without a mixer?
Yes! Use a sturdy spoon or spatula to mix the ingredients by hand. Creaming the butter and sugar will take a bit more effort, but it’s doable.
Why didn’t my crust stay together?
Ensure you pressed the crust mixture firmly into the pan and baked it before adding the next layer. Also, check that you used enough melted butter—this acts as the glue.
Can I make these bars less sweet?
Yes. Try reducing the sugar in the crust and cookie layer by 1–2 tablespoons total, and use dark chocolate chips (60% cacao or higher) for a more bitter contrast.
Summary
S’mores Cookie Bars blend the nostalgic charm of campfire treats with the ease of a homemade baked dessert, delivering layers of graham cracker crust, chewy chocolate cookie, and toasted marshmallow perfection. Easy to customize, impossible to resist, and guaranteed to bring smiles with every bite.