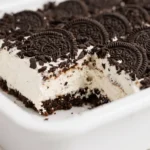
Oreo Icebox Cake: A No-Bake Dessert Classic That Melts in Your Mouth
The Oreo Icebox Cake is a beloved dessert that has charmed generations with its simplicity, creamy texture, and irresistible chocolatey crunch. Combining the nostalgic flavor of Oreo cookies with the silky richness of whipped cream and cream cheese, this no-bake treat requires minimal effort but delivers maximum satisfaction. Whether you’re preparing for a family gathering, a summer picnic, or simply craving something sweet, the Oreo Icebox Cake stands out as a cool, refreshing, and indulgent delight that can be made ahead of time—perfect for stress-free entertaining.
The History of the Oreo Icebox Cake
The origins of the Oreo Icebox Cake trace back to mid-20th century American kitchens, where convenience and creativity merged in home cooking. The concept of an “icebox cake” emerged during the early 1900s when households began using iceboxes (the precursors to modern refrigerators) to chill foods. These cakes were originally created by layering wafer-like cookies—often graham crackers or thin chocolate wafers—with sweetened whipped cream or condensed milk and then allowing them to set in the cold. The magic happens as the liquid ingredients soften the cookies over time, transforming them into a cake-like structure without baking.
When Nabisco introduced Oreo cookies in 1912, they quickly became a favorite among American families. By the 1970s and 1980s, savvy home bakers began substituting traditional wafers with Oreos, capitalizing on their bold chocolate-vanilla creme flavor profile. The result? A richer, more decadent version of the classic icebox cake that soon gained cult status. Over the decades, the recipe evolved with variations incorporating pudding, gelatin, sour cream, or even alcohol, but the core idea remained unchanged: simple ingredients transformed through chilling into something extraordinary.
Today, the Oreo Icebox Cake enjoys renewed popularity thanks to social media, food blogs, and viral TikTok recipes. Its retro charm, combined with modern twists and customization options, makes it a staple at potlucks, birthday parties, and holiday tables across the United States and beyond.
Ingredients Breakdown: What Makes This Cake Irresistible
The beauty of the Oreo Icebox Cake lies in its minimal yet impactful ingredient list. Each component plays a crucial role in creating the final texture and flavor harmony:
- Oreo Cookies: The star of the show. Their crisp chocolate exterior and sweet white creme filling add both structure and flavor. While classic Oreos work best, you can experiment with Double Stuf, Golden, or seasonal flavors for variety.
- Cream Cheese: Adds tanginess and body to the filling, helping it hold shape and preventing the cake from becoming too soft. It should be softened to room temperature for smooth blending.
- Heavy Whipping Cream: When whipped to stiff peaks, it provides lightness and fluffiness, giving the cake its signature airy texture. High fat content ensures stability and rich mouthfeel.
- Vanilla Extract: Enhances sweetness and depth, rounding out the overall flavor profile.
- Sugar: Granulated sugar is typically used to sweeten the cream mixture. Powdered sugar can also be used for quicker dissolution and smoother texture.
- Milk (optional): Sometimes added in small amounts to adjust consistency if the mixture becomes too thick.
These ingredients come together to form a luxuriously creamy filling that gradually softens the cookies, mimicking the layers of a true cake while maintaining a chilled, custard-like experience.
Step-by-Step Recipe: How to Make the Perfect Oreo Icebox Cake
Follow these detailed steps to create a flawless Oreo Icebox Cake that impresses every time:
- Gather and Prepare Ingredients: Take the cream cheese out of the refrigerator about 30 minutes before starting to ensure it’s fully softened. Measure all ingredients precisely. You’ll need 24–36 Oreo cookies (depending on pan size), 8 oz of cream cheese, 1 cup of heavy whipping cream, ¼ to ½ cup of granulated sugar (adjust to taste), and 1 teaspoon of pure vanilla extract.
- Whip the Cream Cheese: In a large mixing bowl, beat the softened cream cheese using a hand mixer or stand mixer on medium speed until smooth and creamy, about 1–2 minutes. Scrape down the sides with a spatula to ensure even mixing.
- Add Sugar and Vanilla: Gradually add the sugar and vanilla extract to the cream cheese. Mix on medium until fully incorporated and fluffy, another 1–2 minutes.
- Whip the Heavy Cream: In a separate clean bowl (preferably chilled), pour in the heavy whipping cream. Using clean beaters, whip on high speed until stiff peaks form—this means the cream holds its shape when the beaters are lifted. Be careful not to over-whip, or it may turn grainy or buttery.
- Fold Together: Gently fold the whipped cream into the cream cheese mixture in two or three additions using a spatula. Use a folding motion—cutting down through the center, scraping along the bottom, and turning over—to preserve air and maintain volume. Continue until no streaks remain and the mixture is uniform and cloud-like.
- Prepare the Pan: Choose a loaf pan, square dish, or springform pan (8×8 inch or 9×5 inch works well). For easier removal, line the pan with plastic wrap, leaving overhang on the sides. This acts as a sling for lifting the cake out after chilling.
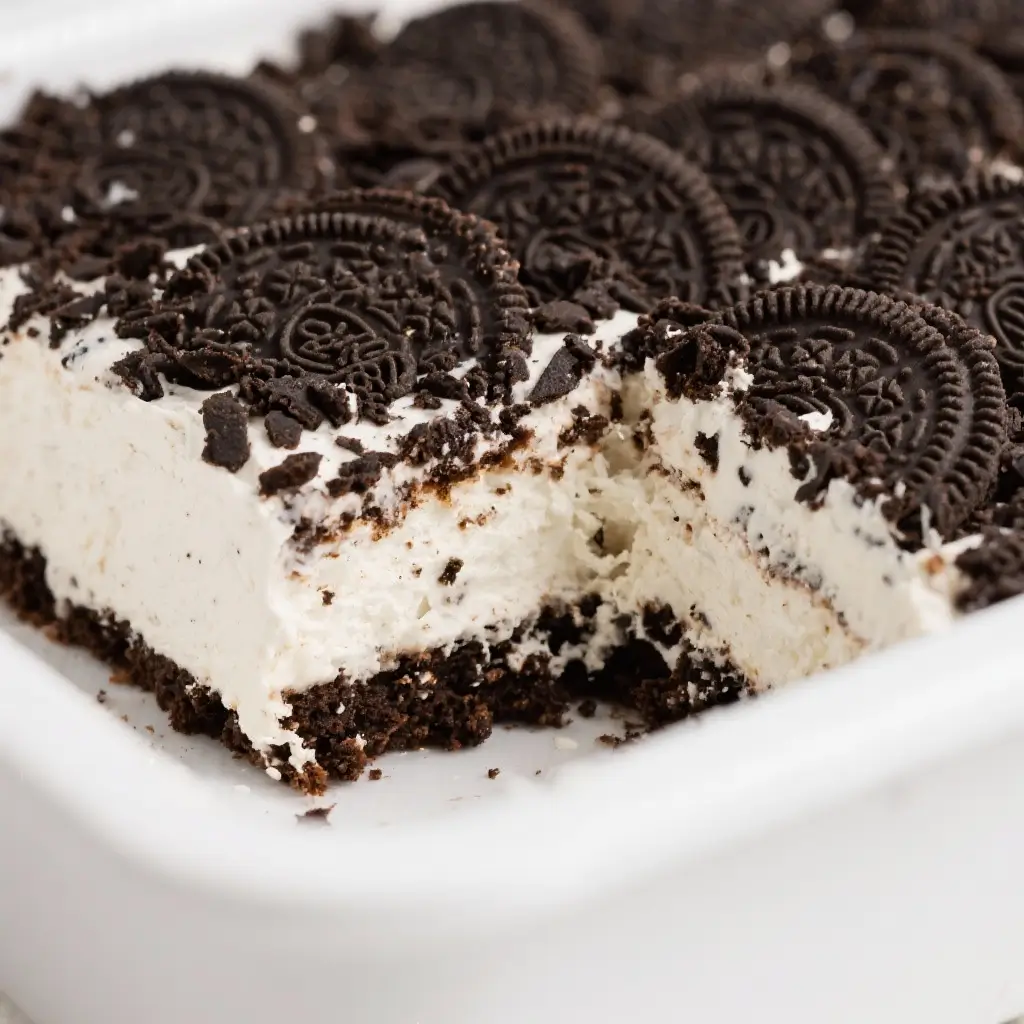
- Layer the First Row of Cookies: Remove the Oreo creme fillings if desired (though most keep them intact for extra sweetness). Arrange a single layer of whole Oreos snugly side by side at the bottom of the pan. Slightly press them into the surface to stabilize.
- Add the First Layer of Filling: Spread approximately one-third of the cream mixture evenly over the Oreos using an offset spatula or the back of a spoon. Aim for a smooth, level surface.
- Repeat Layers: Add a second layer of Oreos, followed by another third of the filling. Repeat once more for a total of three Oreo layers and three cream layers. Finish with a final layer of cream on top.
- Smooth the Top: Use a spatula dipped in warm water to smooth the top for a clean finish. You can also create decorative swirls if serving uncovered.
- Crush Extra Oreos for Garnish: Crush 6–8 additional Oreos (use a food processor or place in a zip-top bag and crush with a rolling pin). Sprinkle the crumbs over the top layer for visual appeal and added crunch.
- Chill Thoroughly: Cover the pan tightly with plastic wrap or aluminum foil and refrigerate for at least 6 hours, but preferably overnight (8–12 hours). This allows the cookies to absorb moisture and soften into a cake-like texture.
- Serve: After chilling, use the plastic wrap overhang to lift the cake gently from the pan. Transfer to a serving platter. Slice with a sharp knife dipped in hot water for clean cuts. Wipe the blade between slices.
Tips for Success: Mastering Your Oreo Icebox Cake
- Use Cold Equipment for Whipping Cream: Chill your bowl and beaters in the freezer for 10–15 minutes before whipping cream. Cold tools help achieve faster, stiffer peaks.
- Don’t Skip the Chill Time: Rushing the setting process leads to a loose, crumbly cake. Allow at least 6 hours, but overnight chilling yields superior texture.
- Room Temperature Cream Cheese: Softened cream cheese blends smoothly without lumps. If left too long, it may become runny; avoid microwaving unless absolutely necessary.
- Stabilize with Pudding (Optional): For a firmer set, especially in warm climates, mix in 1 package (3.4 oz) of instant chocolate or vanilla pudding powder with the cream cheese before adding whipped cream.
- Prevent Weeping: Avoid using low-fat dairy products—they contain more water and can make the cake soggy. Stick to full-fat cream cheese and heavy cream.
- Customize Presentation: Pipe the final layer using a star tip for an elegant touch. Add fresh berries, chocolate shavings, or edible glitter for special occasions.
- Freezing Option: The cake can be frozen for up to 1 month. Wrap tightly in plastic and foil. Thaw overnight in the fridge before serving.
Variations and Customizations: Make It Your Own
One of the greatest strengths of the Oreo Icebox Cake is its versatility. Here are some creative ways to personalize it:
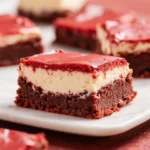
- Flavored Oreos: Try Red Velvet, Birthday Cake, Peanut Butter, Mint, or Limited Edition seasonal Oreos to change the flavor profile dramatically.
- Peanut Butter Swirl: Add ½ cup of peanut butter to the cream cheese mixture or swirl in melted peanut butter cups between layers.
- Chocolate Lover’s Version: Mix melted dark or milk chocolate into the cream filling or drizzle ganache between layers.
- Fruity Twist: Add a layer of raspberry jam or fresh sliced strawberries between the cookie layers for a sweet-tart contrast.
- Alcoholic Infusion: Add 1–2 tablespoons of Baileys Irish Cream, Kahlua, or Godiva liqueur to the cream mixture for an adult-friendly dessert.
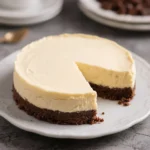
- Gluten-Free/Keto Options: Use gluten-free chocolate sandwich cookies or keto-friendly alternatives like homemade almond flour chocolate cookies for dietary restrictions.
- Mini Jars: Layer ingredients in mason jars or parfait glasses for individual servings—perfect for parties or gifts.
- Ice Cream Base: Combine crushed Oreos with softened vanilla ice cream, layer in a pan, and freeze for an Oreo Ice Cream Cake hybrid.
Health Considerations and Nutritional Value
While undeniably delicious, the Oreo Icebox Cake is a high-calorie, sugar-dense dessert best enjoyed in moderation. Here’s a general nutritional breakdown per slice (based on 8 servings):
- Calories: ~350–450 kcal
- Total Fat: 20–28g (including 12g saturated fat)
- Carbohydrates: 35–45g (with 20–25g sugars)
- Protein: 3–5g
- Sodium: ~200–300mg
Key Notes:
- The primary sources of fat and calories come from heavy cream, cream cheese, and Oreo cookies.
- High sugar content comes from both the cookies and added sweeteners—consider reducing sugar or using a sugar substitute like erythritol for lower glycemic impact.
- Lactose-intolerant individuals may substitute with lactose-free cream cheese and whipping cream alternatives, though results may vary in texture.
- For a lighter version, consider using whipped topping (like Cool Whip) instead of homemade whipped cream, though this reduces richness and natural flavor.
- Not suitable for vegans unless plant-based substitutes are used (vegan cream cheese, coconut whipped cream, dairy-free cookies).
Full Ingredient List
- 36 Oreo cookies (plus 6–8 extra for topping)
- 8 ounces (1 package) cream cheese, softened
- 1 cup heavy whipping cream, cold
- ½ cup granulated sugar (or powdered sugar for smoother texture)
- 1 teaspoon pure vanilla extract
- Plastic wrap (for lining pan and covering)
Detailed Directions Recap
- Line a 9×5-inch loaf pan or 8×8-inch square dish with plastic wrap.
- In a large bowl, beat softened cream cheese until smooth.
- Add sugar and vanilla; mix until fluffy.
- In a separate bowl, whip cold heavy cream to stiff peaks.
- Fold whipped cream into cream cheese mixture until fully combined and airy.
- Place a layer of whole Oreos in the bottom of the pan.
- Spread ⅓ of the cream mixture over the Oreos.
- Repeat layering: Oreos → cream → Oreos → cream → Oreos → cream (total of 3 cookie layers).
- Crush reserved Oreos and sprinkle over the top.
- Cover with plastic wrap and refrigerate for 6–12 hours.
- Remove from pan using plastic overhang, slice, and serve chilled.
Frequently Asked Questions (FAQ)
Q: Can I make Oreo Icebox Cake without cream cheese?
A: Yes, though the texture will be less rich. Substitute with mascarpone or increase whipped cream slightly. Some recipes use only whipped cream and sweetened condensed milk.
Q: How long does it last in the fridge?
A: Up to 5 days when stored covered in the refrigerator. However, best quality is within the first 2–3 days.
Q: Why is my cake watery?
A: Likely due to under-whipped cream, warm ingredients, or low-fat substitutes. Always use full-fat dairy and chill components properly.
Q: Can I use whipped topping instead of heavy cream?
A: Yes—1 tub (8 oz) of whipped topping like Cool Whip can replace the whipped cream. Fold into sweetened cream cheese. Results are softer but convenient.
Q: Do I need to remove the Oreo creme filling?
A: Not necessarily. Most people leave it in for extra sweetness and flavor. Removing it gives a less sweet, more balanced taste.
Q: Can I freeze Oreo Icebox Cake?
A: Yes. Freeze for up to 1 month. Wrap tightly in plastic and foil. Thaw slowly in the refrigerator overnight.
Q: What size pan should I use?
A: A 9×5-inch loaf pan, 8×8-inch square, or 7×3-inch springform pan works best. Adjust cookie count based on pan size.
Q: Can I make it ahead of time?
A: Absolutely! This dessert is ideal for making 1–2 days in advance. Chilling enhances flavor and texture.
Summary
The Oreo Icebox Cake is a timeless no-bake dessert that combines crunchy chocolate cookies with a luscious, creamy filling, transforming into a cake-like masterpiece through simple refrigeration. Effortless to prepare and endlessly customizable, it remains a crowd-pleasing favorite for any occasion.