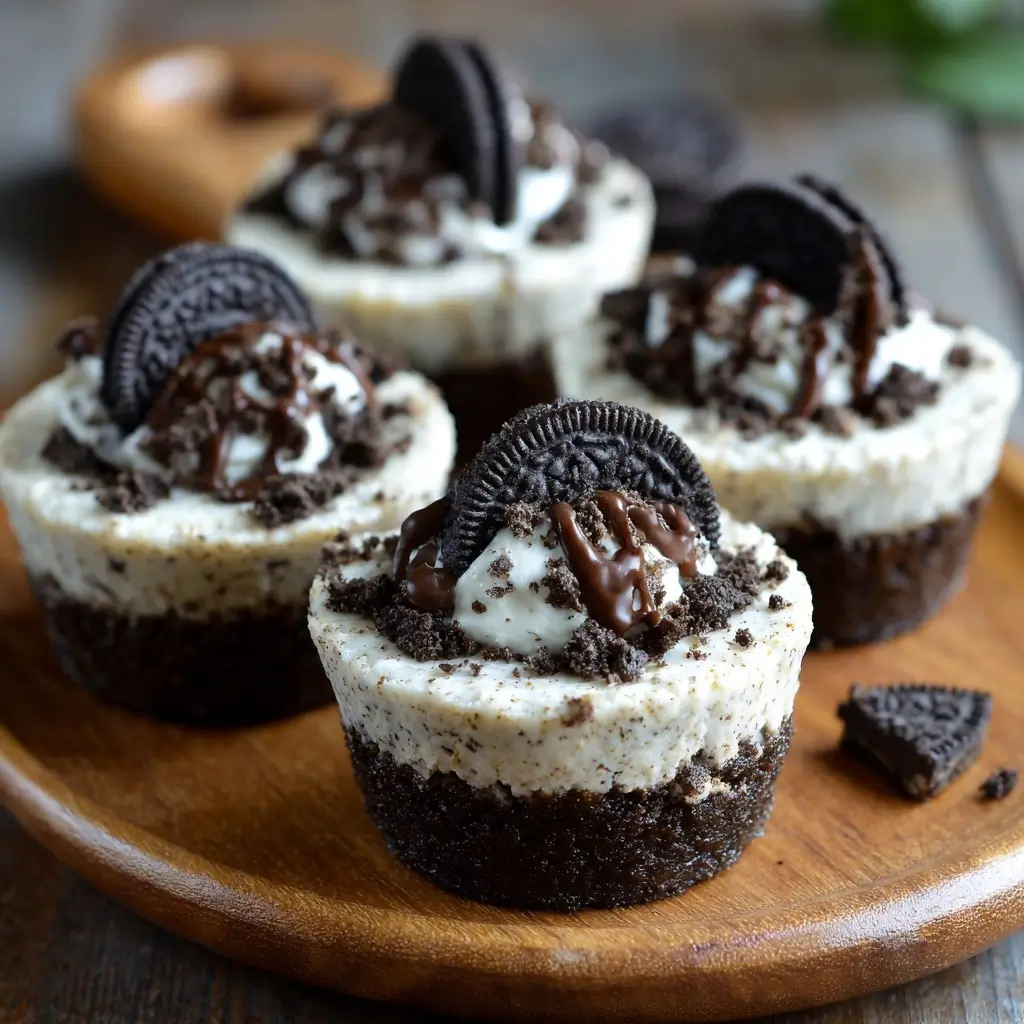
No Bake Oreo Cheesecake Cups: A Decadent Dessert Delight
If you’re searching for a dessert that’s rich, creamy, refreshing, and incredibly easy to make—look no further than No Bake Oreo Cheesecake Cups. These bite-sized treats combine the classic flavor of Oreo cookies with the smooth texture of cheesecake, all without requiring an oven. Perfect for summer gatherings, holiday parties, or just satisfying your sweet tooth at home, these mini desserts are as delightful to look at as they are to eat. Whether you’re a seasoned baker or a complete novice in the kitchen, this no-bake recipe is guaranteed to impress with minimal effort and maximum flavor.
The History of No Bake Cheesecake
Cheesecake has been enjoyed since ancient times, with early versions dating back to Ancient Greece. However, the modern concept of no bake cheesecake emerged in the mid-20th century, particularly gaining popularity in American households during the 1950s and 60s. With the rise of refrigeration and the availability of cream cheese, especially brands like Philadelphia, no bake desserts became a staple due to their simplicity and cool, creamy texture.
The addition of Oreo cookies into cheesecake recipes is a more recent innovation, likely inspired by the enduring popularity of the Oreo brand, first introduced in 1912 by Nabisco. Combining the chocolatey crunch of Oreos with the velvety richness of cheesecake was a natural evolution. The “No Bake Oreo Cheesecake Cup” as we know it today gained traction through food blogs, Pinterest, and social media platforms around the late 2000s and early 2010s, becoming a viral sensation thanks to its photogenic appearance and family-friendly ingredients.
Ingredients Breakdown
One of the reasons No Bake Oreo Cheesecake Cups are so beloved is their accessible and familiar ingredient list. Let’s take a closer look at each component:
- Oreo Cookies: The star of the show! Used both in the crust and for garnish. Their bittersweet chocolate flavor perfectly complements the creamy filling. Feel free to use regular, double-stuffed, or even gluten-free versions depending on dietary needs.
- Cream Cheese: Provides the rich, tangy base of the cheesecake. Full-fat brick-style cream cheese gives the best texture and flavor. Make sure it’s softened to room temperature for smooth blending.
- Heavy Whipping Cream: When whipped, this adds lightness and fluffiness to the filling, giving the cheesecake a luxurious mouthfeel.
- Confectioners’ Sugar: Also known as powdered sugar, it sweetens the mixture while dissolving seamlessly without graininess.
- Vanilla Extract: Enhances the overall flavor profile, adding warmth and depth.
- Whipped Topping (Optional): Some recipes include Cool Whip or homemade whipped topping for extra volume and stability, especially useful if making ahead of time.
Each ingredient plays a critical role in achieving the perfect balance between sweetness, creaminess, and texture.
Step-by-Step Recipe
Creating No Bake Oreo Cheesecake Cups is a fun and straightforward process. Follow these detailed steps to make flawless mini cheesecakes every time:
- Prepare the Crust: Begin by crushing about 20 Oreo cookies (remove the filling if desired, though most leave it in for extra sweetness). You can crush them in a food processor, blender, or place them in a sealed plastic bag and roll with a rolling pin until finely ground. Transfer the crumbs to a bowl and mix with 4 tablespoons of melted unsalted butter. Stir until the mixture resembles wet sand.
- Form the Base: Press about 1–2 tablespoons of the Oreo crumb mixture firmly into the bottom of each cup in a muffin tin lined with cupcake liners (or small clear dessert cups for individual servings). Use the back of a spoon or a small glass to pack it down evenly. Place the crusts in the refrigerator to set for at least 15 minutes.
- Make the Filling: In a large mixing bowl, beat 16 oz (2 packages) of softened cream cheese on medium speed until smooth and creamy (about 2 minutes). Gradually add ½ cup of confectioners’ sugar and 1 teaspoon of vanilla extract. Mix until fully combined and scrape down the sides as needed.
- Whip the Cream: In a separate bowl, whip 1 cup of cold heavy whipping cream until stiff peaks form. This step is crucial—it gives the cheesecake its airy, melt-in-your-mouth texture.
- Combine Mixtures: Gently fold the whipped cream into the cream cheese mixture using a spatula. Be careful not to deflate the mixture—fold slowly until uniform and silky. For added Oreo flavor, fold in ¼ cup of crushed Oreo pieces.
- Fill the Cups: Remove the prepared crusts from the fridge. Spoon or pipe the cheesecake filling over each crust, filling to the top. Use an offset spatula or the back of a spoon to smooth the surface.
- Chill: Cover the tray or cups with plastic wrap and refrigerate for at least 4 hours, preferably overnight, to allow the filling to set properly.
- Garnish and Serve: Before serving, top each cup with a mini Oreo, a dollop of whipped cream, or a drizzle of chocolate syrup. You can also sprinkle with additional Oreo crumbs for texture and visual appeal.
Tips for Success
- Softened Cream Cheese is Key: Never skip bringing your cream cheese to room temperature. Cold cream cheese leads to lumpy filling. Let it sit out for 1–2 hours before starting.
- Avoid Overmixing: Once you add the whipped cream, fold gently. Overmixing deflates the air and results in a denser texture.
- Use Fresh Oreos: Stale cookies can affect both flavor and crust cohesion. If your Oreos are dry, consider adding an extra teaspoon of melted butter.
- Chill Utensils for Whipping Cream: For best results when whipping cream, chill the bowl and beaters in the freezer for 10–15 minutes beforehand.
- Don’t Skip the Chill Time: Rushing this step leads to soft, unstable cups. Allow at least 4 hours for proper setting; overnight is ideal.
- Piping Perfection: For a professional touch, transfer the filling to a piping bag fitted with a star tip. Swirl the filling elegantly into each cup.
- Prevent Weeping: If condensation forms on top after refrigeration, gently pat with a paper towel before garnishing.
Variations and Customizations
The beauty of No Bake Oreo Cheesecake Cups lies in their versatility. Here are some creative twists to try:
- Flavored Oreos: Use seasonal or flavored Oreos like Birthday Cake, Peanut Butter, Mint, or Red Velvet for unique variations.
- Peanut Butter Swirl: Add a spoonful of peanut butter to the cream cheese mixture or swirl it on top before chilling.
- Fruit-Infused: Layer in fresh raspberries, strawberries, or blueberries at the base before adding the filling for a fruity twist.
- Chocolate Lover’s Dream: Mix in melted dark chocolate or cocoa powder into the filling, or drizzle ganache on top.
- S’mores Style: Replace the Oreo crust with graham cracker crumbs and top with mini marshmallows and chocolate chips.
- Dairy-Free/Vegan Option: Substitute cream cheese with vegan cream cheese (like Kite Hill), use coconut cream instead of heavy cream, and choose dairy-free Oreos.
- Gluten-Free Version: Use gluten-free chocolate sandwich cookies (such as Glutino or Kinnikinnick) for the crust and ensure all other ingredients are certified GF.
- Mini Mason Jar Desserts: Serve in small mason jars for a rustic, portable presentation perfect for picnics or gifts.
- Alcohol-Infused: Add a splash of Baileys, Kahlua, or amaretto to the filling for an adult-only treat.
Health Considerations and Nutritional Value
While undeniably delicious, it’s important to enjoy No Bake Oreo Cheesecake Cups in moderation due to their high sugar and fat content. Here’s a general nutritional breakdown per serving (1 cup, approximately):
- Calories: ~300–350 kcal
- Total Fat: 20–25g (mostly from cream cheese, butter, and heavy cream)
- Saturated Fat: 12–15g
- Carbohydrates: 28–35g (including 18–22g of sugar)
- Protein: 4–6g
- Sodium: 200–300mg
Considerations:
- Sugar Content: High due to Oreos, confectioners’ sugar, and fillings. Diabetics or those monitoring sugar intake should consume sparingly or explore low-sugar alternatives (e.g., sugar-free Oreos, erythritol-sweetened fillings).
- Lactose Sensitivity: Contains dairy. Use plant-based substitutes for lactose-free options.
- Portion Control: These cups are rich and satisfying—one is often enough!
- Balanced Indulgence: Pair with fresh fruit or a green salad if serving at a meal to balance the indulgence.
Ingredients
- 24 Oreo cookies, divided (plus extras for garnish)
- 4 tablespoons unsalted butter, melted (can substitute with coconut oil for dairy-free)
- 16 oz (2 packages) full-fat cream cheese, softened
- ½ cup confectioners’ sugar (powdered sugar), sifted
- 1 teaspoon pure vanilla extract
- 1 cup heavy whipping cream, cold
- Optional: ¼ cup additional crushed Oreos for mixing into filling
- Optional toppings: whipped cream, chocolate shavings, mini Oreos, fresh berries
Directions
- Crush 20 Oreo cookies into fine crumbs using a food processor or sealed plastic bag and rolling pin. Mix with melted butter until well combined.
- Press 1–2 tablespoons of the mixture into the bottom of each cupcake liner placed in a muffin tin. Chill in the refrigerator for 15 minutes.
- In a large bowl, beat softened cream cheese until smooth and creamy (about 2 minutes).
- Add confectioners’ sugar and vanilla extract. Mix until fully incorporated and smooth.
- In a separate chilled bowl, whip the heavy cream until stiff peaks form.
- Gently fold the whipped cream into the cream cheese mixture in three additions, being careful not to deflate it. Fold in optional crushed Oreos if desired.
- Remove crusts from the fridge. Spoon or pipe the filling evenly over each crust, smoothing the tops.
- Cover and refrigerate for at least 4 hours, or preferably overnight.
- Before serving, garnish each cup with a whole mini Oreo, whipped cream, or chocolate drizzle.
- Serve chilled and store leftovers in the refrigerator for up to 5 days.
FAQ
Can I make these ahead of time?
Yes! These cheesecake cups can be made 1–2 days in advance. Store covered in the refrigerator until ready to serve.
Can I freeze No Bake Oreo Cheesecake Cups?
Absolutely. Freeze them in an airtight container for up to 2 months. Thaw in the refrigerator for 2–3 hours before serving. Note: texture may be slightly softer after freezing.
Why is my filling runny?
This usually happens if the cream wasn’t whipped to stiff peaks or if the cream cheese was too cold. Ensure proper whipping and softened cream cheese for best results.
Can I use Cool Whip instead of whipping cream?
Yes. Substitute 1 cup of thawed frozen whipped topping (like Cool Whip) for the whipped cream. The texture will be lighter and less rich but still delicious.
How do I prevent the crust from sticking to the pan?
Always use cupcake liners—either paper, foil, or parchment. Silicone molds also work well and allow easy removal.
Are these suitable for kids?
Definitely! Kids love the Oreo flavor and fun size. Just be mindful of sugar content and portion size.
Can I make them nut-free?
Yes, standard Oreos and all listed ingredients are nut-free, but always check labels to ensure no cross-contamination if allergies are severe.
Summary
No Bake Oreo Cheesecake Cups are the ultimate no-fuss dessert combining a crunchy Oreo crust with a luxuriously creamy cheesecake filling—all without turning on the oven. Easy to customize, perfect for any occasion, and guaranteed to disappear fast!