Introduction
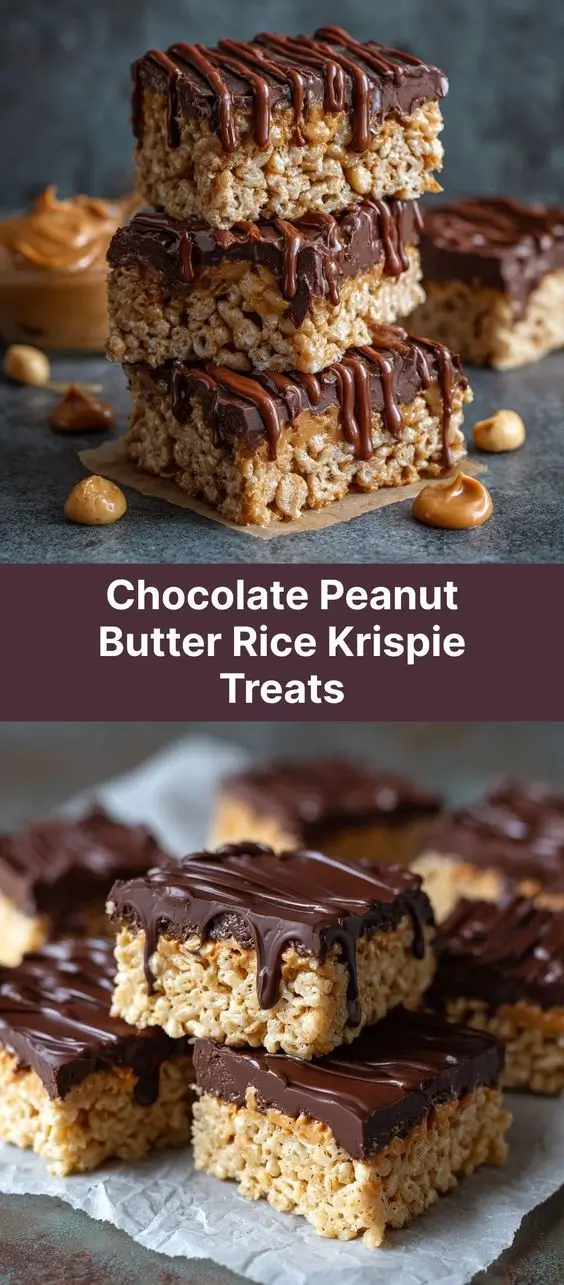
Chocolate Peanut Butter Rice Krispie Treats are a delightful twist on the classic American dessert that has been a staple in lunchboxes, potlucks, and family gatherings for generations. Combining the nostalgic crunch of Rice Krispies with the rich creaminess of peanut butter and the indulgent depth of chocolate, these treats offer a perfect balance of sweet and savory. Whether you’re making them for kids, adults, or as a fun weekend project with your family, these gooey, crunchy confections are sure to bring smiles all around. With their simple ingredients and no-bake preparation, they’re ideal for quick dessert fixes, holiday gifting, or even as part of a themed party spread. In this comprehensive guide, we’ll dive deep into everything you need to know about Chocolate Peanut Butter Rice Krispie Treats—from their fascinating history to ingredient breakdowns, foolproof recipes, expert tips, health-conscious variations, and answers to frequently asked questions.
The History
The origin of Rice Krispie Treats dates back to the early 1930s when Kellogg’s, the cereal manufacturer, was looking for creative ways to promote its newly launched Rice Krispies cereal. The original recipe was developed by Kellogg’s home economists, Malitta Jensen and Mildred Day, who combined marshmallows, butter, and the crispy rice cereal into a moldable, no-bake snack. It was first introduced through promotional cookbooks and quickly gained popularity due to its simplicity and kid-friendly appeal. By 1941, the recipe had become so beloved that Kellogg’s officially trademarked “Rice Krispies Treats” and began printing it directly on cereal boxes.
Over the decades, bakers and home cooks have experimented with countless variations—adding chocolate chips, sprinkles, dried fruits, nut butters, and more. The integration of peanut butter into the mix became especially popular in the mid-20th century, as peanut butter emerged as a pantry staple in American households, prized for its affordability, protein content, and rich flavor. The combination of chocolate and peanut butter—a pairing immortalized by products like Reese’s Peanut Butter Cups—naturally found its way into Rice Krispie Treats, creating a hybrid dessert that satisfies both sweet and salty cravings. Today, Chocolate Peanut Butter Rice Krispie Treats represent a modern evolution of a vintage favorite, blending tradition with contemporary taste preferences.
Ingredients Breakdown
To make perfect Chocolate Peanut Butter Rice Krispie Treats, understanding each ingredient’s role is essential. Here’s a detailed look at what goes into this decadent treat:
- Rice Krispies Cereal: The foundation of the treat, providing a light, airy crunch. Choose plain, unsweetened Rice Krispies for optimal texture and to avoid overpowering sweetness. Generic versions work too, but ensure they are crisp and not stale.
- Marshmallows: Mini marshmallows are preferred because they melt evenly and quickly. They act as the glue that binds the cereal together. The sugar and gelatin in marshmallows create a sticky matrix that sets as it cools, giving the treats their signature chew.
- Butter: Adds richness and helps the marshmallows melt smoothly. Unsalted butter is recommended so you can control the salt level. It also prevents separation and ensures a glossy, uniform mixture.
- Peanut Butter: Creamy, natural, or processed peanut butter can be used depending on desired flavor intensity. It contributes protein, fat, and a savory note that balances the sweetness. Opt for smooth varieties to maintain consistency; chunky peanut butter can alter texture unpredictably.
- Chocolate: Can be added in multiple forms—chocolate chips, chopped chocolate bars, cocoa powder, or even chocolate hazelnut spread. Semi-sweet, milk, or dark chocolate works well. Chocolate adds depth, antioxidants (in darker varieties), and visual appeal.
- Salt: A pinch enhances all the flavors and cuts through the sweetness. Especially important if using unsalted butter or low-sodium peanut butter.
- Vanilla Extract (optional): A few drops add aromatic complexity and round out the flavor profile.
- Additional Mix-ins (optional): Consider adding chopped nuts (pecans, peanuts), mini M&Ms, pretzel pieces, shredded coconut, or dried banana chips for extra texture and flavor contrast.
Step-by-Step Recipe
Follow this detailed guide to create delicious, restaurant-quality Chocolate Peanut Butter Rice Krispie Treats right in your kitchen.
- Prepare Your Workspace: Line a 9×13-inch baking pan with parchment paper or lightly grease it with butter or non-stick spray. This ensures easy removal once set.
- Melt the Base: In a large saucepan over low heat, melt 4 tablespoons (½ stick) of unsalted butter. Stir occasionally to prevent browning.
- Add Marshmallows: Once the butter is fully melted, add 10 cups of mini marshmallows. Stir continuously with a silicone spatula or wooden spoon until completely melted and smooth. Avoid high heat to prevent burning.
- Incorporate Peanut Butter: Remove from heat. Add ¾ cup of creamy peanut butter and stir until fully blended into the marshmallow mixture. The residual heat will soften the peanut butter for seamless integration.
- Add Flavor Enhancers: Stir in 1 teaspoon of vanilla extract and a pinch of salt. These small additions elevate the overall flavor significantly.
- Mix in Chocolate: Fold in 1 cup of semi-sweet chocolate chips or chopped chocolate. Alternatively, reserve some for topping. The chocolate will begin to melt slightly from the warmth—this is ideal.
- Add Cereal Gradually: Pour in 6 cups of Rice Krispies cereal. Gently fold using a spatula until evenly coated. Be careful not to crush the cereal. If adding extra mix-ins (nuts, pretzels), include them now.
- Transfer to Pan: Immediately transfer the mixture to the prepared pan. Use a greased spatula or wax paper to press it down evenly. Work quickly before the mixture begins to set.
- Optional Chocolate Drizzle: Melt additional chocolate (½ cup) and drizzle over the top for decoration and enhanced flavor. You can also sprinkle crushed peanuts or sea salt flakes for gourmet flair.
- Cool and Set: Allow the treats to cool at room temperature for at least 1–2 hours. For faster setting, refrigerate for 30–45 minutes.
- Cut Into Squares: Once firm, lift the slab using the parchment paper edges. Place on a cutting board and slice into 2-inch squares using a sharp knife dipped in hot water for clean cuts.
- Store Properly: Keep in an airtight container at room temperature for up to 5 days, or refrigerate for up to 2 weeks. Layer with parchment paper to prevent sticking.
Tips
- Use Low Heat: Always melt marshmallows over low heat to avoid scorching. Burnt marshmallows develop an unpleasant bitter taste.
- Grease Utensils: Coat your spatula, spoon, and hands with butter or cooking spray to prevent sticking during mixing and pressing.
- Don’t Overmix: Folding too vigorously can crush the cereal and result in dense, tough treats. Gentle folding preserves airiness.
- Uniform Size: For consistent appearance, use a ruler when cutting and wipe the knife between slices.
- Enhance Chewiness: Slightly under-melting the marshmallows can yield a chewier texture, while full melting gives a smoother consistency.
- Double Boiler Option: If concerned about scorching, use a double boiler (a heatproof bowl over simmering water) for melting.
- Custom Shapes: Press mixture into silicone molds for fun shapes—great for birthdays or holidays.
- Make Ahead: Prepare up to a day in advance. Store covered at room temperature.
- Transport-Friendly: Wrap individual squares in plastic wrap or cellophane for gifting or travel.
- Revive Stale Treats: If treats dry out, place a slice of bread in the container overnight—the moisture will rehydrate them slightly.
Variations and Customizations
One of the greatest strengths of Chocolate Peanut Butter Rice Krispie Treats is their versatility. Here are numerous ways to customize them for different tastes, dietary needs, and occasions:
- Dark Chocolate Version: Use dark chocolate (70% cocoa or higher) and natural almond butter for a more sophisticated, slightly bitter profile.
- White Chocolate Swirl: Swirl in melted white chocolate after mixing in the cereal for a marbled effect.
- Reese’s Style: Add chopped Reese’s cups or miniatures before pressing into the pan.
- Crunchy Delight: Mix in crushed pretzels or honey-roasted peanuts for a sweet-and-salty crunch.
- Fruity Twist: Add dried banana chips or raisins for a fruity contrast.
- Holiday Themes: Incorporate seasonal sprinkles, red and green candies, or edible glitter for festive occasions.
- S’mores Inspired: Add crushed graham crackers and mini marshmallows, then drizzle with chocolate and peanut butter.
- Protein-Packed: Stir in a scoop of unflavored or vanilla whey protein powder during melting (add extra butter or PB if too dry).
- Vegan Version: Use plant-based butter, vegan marshmallows (like Dandies), dairy-free chocolate, and ensure the cereal is vegan-friendly.
- Gluten-Free: Substitute with gluten-free rice cereal (e.g., Barbara’s Brown Rice Crisp or Catalina Crunch).
- No-Sugar-Added: Use sugar-free marshmallows, unsweetened peanut butter, stevia-sweetened chocolate, and low-sugar cereal.
- Birthday Cake Style: Add rainbow sprinkles and swap peanut butter for vanilla frosting.
- Nut-Free Option: Replace peanut butter with sunflower seed butter or soy nut butter for allergies.
- Layered Bars: Create two layers—one classic Rice Krispie and one chocolate peanut butter—and stack them before chilling.
- Mini Bites: Roll mixture into small balls instead of pressing into a pan—perfect for parties.
Health Considerations and Nutritional Value
While Chocolate Peanut Butter Rice Krispie Treats are undeniably delicious, it’s important to understand their nutritional profile and how to enjoy them mindfully.
A typical square (based on 12 servings per batch) contains approximately:
- Calories: 220–280 kcal
- Total Fat: 10–14g (mostly from butter and peanut butter)
- Saturated Fat: 4–6g
- Cholesterol: 10–15mg
- Sodium: 180–250mg
- Total Carbohydrates: 35–42g
- Sugars: 20–28g (primarily from marshmallows and chocolate)
- Dietary Fiber: 1–2g
- Protein: 4–6g (mainly from peanut butter and cereal)
Key Nutritional Insights:
- Sugar Content: High in added sugars due to marshmallows and chocolate. Enjoy in moderation, especially for children and those managing blood sugar levels.
- Fat Profile: Contains healthy monounsaturated fats from peanut butter but also saturated fat from butter and chocolate. Balance with whole foods throughout the day.
- Protein Boost: Peanut butter increases protein content compared to traditional Rice Krispie Treats, making them slightly more satiating.
- Allergens: Contains peanuts, tree nuts (if using nut-based butter), milk (in chocolate and butter), and gluten (unless substituted). Always label accordingly for shared settings.
- Portion Control: Cut into smaller squares to manage intake. One small piece can satisfy a sweet craving without overindulgence.
- Kid-Friendly: While tasty, limit frequent consumption due to low fiber and high glycemic load. Pair with fruit or yogurt for a balanced snack.
- Dental Health: Sticky and sugary—encourage brushing or rinsing after eating to protect teeth.
Ingredients
- 4 tablespoons (½ stick) unsalted butter
- 10 cups mini marshmallows
- ¾ cup creamy peanut butter (natural or processed)
- 6 cups Rice Krispies cereal (plain)
- 1 cup semi-sweet chocolate chips (plus extra for topping, optional)
- 1 teaspoon vanilla extract
- Pinch of salt
- Optional: chopped nuts, pretzels, sprinkles, or dried fruit
Directions
- Line a 9×13-inch baking dish with parchment paper or grease lightly with butter.
- In a large saucepan over low heat, melt the butter.
- Add the marshmallows and stir continuously until completely melted and smooth.
- Remove from heat. Stir in the peanut butter, vanilla, and salt until fully combined.
- Fold in the chocolate chips until evenly distributed.
- Gently mix in the Rice Krispies cereal until all pieces are coated. Do not overmix.
- Pour the mixture into the prepared pan. Use a buttered spatula or wax paper to press it evenly into the pan.
- If desired, melt additional chocolate and drizzle over the top. Sprinkle with sea salt or crushed peanuts.
- Let cool at room temperature for 1–2 hours or refrigerate for 30–45 minutes until set.
- Cut into squares and serve. Store leftovers in an airtight container.
FAQ
Can I use regular marshmallows instead of mini?
Yes, but mini marshmallows melt more evenly. If using large marshmallows, chop them first and increase stirring time.
Why are my treats too hard?
Overheating the marshmallow mixture or overmixing can cause hardening. Always use low heat and fold gently.
Can I freeze Chocolate Peanut Butter Rice Krispie Treats?
Yes! Wrap tightly in plastic and store in a freezer bag for up to 3 months. Thaw at room temperature for 30 minutes before serving.
How do I prevent them from being too sticky?
Grease your tools and hands well. Using a little corn syrup in the melting process can also reduce stickiness.
Can I make them without chocolate?
Absolutely. Omit chocolate chips and drizzle for a classic peanut butter version.
Are they safe for school snacks?
Only if peanut-free. Use sunflower seed butter and check cereal labels for allergen statements.
Can I bake them?
No. These are no-bake treats. Baking will burn the marshmallows and destroy the texture.
What can I use instead of Rice Krispies?
Other crispy rice cereals work, or try puffed rice, cornflakes (more fragile), or even gluten-free alternatives.
Can I add protein powder?
Yes, but start with ¼–½ cup. You may need extra liquid (butter or milk) to maintain texture.
Why did my chocolate sink to the bottom?
If the mixture is too hot, chocolate may melt excessively. Cool slightly before folding in, or reserve some for topping.
Summary
Chocolate Peanut Butter Rice Krispie Treats combine the nostalgic crunch of Rice Krispies with the rich, creamy flavors of peanut butter and chocolate in a no-bake dessert that’s easy, customizable, and universally loved.
Perfect for families, parties, or quick homemade gifts, these treats offer endless variations while remaining simple to prepare—just melt, mix, press, and chill for a delicious sweet-savory delight.