Introduction
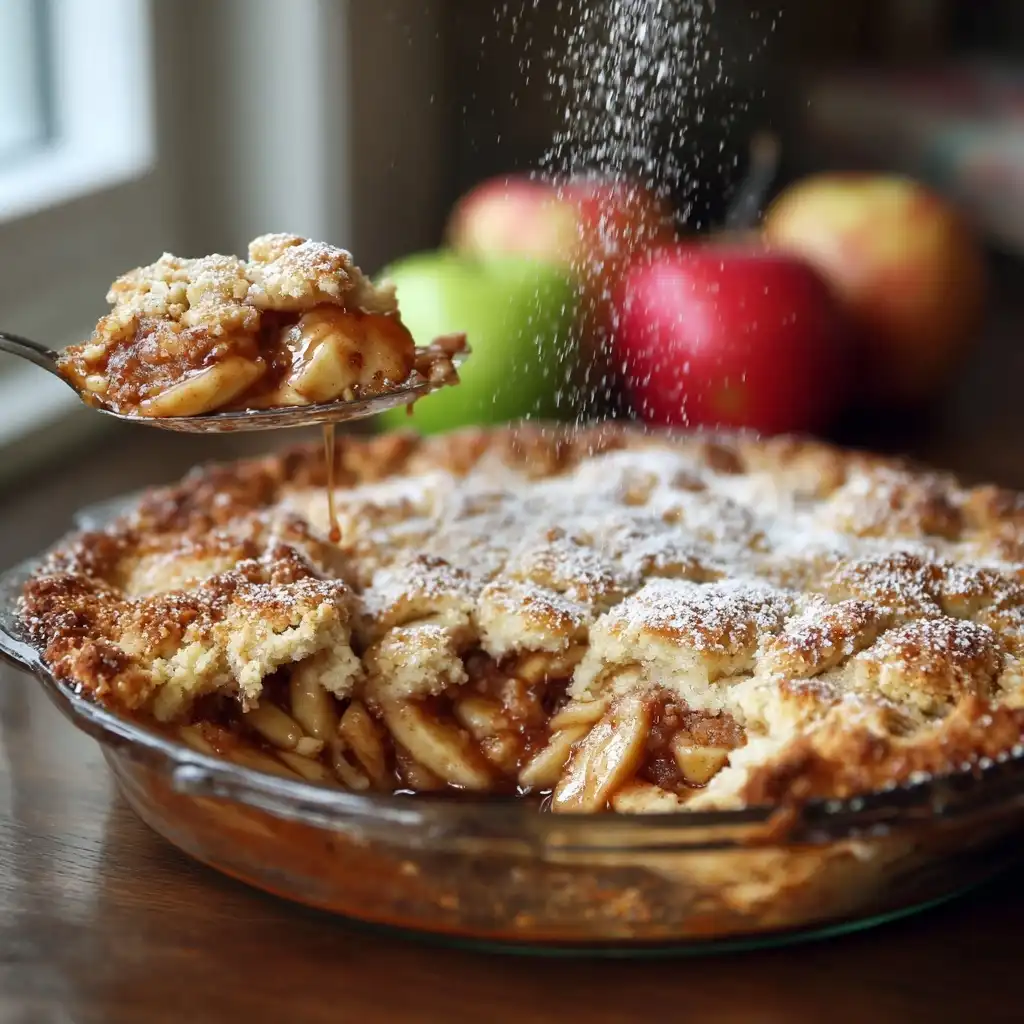
Apple Pie Cobbler is a beloved American dessert that masterfully bridges the comforting familiarity of classic apple pie with the rustic, homey charm of a cobbler. Unlike traditional pie—encased in flaky, buttery pastry on top and bottom—this hybrid treats you to tender, spiced apples nestled beneath a golden, biscuit-like or cakey topping that bakes up soft, slightly crisp at the edges, and irresistibly fragrant. It’s the kind of dessert that fills your kitchen with the warm aroma of cinnamon, brown sugar, and baked apples—and evokes memories of family gatherings, harvest festivals, and cozy autumn evenings. Whether served warm with a scoop of vanilla ice cream, drizzled with caramel sauce, or enjoyed plain with a splash of cold milk, Apple Pie Cobbler delivers soul-satisfying sweetness with minimal fuss and maximum flavor.
The History
The origins of Apple Pie Cobbler are deeply rooted in American frontier ingenuity and resourcefulness. While apple pie itself traces back to medieval England (with early versions appearing in 14th-century cookbooks like The Forme of Cury), it was in colonial America—where apples thrived in New England orchards—that the fruit became synonymous with national identity (“as American as apple pie”). The “cobbler” component emerged later, likely in the 18th and 19th centuries, when settlers adapted British “cobblers” (a term possibly derived from “to cobble together”)—rustic fruit desserts topped with dumplings or biscuit dough—due to limited access to pie tins, rolling pins, or refined flour. Without proper pastry-making tools or time, pioneers used what they had: sliced apples cooked with sugar and spices, then crowned with simple drop biscuits or spooned batter that “cobbled” the surface as it baked. By the late 1800s, regional variations flourished—from the biscuit-topped cobblers of the South to the cake-like “brown betty”–inspired versions of New England. Apple Pie Cobbler, as we know it today, crystallized in mid-20th-century American cookbooks and community church cookbooks, where it was celebrated for its forgiving technique, pantry-friendly ingredients, and crowd-pleasing versatility. Its enduring popularity reflects not just taste—but tradition, adaptability, and the timeless American love affair with apples.
Ingredients Breakdown
Understanding each ingredient’s role ensures success—and empowers customization:
- Apples: The star. Choose firm, tart-sweet varieties like Granny Smith (for structure and bright acidity), Honeycrisp (juicy and balanced), Braeburn (spice-forward), or Jonagold (aromatic and tender). Avoid mealy types like Red Delicious. A blend of two or three varieties adds complexity. Peeled or unpeeled? Peeling yields a smoother texture; leaving skins on boosts fiber, color, and subtle tannic depth—just be sure to use organic apples if keeping skins.
- Sugar: Granulated sugar provides baseline sweetness and aids in caramelization. Brown sugar (light or dark) adds molasses notes, moisture, and richness—ideal for deepening flavor in the filling. Some recipes use a mix for balance.
- Spices: Ground cinnamon is non-negotiable; freshly ground offers superior aroma. Nutmeg (freshly grated), allspice, and a whisper of cardamom or ginger add warmth and nuance. Clove should be used sparingly—it’s potent!
- Thickener: Cornstarch is most common—reliable, clear, and effective at medium-high heat. Tapioca starch (instant or pearls) yields a glossy, jammy consistency and holds up well during freezing. Flour works in a pinch but can cloud the filling and requires longer bubbling to eliminate raw taste.
- Acid: Fresh lemon juice brightens flavors, balances sweetness, prevents browning, and helps pectin set. Apple cider vinegar is an excellent alternative for deeper tang.
- Butter: Unsalted butter is preferred for control over sodium. In the filling, small cubes create pockets of rich flavor and help thicken juices. In the topping, it contributes tenderness, flakiness (in biscuit versions), or moist crumb (in cake-style).
- Flour: All-purpose flour forms the base of most toppings. For gluten-free options, a 1:1 GF blend (with xanthan gum) works well—just avoid overmixing. Whole wheat pastry flour adds nuttiness and fiber but may yield denser results.
- Leavening: Baking powder (and sometimes baking soda) gives lift to biscuit or cake toppings. Ensure it’s fresh—test by mixing ½ tsp with hot water; vigorous fizzing = active.
- Liquid: Milk, buttermilk, heavy cream, or even apple cider enriches the topping. Buttermilk adds tenderness and subtle tang; cream yields extra richness; plant-based milks (oat, soy) work beautifully for dairy-free versions.
- Eggs: Binders and emulsifiers—they improve structure, color, and richness in cake-style cobblers. Optional in drop-biscuit versions but highly recommended for golden sheen and cohesion.
- Salt: Fine sea salt or kosher salt enhances all other flavors—even in sweet applications. Never omit it.
- Vanilla Extract: Pure, high-quality extract (not imitation) adds aromatic depth to both filling and topping. Bourbon vanilla is especially lovely with apples.
Step-by-Step Recipe
- Preheat & Prep: Position oven rack in the center. Preheat oven to 375°F (190°C). Generously grease a 9×13-inch baking dish (or 10-inch cast-iron skillet for rustic presentation) with butter or non-stick spray. Line bottom with parchment paper for easy removal, if desired.
- Prepare the Apple Filling: Peel, core, and slice 6–7 medium apples (about 8 cups sliced, ~2.5 lbs / 1.1 kg total). Aim for uniform ¼-inch-thick slices to ensure even cooking. In a large bowl, combine apples with ¾ cup granulated sugar, ½ cup packed brown sugar, 2 tbsp cornstarch (or 3 tbsp tapioca starch), 2 tsp ground cinnamon, ¼ tsp freshly grated nutmeg, ⅛ tsp ground allspice, 1 tbsp fresh lemon juice, 1 tsp pure vanilla extract, and ¼ tsp fine sea salt. Gently toss until apples are evenly coated. Let sit 15–20 minutes—this draws out juices and allows spices to bloom.
- Cook the Filling (Optional but Recommended): Transfer apple mixture to a large skillet or Dutch oven over medium heat. Cook, stirring occasionally, for 8–10 minutes until apples soften slightly (but still hold shape), juices bubble and thicken into a glossy syrup, and raw starch taste disappears. Remove from heat and stir in 2 tbsp cold unsalted butter, cut into small cubes, until melted and incorporated. Cool slightly (5 minutes)—this prevents soggy topping.
- Make the Topping: While filling cools, prepare topping. For a biscuit-style topping: In a medium bowl, whisk together 2 cups all-purpose flour, ¼ cup granulated sugar, 1 tbsp baking powder, ½ tsp salt, and ½ tsp ground cinnamon. Cut in ½ cup (1 stick) cold, cubed unsalted butter using a pastry cutter or fork until mixture resembles coarse crumbs with pea-sized butter pieces. Stir in ¾ cup cold buttermilk (or whole milk) and 1 large egg just until a shaggy dough forms—do not overmix. For a cake-style topping: In a bowl, whisk 1½ cups flour, 1 tsp baking powder, ½ tsp baking soda, ½ tsp salt. In another bowl, beat ½ cup softened butter with ¾ cup brown sugar until fluffy (~3 mins). Add 1 egg, 1 tsp vanilla, and ½ cup buttermilk; beat until smooth. Gradually fold dry ingredients into wet until just combined.
- Assemble: Pour warm (not hot) apple filling into prepared baking dish, spreading evenly. Drop biscuit dough by heaping tablespoons (or spoon cake batter) over apples in mounds—don’t spread; it will expand. For even coverage, use an ice cream scoop. Optional: sprinkle topping with coarse turbinado sugar and/or extra cinnamon for crunch and sparkle.
- Bake: Place dish on a foil-lined or parchment-lined baking sheet (to catch potential bubbles/overflow). Bake at 375°F for 40–50 minutes—biscuit version takes ~45 mins; cake version ~40 mins—until topping is deep golden brown, puffed, and a toothpick inserted into the center comes out clean (no wet batter). Filling should bubble vigorously around the edges.
- Cool & Serve: Let cool on a wire rack for at least 25–30 minutes before serving. This crucial step allows filling to set—preventing runny slices and letting flavors meld. Serve warm, never piping hot.
Tips
- Apple Selection Matters: Underripe apples won’t soften enough; overripe ones turn mushy. Test ripeness by gently pressing near the stem—if it yields slightly with a sweet, fragrant aroma, it’s ideal.
- Prevent Soggy Bottoms: Always let cooked filling cool slightly before topping. If skipping stovetop cooking, toss apples with thickener and let drain 20 mins in a colander—discard excess liquid.
- Chill Butter for Biscuits: Cold fat = flaky layers. Grate frozen butter into flour for effortless incorporation.
- Don’t Overmix Topping: Gluten develops quickly—stir only until *just* combined. Lumps are okay; overworked dough becomes tough.
- Rotate for Even Baking: Halfway through baking, rotate the pan 180° for uniform browning.
- Check Doneness Accurately: Visual cues matter more than timer alone. Golden color + bubbling edges + clean toothpick = ready. If topping browns too fast, tent loosely with foil.
- Boost Flavor Depth: Toast spices in a dry skillet for 30 seconds before adding to filling. Add 1 tbsp Calvados, bourbon, or apple brandy to filling for sophisticated warmth.
- Texture Tweaks: For extra-crispy topping, brush with melted butter and sprinkle turbinado sugar before baking. For extra-tender, add 2 tbsp sour cream to biscuit dough.
- Storage Wisdom: Cool completely before covering. Refrigerate up to 5 days. Reheat individual portions in microwave (30-sec bursts) or full dish at 325°F for 15–20 mins.
- Freezing Success: Freeze unbaked cobbler (covered tightly) up to 3 months. Bake from frozen—add 15–20 mins to bake time and cover with foil first 25 mins to prevent burning.
Variations and Customizations
Apple Pie Cobbler is gloriously adaptable—here are inspired twists for every palate and pantry:
- Double-Apple Delight: Fold 1 cup finely chopped dried apples (soaked 10 mins in hot apple cider) into the filling for concentrated flavor and chewy texture.
- Oatmeal-Crumb Topping: Replace biscuit/cake topping with a streusel: 1 cup flour, 1 cup old-fashioned oats, ¾ cup brown sugar, 1 tsp cinnamon, ½ tsp salt, ½ cup cold butter. Cut in until crumbly; press lightly over filling.
- Caramel-Apple Bliss: Drizzle ½ cup salted caramel sauce over warm filling before adding topping—or swirl ¼ cup into batter.
- Nutty Crunch: Fold ½ cup toasted pecans or walnuts into the topping—or sprinkle over before baking.
- Spiced Pear-Apple Fusion: Replace 2 cups apples with ripe Bosc or Anjou pears for floral sweetness and delicate texture.
- Maple-Glazed: Substitute ¼ cup pure maple syrup for part of the brown sugar in filling; finish baked cobbler with a maple glaze (¼ cup powdered sugar + 1 tbsp maple syrup + splash milk).
- Vegan Version: Use plant-based butter, flax “eggs” (1 tbsp ground flax + 2.5 tbsp water per egg), oat or almond milk, and vegan sugar. Ensure cornstarch is certified vegan.
- Gluten-Free: Swap flour 1:1 with a quality GF all-purpose blend (like Bob’s Red Mill 1-to-1). Add ½ tsp xanthan gum if blend doesn’t include it. Increase baking powder to 1¼ tsp for lift.
- Mini Individual Cobblers: Portion filling and topping into greased 6-oz ramekins. Bake at 375°F for 25–30 mins. Perfect for portion control or elegant entertaining.
- Breakfast Cobbler: Reduce sugar by half, omit spices, add ½ tsp almond extract, and top with a maple-pecan crumble. Serve with Greek yogurt instead of ice cream.
- Chai-Spiced: Replace cinnamon/nutmeg/allspice with 1½ tsp chai spice blend (cardamom, ginger, cloves, black pepper, cinnamon) for bold, warming complexity.
- Boozy Berry Swirl: Gently fold ½ cup fresh or frozen cranberries or raspberries into filling—adds tart contrast and jewel-toned bursts.
Health Considerations and Nutritional Value
While Apple Pie Cobbler is undeniably indulgent, mindful tweaks can enhance its nutritional profile without sacrificing satisfaction:
- Apples = Nutrient Powerhouse: One medium apple provides ~4g dietary fiber (mostly pectin, supporting gut health and cholesterol management), 14% DV vitamin C, quercetin (anti-inflammatory flavonoid), and potassium. Leaving skins on triples fiber and antioxidant content.
- Sugar Awareness: Traditional recipes use 1–1¼ cups total sugar. Reduce by ¼–⅓ cup without compromising structure—apples’ natural sweetness shines with robust spices. Opt for coconut sugar or date paste for lower glycemic impact (adjust liquid accordingly).
- Whole Grain Boost: Substitute up to ½ cup all-purpose flour with whole wheat pastry flour or oat flour in topping—adds B vitamins, magnesium, and sustained energy.
- Healthy Fats: Replace half the butter in topping with cold-pressed apple butter or mashed ripe banana for moisture and heart-healthy fats.
- Protein & Calcium Upgrade: Stir 2 tbsp ground flaxseed or chia seeds into topping batter; serve with Greek yogurt (15g protein/cup) instead of ice cream.
- Portion Control: A standard serving is ~1 cup (filling + topping). Using a 9×13 dish yields ~12 servings—making it easier to manage calories (~320–400 kcal/serving, depending on butter/sugar levels).
- Dietary Accommodations: Naturally vegetarian. Easily made vegan, gluten-free, or nut-free (verify all ingredients). Low-FODMAP option: use 3 cups peeled, cored Gala apples + 1 cup peeled, cored green banana (low-FODMAP fruit) and swap honey for maple syrup.
- Mindful Enjoyment: Savor slowly. Pair with herbal tea (cinnamon or chamomile) to aid digestion. View it as a treat—not daily fare—but one rich in real food, seasonal produce, and joyful tradition.
Ingredients
For the Apple Filling:
- 6–7 medium apples (Granny Smith, Honeycrisp, or mix), peeled, cored, and sliced ¼-inch thick (≈8 cups)
- ¾ cup granulated sugar
- ½ cup packed light or dark brown sugar
- 2 tablespoons cornstarch (or 3 tbsp instant tapioca starch)
- 2 teaspoons ground cinnamon
- ¼ teaspoon freshly grated nutmeg
- ⅛ teaspoon ground allspice
- 1 tablespoon fresh lemon juice
- 1 teaspoon pure vanilla extract
- ¼ teaspoon fine sea salt
- 2 tablespoons unsalted butter, cold and cubed
For the Biscuit-Style Topping:
- 2 cups all-purpose flour
- ¼ cup granulated sugar
- 1 tablespoon baking powder
- ½ teaspoon fine sea salt
- ½ teaspoon ground cinnamon
- ½ cup (1 stick) unsalted butter, very cold and cubed
- ¾ cup cold buttermilk (or whole milk)
- 1 large egg
- Optional: 2 tablespoons turbinado sugar for sprinkling
Directions
- Preheat oven to 375°F (190°C). Grease a 9×13-inch baking dish (or 10-inch cast-iron skillet) generously with butter or non-stick spray.
- In a large bowl, combine sliced apples, granulated sugar, brown sugar, cornstarch, cinnamon, nutmeg, allspice, lemon juice, vanilla, and salt. Toss gently until apples are fully coated. Let stand 15–20 minutes.
- (Recommended step) Transfer apple mixture to a large skillet or Dutch oven. Cook over medium heat, stirring occasionally, for 8–10 minutes until apples soften slightly and juices thicken into a glossy syrup. Remove from heat; stir in cold butter until melted. Cool 5 minutes.
- Meanwhile, make topping: In a medium bowl, whisk flour, ¼ cup sugar, baking powder, salt, and cinnamon. Cut in cold butter using a pastry cutter or fork until mixture resembles coarse crumbs with pea-sized butter pieces. Stir in buttermilk and egg just until a shaggy dough forms—do not overmix.
- Pour warm apple filling into prepared dish. Drop dough by heaping tablespoons (or use a ¼-cup scoop) evenly over apples. Do not flatten—mounds will spread. Sprinkle with turbinado sugar, if using.
- Place dish on a foil-lined baking sheet. Bake 45 minutes, or until topping is deep golden brown and a toothpick inserted into center comes out clean. Filling should bubble vigorously at edges.
- Let cool on a wire rack for at least 25–30 minutes before serving. This allows filling to set and flavors to harmonize.
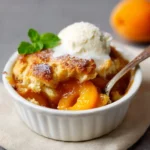
- Serve warm, topped with vanilla ice cream, whipped cream, or a drizzle of caramel sauce.
FAQ
- Can I make this ahead of time?
- Absolutely! Assemble up to 1 day ahead (unbaked), cover tightly, and refrigerate. Add 5–8 minutes to bake time. Or bake fully, cool, refrigerate, and reheat covered at 325°F for 20 minutes.
- Why did my cobbler turn out watery?
- Likely causes: undercooked filling (didn’t bubble long enough), insufficient thickener, using overly juicy apples, or cutting into it too soon. Always let cool 25+ minutes—filling sets as it cools.
- Can I use frozen apples?
- Yes—but thaw completely and drain *all* liquid in a colander (press gently). Increase thickener by 1 tsp, as frozen apples release more water.
- What’s the best way to reheat leftovers?
- Individual portions: Microwave 30–45 seconds. Full dish: Cover with foil, bake at 325°F for 15–20 minutes until warmed through.
- Can I skip the stovetop step?
- You can—just toss apples with thickener and let sit 20 minutes to draw out juice, then drain before assembling. Texture may be slightly less cohesive.
- Is there a lower-sugar version?
- Reduce total sugar to ⅔ cup (½ cup brown + 3 tbsp granulated). Boost spice and vanilla to compensate. Apples’ natural sweetness carries the dish beautifully.
- Can I double the recipe?
- Yes—use two 9×13 dishes or a 12×17-inch jelly roll pan. Bake time remains ~45 mins, but check at 40 mins.
- My topping sank into the apples—what happened?
- Topping was likely added to *hot* filling (steam lifts it) or batter was too thin. Ensure filling is warm—not steaming—and follow mixing instructions precisely.
- How do I store leftovers?
- Cover tightly and refrigerate up to 5 days. Freeze baked cobbler up to 3 months (wrap in foil + freezer bag). Thaw overnight in fridge before reheating.
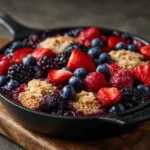
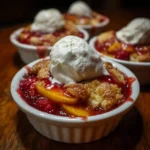
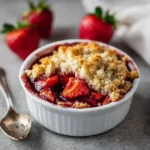
- Can I use a different fruit?
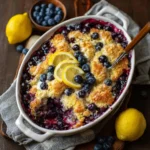
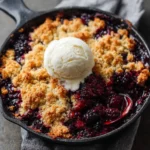
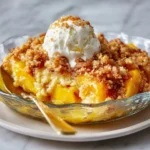
- Yes! Try peach, cherry, blackberry, or mixed berries—adjust sugar and thickener based on fruit’s natural sweetness/juiciness.
Summary
Apple Pie Cobbler is a timeless, adaptable American dessert that celebrates the humble apple with warm spices, a luscious fruit filling, and a tender, golden biscuit or cake-like topping—requiring no pie crust expertise yet delivering maximum comfort and flavor.
With smart ingredient choices, flexible customizations (gluten-free, vegan, lower-sugar), and practical make-ahead tips, it’s as practical for weeknight treats as it is for holiday centerpieces—proving that simplicity, seasonality, and soul-warming tradition are the true secret ingredients.