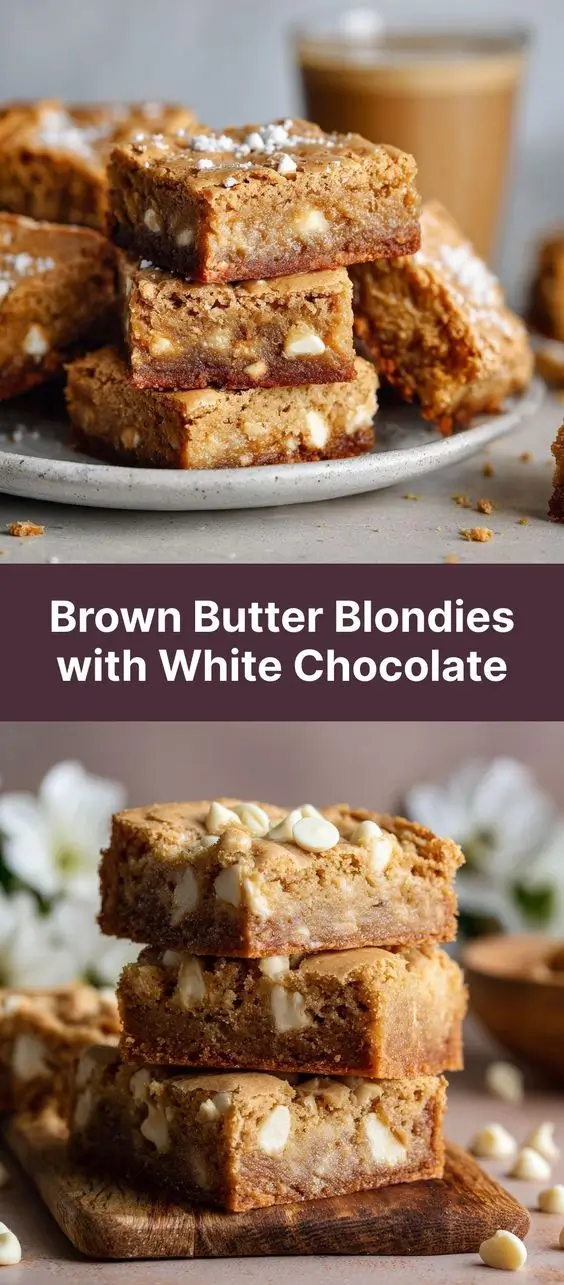
Brown Butter Blondies with White Chocolate: A Decadent, Buttery Delight
The History of Blondies: From Forgotten Cousin to Star Dessert
While chocolate brownies have long reigned supreme in the world of baked treats, their golden-hued cousin—the blondie—has quietly carved out a beloved niche in American dessert culture. Originating in the early 20th century, blondies first appeared in American cookbooks as “brownies without chocolate.” The original concept was simple: take the dense, fudgy texture of a brownie and replace cocoa powder with brown sugar, creating a buttery, caramel-forward bar cookie.
Over time, bakers began experimenting with add-ins like nuts, dried fruit, and vanilla, elevating the humble blondie into a versatile dessert canvas. It wasn’t until the late 1990s and early 2000s that gourmet variations surged in popularity, particularly those incorporating brown butter—a technique borrowed from French cuisine known as beurre noisette. This nutty, aromatic form of cooked butter adds a depth of flavor that transforms ordinary blondies into something truly luxurious.
The addition of white chocolate is a more recent innovation, aligning with the growing appreciation for its creamy sweetness and ability to complement rich, toasted flavors. Today, Brown Butter Blondies with White Chocolate represent the pinnacle of modern blondie evolution: a perfect harmony of toasted butter notes, chewy-crisp texture, and velvety white chocolate chunks.
Ingredients Breakdown: Why Every Component Matters
The magic of these blondies lies not just in technique but in the careful selection and function of each ingredient. Let’s explore what goes into this indulgent treat and why it matters:
- Unsalted Butter (for browning): Starting with unsalted butter gives you complete control over the salt content. When browned, it develops complex nutty, toasty flavors due to the Maillard reaction—transforming simple butter into a rich, aromatic base.
- Brown Sugar (light or dark): Brown sugar is essential for moisture and chewiness. Its molasses content contributes to the deep caramel notes and helps create that signature fudgy interior. Dark brown sugar intensifies the molasses flavor, while light brown offers a subtler profile.
- Granulated Sugar: Adds sweetness and aids in developing a slightly crisp top crust when combined with the creaming method.
- Large Eggs: Provide structure, leavening, and richness. Room-temperature eggs blend more smoothly into the batter, preventing curdling when mixed with warm brown butter.
- Pure Vanilla Extract: Enhances overall flavor complexity. High-quality vanilla brings floral and spicy undertones that elevate the entire dessert.
- All-Purpose Flour: The structural backbone. Measured correctly (spooned and leveled), it ensures a tender yet sturdy crumb without dryness.
- Baking Powder: A small amount introduces slight lift, balancing the dense texture while maintaining fudginess.
- Fine Sea Salt: Crucial for balancing sweetness and enhancing all other flavors. Omitting salt risks making the blondies cloyingly sweet.
- White Chocolate Chunks or Chopped Bars: High-quality white chocolate (at least 30% cocoa butter) melts beautifully and provides bursts of creamy sweetness. Avoid candy coating or chips labeled “white morsels” which often contain hydrogenated oils.
- Optional Add-Ins: Toasted chopped pecans or walnuts add crunch and earthy contrast. Flaky sea salt on top before baking enhances the sweet-salty balance.
Step-by-Step Recipe: How to Make Perfect Brown Butter Blondies with White Chocolate
Follow this detailed guide to achieve bakery-quality blondies with a crisp top, chewy center, and irresistible aroma of toasted butter.
Ingredients
- 1 cup (2 sticks / 226g) unsalted butter
- 1 ½ cups (300g) packed light or dark brown sugar
- ¼ cup (50g) granulated sugar
- 2 large eggs, at room temperature
- 2 teaspoons pure vanilla extract
- 2 cups (240g) all-purpose flour
- 1 teaspoon baking powder
- ½ teaspoon fine sea salt (plus extra for topping)
- 12 oz (340g) high-quality white chocolate, chopped into chunks or chips
- 1 cup (100g) toasted chopped pecans or walnuts (optional)
Directions
- Brown the Butter: Place the butter in a light-colored saucepan (so you can monitor color changes). Melt over medium heat, swirling occasionally. As it melts, it will begin to foam and sizzle. Continue cooking until the foam subsides and the milk solids at the bottom turn golden brown and emit a nutty aroma—about 6–8 minutes. Remove immediately from heat and pour into a heatproof bowl, including all the browned bits. Let cool slightly for 10–15 minutes (should be warm, not hot).
- Preheat Oven & Prepare Pan: Preheat your oven to 350°F (175°C). Line a 9×13-inch baking pan with parchment paper, leaving overhang on two sides for easy removal. Lightly grease the parchment if desired.
- Cream Sugars and Butter: In a large mixing bowl, combine the warm browned butter, brown sugar, and granulated sugar. Use a wooden spoon or hand mixer to stir until well blended and slightly glossy—about 1–2 minutes.
- Add Eggs and Vanilla: Beat in the eggs one at a time, mixing thoroughly after each addition. Stir in the vanilla extract. The mixture should look smooth and emulsified.
- Incorporate Dry Ingredients: In a separate bowl, whisk together the flour, baking powder, and salt. Gradually add this mixture to the wet ingredients, folding gently with a spatula until just combined. Do not overmix—this prevents toughness.
- Fold in White Chocolate (and Nuts): Add the white chocolate chunks and toasted nuts (if using). Gently fold them into the batter until evenly distributed.
- Spread and Top: Transfer the batter to the prepared pan. Use an offset spatula to spread it evenly into the corners. For visual appeal and enhanced flavor, sprinkle a few extra white chocolate chunks on top and lightly press them in. Finish with a pinch of flaky sea salt over the surface.
- Bake: Bake for 28–35 minutes, or until the edges are golden brown and the center is set but still slightly soft when gently pressed. A toothpick inserted near the center should come out with moist crumbs (not wet batter).
- Cool Completely: Allow the blondies to cool completely in the pan on a wire rack—this takes about 1–2 hours. Cooling is crucial for clean slicing and proper texture development.
- Cut and Serve: Use the parchment overhang to lift the blondie block out of the pan. Place on a cutting board and slice into squares using a sharp knife dipped in hot water for clean cuts.
Tips for Success: Expert Advice for Foolproof Blondies
- Control Butter Temperature: After browning, let the butter cool enough so it doesn’t cook the eggs when added. Warm—not hot—is ideal. If too hot, wait 10–15 minutes before proceeding.
- Don’t Overbake: These blondies continue to set as they cool. Pull them from the oven when the center still has a slight jiggle to ensure a chewy interior.
- Use Parchment Paper: This guarantees easy removal and prevents sticking. Aluminum foil works too, but parchment is non-reactive and cleaner.
- Chop Your Own White Chocolate: Buying a good bar and chopping it yourself yields better flavor and melt-in-your-mouth texture than pre-made chips.
- Toasting Nuts: If adding nuts, toast them first! Spread on a baking sheet and bake at 350°F for 8–10 minutes until fragrant. Cool before folding in.
- Measure Flour Correctly: Spoon flour into your measuring cup and level off with a knife. Scooping directly packs too much flour, leading to dry blondies.
- Room-Temperature Eggs: Cold eggs can cause the browned butter to seize or create lumps. Let them sit in warm water for 5 minutes if needed.
Variations and Customizations: Make It Your Own
One of the greatest strengths of blondies is their adaptability. Here are some creative twists to personalize your batch:
- Salted Caramel Swirl: Drizzle ⅓ cup of thick caramel sauce over the batter before baking, then use a knife to swirl it through for a gooey surprise.
- Lemon-Zested White Chocolate: Add 1 tablespoon of finely grated lemon zest to brighten the sweetness and cut through richness.
- Dual Chocolate: Replace half the white chocolate with dark or semi-sweet chocolate chunks for a sophisticated flavor contrast.
- Coconut Bliss: Fold in ¾ cup toasted shredded coconut along with the white chocolate for tropical flair.
- Espresso Kick: Add 1–2 teaspoons of instant espresso powder to the dry ingredients for a mocha-like depth without overpowering bitterness.
- Almond Joy Style: Combine white chocolate, toasted coconut, and chopped almonds for a homemade candy bar vibe.
- Gluten-Free Option: Substitute the all-purpose flour with a 1:1 gluten-free baking blend (like Bob’s Red Mill). Ensure it contains xanthan gum for binding.
- Vegan Version: Replace butter with refined coconut oil, use flax eggs (2 tbsp ground flax + 5 tbsp water), and choose dairy-free white chocolate (such as Enjoy Life brand).
- Mini Blondie Bites: Bake in a muffin tin lined with cupcake liners for portable treats—bake 18–22 minutes.
- Stuffed Blondies: Place a small piece of white chocolate truffle or caramel square in the center of each portion before baking for a molten core.
Health Considerations and Nutritional Value
While undeniably indulgent, understanding the nutritional makeup of these blondies can help with mindful enjoyment:
Nutrition Facts (per serving, assuming 15 servings):
- Calories: ~380–420
- Total Fat: 22–25g (mostly from butter and white chocolate)
- Saturated Fat: 13–15g
- Cholesterol: 70–80mg
- Sodium: 120–150mg
- Total Carbohydrates: 48–52g
- Sugars: 32–36g
- Protein: 4–5g
- Fiber: 1g
Health Notes:
- High in Added Sugars: Due to both brown and white sugars plus sweet white chocolate, these blondies are best enjoyed in moderation, especially for those managing blood sugar levels.
- Saturated Fat Content: While brown butter adds incredible flavor, it increases saturated fat. Consider using part olive oil (up to half) for a heart-healthier fat profile, though this alters texture slightly.
- Gluten and Dairy: Contains both gluten and dairy. Gluten-free and vegan substitutions are possible, as noted above.
- No Artificial Ingredients: When made with quality ingredients, these blondies avoid preservatives, artificial flavors, and trans fats—making them a cleaner indulgence compared to store-bought versions.
- Balanced Pairing: Serve with fresh berries or a dollop of Greek yogurt to add nutrients and balance richness.
Frequently Asked Questions (FAQ)
Can I make brown butter ahead of time?
Yes! Brown butter can be made up to 3 days in advance and stored in the fridge. Re-warm it gently until liquid but not hot before using.
Why did my blondies turn out cakey?
Overmixing the batter after adding flour can develop gluten, resulting in a cake-like texture. Always mix until just combined. Also, too much flour or overbaking can contribute to dryness.
Can I freeze these blondies?
Absolutely. Wrap cooled blondies tightly in plastic wrap and store in an airtight container. Freeze for up to 3 months. Thaw at room temperature or warm briefly in the oven for fresh-baked taste.
Why did the white chocolate sink to the bottom?
If the batter is too thin or the chocolate pieces are too large/heavy, they may settle. Toss the chunks in 1 tsp of flour before folding in to help suspend them.
Can I double the recipe?
Yes, but use a 12×18-inch half-sheet pan and increase baking time to 30–38 minutes. Monitor closely to avoid overbaking.
What’s the difference between blondies and brownies?
Blondies are made without cocoa powder, relying on brown sugar and butter for flavor. They’re lighter in color, have a caramel-vanilla profile, and often include add-ins like white chocolate or nuts.
Can I use salted butter for browning?
You can, but reduce added salt in the recipe by ¼–½ teaspoon to avoid oversalting. Unsalted butter is preferred for precise control.
How long do they stay fresh?
Store in an airtight container at room temperature for up to 5 days. For longer storage, refrigerate (up to 1 week) or freeze (up to 3 months).
Summary
Rich, golden brown butter blondies swirled with melty white chocolate chunks deliver a symphony of nutty, buttery, and sweet flavors in every bite.
Perfectly crisp on top and chewy within, this elevated dessert is sure to become your go-to for potlucks, gifts, or a decadent treat any day of the week.