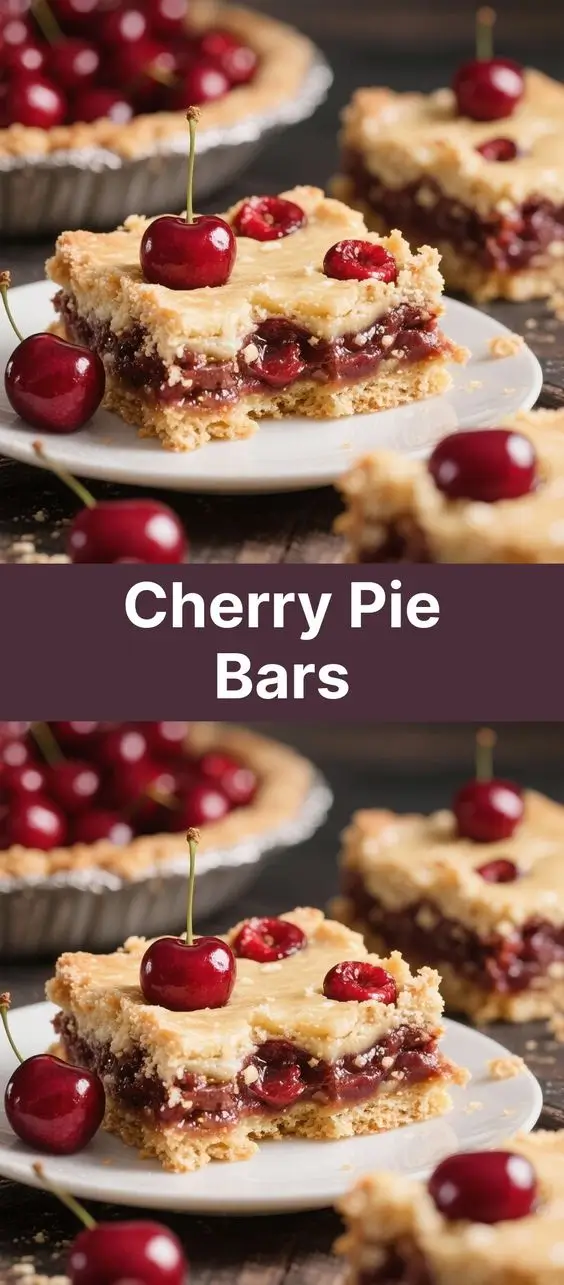
Cherry Pie Bars: A Delicious Fusion of Flavors and Tradition
The History of Cherry Pie Bars
Cherry pie bars are a modern twist on the classic American cherry pie, blending the rich heritage of fruit-based desserts with the convenience and portability of bar cookies. The origins of cherry pie trace back centuries, with early recipes appearing in English cookbooks as far back as the 14th century. Cherries were prized for their tartness and natural sweetness, often used in tarts and pies by European bakers. When settlers brought cherries to North America, particularly Michigan and other Great Lakes states, cherry cultivation flourished.
By the 20th century, American home bakers began experimenting with easier, more accessible versions of traditional pies—leading to the rise of dessert bars. These single-layer treats combined buttery shortbread crusts with fruit fillings and often a crumb topping or lattice design. Cherry pie bars emerged as a hybrid between pie and cookie, offering all the flavor of a homemade cherry pie in a simpler, sliceable format. Today, they’re a staple at potlucks, bake sales, and family gatherings across the U.S., cherished for their nostalgic taste and ease of preparation.
Ingredients Breakdown
Understanding each ingredient in cherry pie bars helps ensure the perfect balance of texture and flavor. Here’s a detailed look at what goes into this delightful dessert:
- All-Purpose Flour – Forms the base structure of both the crust and streusel topping. It provides gluten development for a tender yet sturdy texture.
- Unsalted Butter (cold) – Essential for flakiness and richness. Using cold butter ensures a crisp, melt-in-your-mouth crust when baked.
- Granulated Sugar – Adds sweetness to the crust and balances the tartness of the cherries.
- Brown Sugar – Used primarily in the filling or streusel, it contributes moisture and a caramel-like depth.
- Salted Butter (for filling/topping) – Sometimes used in the topping for enhanced flavor; adjust salt accordingly.
- Fresh or Frozen Cherries – Pitted sweet or tart cherries work well. Tart cherries like Montmorency offer a classic pie flavor, while sweet varieties add natural sugar.
- Canned Cherry Pie Filling – A convenient alternative that saves time without sacrificing too much quality.
- Cornstarch – Thickens the cherry filling to prevent sogginess and create a jammy consistency.
- Lemon Juice – Brightens the flavor profile and enhances the natural acidity of the cherries.
- Vanilla Extract – Adds warmth and complexity to both the crust and filling.
- Almond Extract (optional) – A signature note in many cherry desserts, complementing the stone fruit character.
- Eggs – Occasionally used in custard-style variations or to bind ingredients in certain recipes.
- Salt – Enhances overall flavor and counters excessive sweetness.
- Oats (optional) – Added to the topping for a rustic crunch and heartier texture.
Step-by-Step Recipe
Ingredients
- 2 cups all-purpose flour
- 1/2 cup granulated sugar
- 1/4 teaspoon salt
- 3/4 cup cold unsalted butter, cubed
- 1 large egg yolk (optional, for richer crust)
- 1 teaspoon vanilla extract
- 2 cups pitted fresh or frozen cherries (thawed if frozen)
- 1/3 cup brown sugar
- 2 tablespoons cornstarch
- 1 tablespoon lemon juice
- 1/2 teaspoon almond extract (optional)
- 1/2 cup rolled oats (optional, for topping)
- 1/4 cup chopped almonds or slivered almonds (optional)
Directions
- Preheat Oven: Set your oven to 350°F (175°C). Line a 9×13-inch baking pan with parchment paper, leaving overhang on two sides for easy removal.
- Make the Crust: In a food processor, combine flour, granulated sugar, and salt. Pulse briefly to mix. Add cold cubed butter and pulse until the mixture resembles coarse crumbs. Add vanilla and egg yolk (if using), then pulse just until the dough begins to clump together.
- Press Into Pan: Transfer the dough to the prepared pan. Use your fingers or a flat-bottomed glass to press it evenly into the bottom. Bake for 18–20 minutes, or until lightly golden around the edges. Remove and let cool slightly while preparing the filling.
- Prepare the Filling: In a medium bowl, toss cherries with brown sugar, cornstarch, lemon juice, and almond extract. Let sit for 10 minutes to allow juices to release and thicken slightly.
- Add Filling: Spread the cherry mixture evenly over the pre-baked crust. If making a crumb topping, mix oats, 1/4 cup flour, 1/4 cup brown sugar, 1/4 teaspoon cinnamon (optional), and 1/4 cup softened butter until crumbly. Stir in chopped almonds if desired.
- Top the Bars: Sprinkle the crumb topping evenly over the cherries, covering completely.
- Bake: Place in the oven and bake for 35–40 minutes, or until the topping is golden brown and the filling is bubbling at the edges.
- Cool Completely: Allow the bars to cool in the pan on a wire rack for at least 2 hours. This cooling period is crucial—it allows the filling to set properly.
- Cut and Serve: Use the parchment overhang to lift the entire slab out of the pan. Slice into squares or rectangles using a sharp knife dipped in hot water for clean cuts.
Tips for Perfect Cherry Pie Bars
- Use Cold Butter for the Crust: Just like in pie dough, cold butter creates steam during baking, resulting in a flaky, tender base.
- Don’t Skip Pre-Baking the Crust: Blind baking prevents a soggy bottom, especially important with juicy fruit fillings.
- Thicken the Filling Properly: Cornstarch is key, but you can also use tapioca starch or arrowroot powder for similar results. Adjust amount based on cherry juiciness.
- Drain Excess Liquid from Frozen Cherries: If using frozen cherries, thaw them first and drain off extra juice to avoid runny bars.
- Let Them Cool Fully: Rushing the cooling process leads to collapsed or messy bars. Patience ensures clean slices.
- Line the Pan Well: Parchment paper makes removal effortless and minimizes cleanup.
- Add Almond Extract Sparingly: A little goes a long way—it should enhance, not overpower.
- Store Correctly: Keep covered at room temperature for up to 2 days or refrigerate for up to 5 days for longer freshness.
Variations and Customizations
Cherry pie bars are highly adaptable—perfect for seasonal changes, dietary needs, or creative experimentation. Try these fun twists:
- Double Crust Version: Instead of a crumb topping, roll out a second batch of dough and place it over the cherries. Cut slits for venting and bake as usual for mini pie vibes.
- Gluten-Free Option: Substitute all-purpose flour with a 1:1 gluten-free baking blend. Ensure cornstarch is certified GF if needed.
- Dairy-Free Version: Replace butter with vegan butter or refined coconut oil (solid state) for a plant-based treat.
- Lower Sugar Options: Reduce sugar in the filling and use monk fruit sweetener or erythritol instead. Pair with naturally sweet cherries.
- Mixed Berry Cherry Bars: Combine cherries with blueberries, raspberries, or blackberries for a colorful, complex flavor.
- White Chocolate Drizzle: After cooling, drizzle melted white chocolate over the top for added elegance and sweetness.
- Nut-Free Topping: Omit almonds and use oat-only streusel or crushed graham crackers for crunch.
- Mini Mason Jar Bars: Bake in individual foil pans or mason jar lids for cute party favors.
- Chai-Spiced Cherry Bars: Add cardamom, ginger, cloves, and cinnamon to the crust or topping for a warm, aromatic twist.
- Boozy Cherries: Soak cherries in a splash of kirsch, bourbon, or amaretto before adding to the filling for adult-friendly depth.
Health Considerations and Nutritional Value
While cherry pie bars are undeniably indulgent, there are ways to enjoy them mindfully. A typical serving (one bar from a 9×13-inch pan) contains approximately:
| Nutrient | Amount (approximate) |
|---|---|
| Calories | 280–320 |
| Total Fat | 14–18g |
| Saturated Fat | 8–10g |
| Cholesterol | 35–50mg |
| Sodium | 80–120mg |
| Total Carbohydrates | 40–45g |
| Dietary Fiber | 2–3g |
| Sugars | 22–28g |
| Protein | 3–4g |
Health Benefits of Cherries: Cherries themselves are rich in antioxidants, particularly anthocyanins, which may help reduce inflammation and support heart health. They’re also a natural source of melatonin, potentially aiding sleep. Tart cherries have been studied for their role in reducing muscle soreness and improving recovery after exercise.
To boost nutritional value:
- Use whole wheat pastry flour for part of the all-purpose flour to increase fiber.
- Incorporate chia seeds or ground flaxseed into the crust for omega-3s.
- Opt for less sugar and rely on ripe fruit sweetness.
- Add nuts for healthy fats and protein.
However, due to high sugar and fat content, those managing diabetes, cardiovascular issues, or weight should consume cherry pie bars in moderation. Always consult dietary guidelines specific to individual health conditions.
Frequently Asked Questions (FAQ)
Can I use canned cherry pie filling?
Yes! One 21-ounce can of cherry pie filling can replace the homemade filling. Simply spread it over the pre-baked crust and add topping before baking. It’s a quick shortcut with decent results.
Can I freeze cherry pie bars?
Absolutely. Once cooled and sliced, store in an airtight container with parchment between layers. Freeze for up to 3 months. Thaw overnight in the refrigerator or at room temperature for 1 hour.
Why are my cherry pie bars runny?
This usually happens if the cornstarch wasn’t mixed well, too many liquids were added, or the bars weren’t cooled long enough. Always let them set fully before cutting.
Can I make these ahead of time?
Yes—bake and cool completely, then cover and refrigerate for up to 2 days before serving. You can even assemble and chill unbaked bars, then bake when needed (add a few extra minutes).
What kind of cherries should I use?
Fresh sweet cherries (like Bing) work well in summer. For a tangier taste, use tart cherries (Montmorency). Frozen unsweetened cherries are excellent year-round alternatives.
How do I pit cherries easily?
Use a cherry pitter tool, or improvise with a paper clip, chopstick, or straw pushed through the stem end to push out the pit.
Can I make them vegan?
Yes—use plant-based butter, skip the egg yolk, and ensure sugar is vegan-certified. Some substitutes may alter texture slightly, so test small batches first.
Do cherry pie bars need to be refrigerated?
After 2 days at room temperature, refrigeration is recommended to maintain freshness and prevent spoilage, especially in warm climates.
Summary
Cherry pie bars bring together the comforting flavors of homemade cherry pie with the convenience of a no-fuss dessert bar—featuring a buttery crust, luscious cherry filling, and optional crumb topping for ultimate satisfaction.
Easy to customize, perfect for sharing, and endlessly delicious, these bars are a must-have in any baker’s repertoire, whether for holidays, weeknight treats, or meal prep desserts.