Introduction
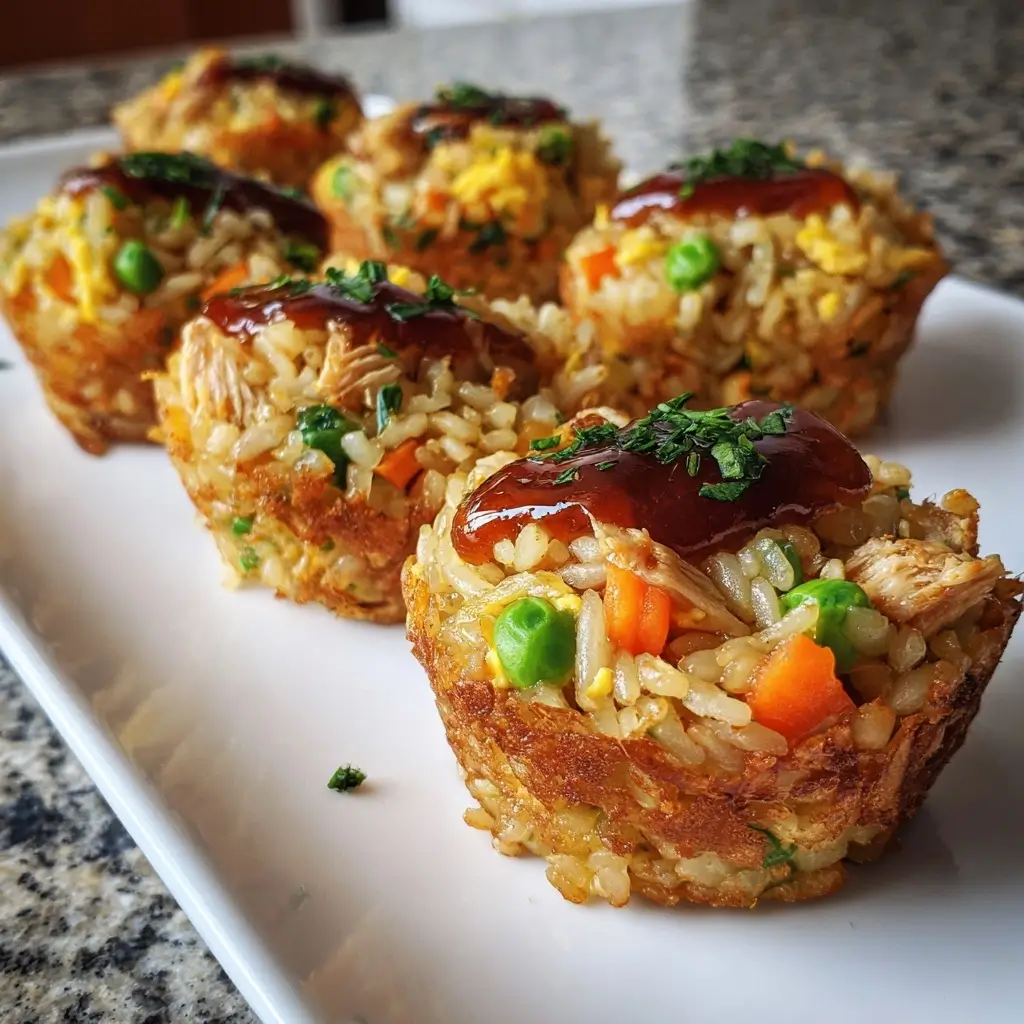
Chicken Fried Rice Cups are a brilliant fusion of classic comfort food and modern, portable convenience—transforming beloved takeout-style fried rice into elegant, handheld, bite-sized portions perfect for appetizers, party platters, meal prep, or even kid-friendly lunches. Unlike traditional fried rice served in a bowl, these individual servings are baked or pan-fried in muffin tins, silicone cup molds, or mini cast-iron skillets to create crisp-edged, golden-brown “cups” with tender, savory interiors. Each cup is a self-contained symphony of textures and flavors: fluffy day-old rice, tender shredded or diced chicken, vibrant vegetables, umami-rich soy and oyster sauces, and aromatic garnishes—all held together just enough to hold its shape without sacrificing authenticity. Whether you’re hosting a summer BBQ, preparing grab-and-go breakfasts, or seeking a clever way to repurpose leftover roast chicken and cold rice, Chicken Fried Rice Cups deliver restaurant-quality taste with home-kitchen practicality—and they’re endlessly adaptable to dietary preferences, seasonal produce, and pantry availability.
The History
Fried rice itself traces its origins over 1,500 years to the Sui Dynasty in China, where resourceful cooks transformed leftover rice into flavorful new meals—a culinary philosophy rooted in sustainability and ingenuity. As Chinese immigrants brought their traditions across the globe, regional adaptations flourished: Thai pineapple fried rice, Indonesian nasi goreng, and American-Chinese takeout fried rice (with its signature smoky wok hei, though often achieved via high-BTU stovetops or seasoned woks in professional kitchens). The concept of “rice cups” emerged more recently—gaining traction in the early 2010s through food blogs and Pinterest-driven home cooking trends—as bakers and meal-preppers experimented with savory rice-based muffins. Influenced by Korean dolsot bibimbap bowls, Japanese ochazuke-inspired rice molds, and even Mexican arroz con pollo “tostada cups,” Chicken Fried Rice Cups represent a natural evolution: marrying Eastern stir-fry tradition with Western baking techniques and portion-controlled presentation. Their popularity surged during the pandemic as families sought safe, shareable, low-contact finger foods—and today, they appear on menus at trendy Asian fusion cafés, school lunch programs emphasizing whole grains, and even gourmet meal-kit services offering pre-portioned, flash-frozen cup bases for 15-minute assembly.
Ingredients Breakdown
Understanding each ingredient’s role elevates both flavor and function in Chicken Fried Rice Cups:
- Day-Old Cooked Rice (preferably jasmine or long-grain white): The cornerstone—cooled, slightly dried rice prevents mushiness and ensures distinct, separate grains that crisp beautifully at the edges. Freshly cooked rice contains too much moisture and will steam rather than fry, resulting in gummy cups.
- Chicken Breast or Thigh (cooked & finely diced/shredded): Breast offers lean tenderness; thigh delivers richer flavor and juiciness due to higher fat content. Poaching, roasting, or grilling the chicken ahead adds depth—especially if marinated in ginger-soy or sesame-garlic paste.
- Vegetable Medley (diced small for uniform texture): Classic trio includes carrots (for sweetness and color), peas (for pop and freshness), and green onions (for aromatic brightness). Optional upgrades: bell peppers (crunch + vitamin C), corn kernels (natural sweetness), shiitake mushrooms (umami depth), or baby spinach (wilted-in nutrients).
- Aromatics (minced): Garlic and fresh ginger are non-negotiable—they build the foundational fragrance. Scallion whites (separated from greens) add extra allium complexity when sautéed first.
- Sauces & Seasonings: Low-sodium soy sauce provides salt and fermented savoriness; toasted sesame oil contributes nutty aroma (added *off-heat* to preserve volatility); oyster sauce lends glossy richness and subtle sweetness (vegetarian versions use mushroom-based “oyster” alternatives); a touch of Shaoxing wine or dry sherry enhances depth (optional but recommended); white pepper adds warm, clean heat unlike black pepper’s bitterness.
- Binders & Texture Enhancers: One lightly beaten egg helps cohesion without making cups eggy; a tablespoon of cornstarch slurry (or arrowroot for gluten-free) improves structural integrity and golden crust formation; neutral oil (peanut, avocado, or canola) ensures even browning and prevents sticking.
- Garnishes (added post-baking): Thinly sliced scallion greens, toasted sesame seeds, nori strips, chili crisp, or a drizzle of chili-garlic sauce or sweet chili sauce for contrast and visual appeal.
Step-by-Step Recipe
- Prep & Chill Rice: Use 3–4 cups of fully cooled, day-old rice. Spread on a parchment-lined baking sheet and refrigerate uncovered for 1–2 hours—or freeze for 15 minutes—to further dehydrate surface moisture. This step is critical for achieving crisp exteriors.
- Pre-Cook & Prep Chicken: Dice 1.5 lbs boneless, skinless chicken breast or thigh into ¼-inch pieces. Marinate 15–30 minutes in 1 tbsp soy sauce, 1 tsp grated ginger, 1 tsp minced garlic, and ½ tsp sesame oil. Sauté in 1 tbsp oil over medium-high heat until fully cooked (165°F internal temp) and lightly browned. Cool completely, then shred or finely chop.
- Sauté Aromatics & Veggies: Heat 2 tbsp oil in a large wok or skillet over high heat. Add scallion whites, garlic, and ginger; stir-fry 30 seconds until fragrant. Add carrots and bell peppers; stir-fry 2 minutes until slightly softened but still crisp. Toss in peas, corn, and mushrooms (if using); cook 1 minute more. Remove from heat and let cool slightly.
- Combine Base Mixture: In a very large mixing bowl, gently fold together cooled rice, cooked chicken, vegetable mixture, 3 tbsp soy sauce, 1 tbsp oyster sauce, 1 tsp sesame oil, ½ tsp white pepper, and 2 tbsp water or broth (to reintroduce *just enough* moisture). Avoid overmixing—toss like a salad to keep grains intact.
- Add Egg & Starch Binder: Whisk 1 large egg with 1 tbsp cornstarch and 1 tsp water until smooth. Drizzle over rice mixture and fold gently but thoroughly—this creates subtle binding while preserving texture.
- Prepare Baking Tin: Generously grease a standard 12-cup muffin tin with oil or line with parchment paper liners (cut to fit cups snugly). For ultra-crisp edges, preheat empty tin in a 400°F oven for 5 minutes before filling.
- Portion & Press: Scoop ~⅓ cup of mixture per cup. Use a greased ¼-cup measuring cup or spoon to portion evenly. Press down firmly with the back of a spoon or a small ramekin to compact—this prevents crumbling and encourages structural cohesion. Fill cups to ~¼ inch below rim.
- Bake to Perfection: Bake at 375°F for 22–26 minutes, rotating pan halfway. Cups are done when tops are set, edges are deeply golden brown and slightly pulling away from tin walls, and centers register 165°F on an instant-read thermometer. For extra crunch, broil 1–2 minutes at the end—watch closely!
- Cool & Release: Let rest in tin for 5 minutes—this allows steam to redistribute and sets structure. Run a thin offset spatula or butter knife around each cup’s edge, then invert tin onto a cooling rack. Gently tap bottom to release. Serve warm or at room temperature.
Tips
- Rice is King: Never skip the chilling step—even “day-old” rice straight from the fridge needs surface drying. If rushed, spread hot rice thinly on a tray and fan for 10 minutes, then refrigerate 30 minutes.
- Size Matters: Dice all ingredients uniformly—no larger than ¼ inch. Oversized chicken or veggies create weak points and uneven cooking.
- Oil Wisely: Use oil with high smoke point (avocado, peanut, refined coconut) for baking. Brush tops lightly with oil before baking for extra sheen and browning.
- Don’t Overcrowd: Bake in batches if needed. Overfilling the oven lowers ambient temperature and causes steaming instead of crisping.
- Texture Control: For chewier cups, reduce egg to ½; for firmer, add another ½ tbsp cornstarch. For softer, moister cups (ideal for kids), increase broth by 1 tbsp and reduce bake time by 2 minutes.
- Freezer-Friendly Success: Freeze unbaked cups on a parchment-lined tray for 2 hours, then transfer to airtight freezer bags. Bake from frozen—add 8–10 minutes to bake time and cover loosely with foil for first 15 minutes to prevent over-browning.
- Reheating Magic: Revive leftovers in an air fryer at 350°F for 4–5 minutes—crisp returns instantly! Microwave reheating makes them soggy; avoid unless absolutely necessary (then cover with damp paper towel and heat in 20-sec bursts).
- Nonstick Hack: If using silicone molds, chill filled cups for 15 minutes before baking—the cold start helps prevent sticking and improves lift-off.
Variations and Customizations
Chicken Fried Rice Cups thrive on creativity—here’s how to personalize them for every palate and occasion:
- Dietary Adaptations: Gluten-Free: Use tamari or certified GF soy sauce and GF oyster sauce (or coconut aminos + mushroom powder blend). Vegan: Swap chicken for crumbled marinated tofu, tempeh bacon, or lentils; use vegan oyster sauce and omit egg (replace with 1 tbsp flax “egg” + 1 tsp psyllium husk for binding). Keto/Low-Carb: Substitute cauliflower rice (thoroughly squeezed dry) and increase chicken/egg ratio; bind with almond flour instead of cornstarch.
- Global Twists: Korean-Inspired: Add gochujang (½ tsp per cup), kimchi (1 tsp finely chopped per cup, added last), and top with toasted seaweed & sesame. Thai-Inspired: Stir in 1 tsp fish sauce, ½ tsp lime zest, chopped cilantro, and crushed peanuts; serve with sweet chili dipping sauce. Mexican-Inspired: Mix in black beans, roasted corn, cumin, smoked paprika, and cotija cheese; garnish with avocado crema and pickled red onions.
- Breakfast Edition: Add ¼ cup shredded cheddar, 1 tbsp chopped cooked bacon, and a pinch of turmeric for golden hue. Top with a fried egg before serving.
- Gourmet Upscale: Incorporate diced duck confit, wild mushrooms, truffle oil (drizzled post-bake), and microgreens. Finish with flaky sea salt and aged balsamic reduction.
- Kid-Friendly Version: Omit pepper and strong aromatics; add mild cheddar, finely grated zucchini (squeezed dry), and hidden spinach purée. Shape into fun shapes using cookie cutters after baking.
- Holiday Special: For Thanksgiving leftovers: use turkey instead of chicken, add sage-infused butter to sauté, and mix in cranberry relish (1 tsp per cup) and toasted pecans.
Health Considerations and Nutritional Value
When prepared mindfully, Chicken Fried Rice Cups offer balanced macronutrients and functional micronutrients—far surpassing typical takeout counterparts. A standard serving (2 cups, ~240g) contains approximately:
- Calories: 320–380 kcal (varies by oil usage and protein choice)
- Protein: 22–28g (high-quality complete protein from chicken + egg)
- Carbohydrates: 34–42g (primarily complex carbs from rice; lower glycemic impact when paired with fiber-rich veggies)
- Fiber: 3–5g (from carrots, peas, peppers, optional additions like broccoli or edamame)
- Fats: 9–12g (mostly unsaturated from oils and sesame; minimal saturated fat)
- Vitamins & Minerals: Excellent source of Vitamin A (carrots, peppers), Vitamin K (green onions, spinach), B6 & B12 (chicken), iron (dark meat chicken), selenium (chicken, eggs), and antioxidants (ginger, garlic, green onions).
Smart Swaps for Enhanced Wellness:
- Use brown rice or black rice for increased fiber, magnesium, and anthocyanins—but extend chilling time and add 1 extra tbsp liquid to compensate for absorption.
- Increase vegetable ratio to 50% of total volume—adds volume, nutrients, and satiety with minimal calories.
- Reduce sodium by 30% using low-sodium sauces and boosting umami with nutritional yeast, dried shiitakes, or miso paste (½ tsp diluted in broth).
- For heart health: replace half the oil with unsweetened applesauce or mashed banana (in vegan versions) or use omega-3 rich walnut oil (drizzled post-bake).
- Consider glycemic load: pairing with vinegar-based slaw or citrus-marinated cucumber salad lowers overall meal glycemic index.
Cautions: Those monitoring sodium should check labels on soy and oyster sauces—some brands contain upwards of 900mg sodium per tbsp. Individuals with histamine sensitivity may wish to limit fermented sauces or opt for coconut aminos. Always ensure chicken reaches safe internal temperature—undercooked poultry poses significant food safety risks.
Ingredients
- 3–4 cups cooked, chilled, day-old jasmine or long-grain white rice (preferably refrigerated overnight)
- 1.5 lbs boneless, skinless chicken breast or thighs, cooked and finely diced or shredded
- 2 tbsp neutral high-smoke-point oil (avocado, peanut, or refined coconut), divided
- 1 large yellow onion, finely diced (about 1 cup)
- 2 medium carrots, peeled and finely diced (½ cup)
- 1 red bell pepper, finely diced (½ cup)
- 1 cup frozen peas, thawed and patted dry
- ½ cup fresh or frozen corn kernels, patted dry
- 4 cloves garlic, finely minced (1 tbsp)
- 1 tbsp fresh ginger, grated fine (½ oz)
- 4 green onions, whites and greens separated, finely sliced
- 3 tbsp low-sodium soy sauce (or tamari for GF)
- 1 tbsp oyster sauce (or vegetarian mushroom oyster sauce)
- 1 tsp toasted sesame oil
- ½ tsp freshly ground white pepper
- 1 large egg, lightly beaten
- 1 tbsp cornstarch
- 2 tsp water or low-sodium chicken broth
- Optional: 1 tsp Shaoxing wine or dry sherry
- For garnish: additional sliced green onions, toasted sesame seeds, nori strips, chili crisp
Directions
- Preheat oven to 375°F (190°C). Generously grease a 12-cup standard muffin tin with oil or line with parchment paper liners.
- In a large wok or stainless steel skillet, heat 1 tbsp oil over high heat until shimmering. Add onion whites, garlic, ginger, and scallion whites; stir-fry 30 seconds until highly aromatic.
- Add carrots and bell pepper; stir-fry 2 minutes, tossing constantly. Add peas, corn, and optional mushrooms; cook 1 minute more. Transfer to a large bowl and let cool 5 minutes.
- To same wok (wipe if needed), add remaining 1 tbsp oil. Add diced chicken and stir-fry 1–2 minutes to reheat and lightly crisp edges. Cool 3 minutes, then add to vegetable bowl.
- Add chilled rice, soy sauce, oyster sauce, sesame oil, white pepper, and optional Shaoxing wine. Gently toss with a spatula—do not mash. Fold in cooled veggie-chicken mixture.
- In a small bowl, whisk egg, cornstarch, and water until smooth. Drizzle over rice mixture and fold gently but thoroughly until evenly distributed.
- Scoop ~⅓ cup (about 75g) of mixture into each muffin cup. Press down firmly with the back of a spoon to compact—this is essential for structural integrity.
- Bake for 22–26 minutes, rotating pan halfway through, until tops are set, edges are deep golden brown, and centers reach 165°F internally.
- Let rest in tin for 5 minutes. Run a thin knife around each cup, then invert tin onto a wire rack and gently tap bottom to release.
- Garnish generously with green onions, sesame seeds, and desired toppings. Serve warm or at room temperature.
FAQ
- Can I make these ahead and reheat?
- Absolutely—baked cups refrigerate well for up to 4 days in an airtight container. Reheat in air fryer (350°F for 4–5 min) or toaster oven (same temp, 6–7 min) for best texture. Avoid microwave unless covered with damp paper towel and heated in 20-second pulses.
- Why do my cups fall apart?
- Most commonly due to excess moisture (wet rice or un-drained veggies), insufficient binder (too little egg/cornstarch), or under-compaction. Ensure rice is properly chilled and dried, squeeze peas/corn dry, and press mixture firmly into tins. Let rest 5 minutes before unmolding.
- Can I use frozen rice?
- Yes—but thaw completely in fridge overnight, then spread on a tray and refrigerate uncovered for 1 hour to remove surface ice crystals and excess water. Never use rice straight from freezer.
- What’s the best rice substitute for low-carb?
- Riced cauliflower works well—if you thoroughly squeeze out ALL moisture using cheesecloth or a clean kitchen towel (you’ll be surprised how much water comes out!). Increase egg to 1.5 and add 1 tsp xanthan gum for binding.
- Can I cook these in an air fryer?
- Yes! Place parchment-lined silicone muffin cups in air fryer basket (max 6 at once). Air fry at 370°F for 14–16 minutes, shaking basket gently halfway. Crispness is exceptional—but watch carefully near end.
- Are these suitable for freezing?
- Unbaked cups freeze exceptionally well. Portion into tin, freeze solid (2 hrs), then transfer to freezer bag. Bake from frozen: add 8–10 minutes to time and cover loosely with foil for first 15 minutes.
- Can I make vegetarian versions without tofu?
- Yes—try a hearty medley of lentils (pre-cooked French or black), chickpeas, roasted sweet potato cubes, and walnuts. Boost umami with miso paste (½ tsp), tamari, and dried porcini powder.
- How do I prevent soggy bottoms?
- Preheat your muffin tin, use high-heat oil, ensure rice is ultra-dry, and avoid overloading cups. Also—don’t open oven during first 18 minutes; trapped steam causes steaming instead of crisping.
- Can kids help make these?
- Perfect for kitchen teamwork! Kids can measure rice, tear lettuce for garnish, stir cooled mixtures, scoop portions, and press down with a small cup. Supervise stove and oven steps.
- What dipping sauces pair best?
- Classic options: sweet chili sauce, sriracha mayo (½ sriracha + ½ mayo + lime zest), ginger-scallion oil, or a light ponzu vinaigrette. For low-sugar: mashed avocado with lime and cilantro.
Summary
Chicken Fried Rice Cups reimagine a timeless dish with ingenious portability, customizable nutrition, and restaurant-worthy texture—transforming humble leftovers into elegant, crowd-pleasing bites that satisfy cravings while supporting mindful eating habits.
With meticulous attention to rice preparation, smart ingredient layering, and adaptable techniques, these golden-crusted, tender-centered cups deliver maximum flavor, versatility, and joy—whether served at a holiday gathering, packed in a child’s lunchbox, or enjoyed as a nourishing solo supper.