Introduction
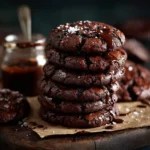
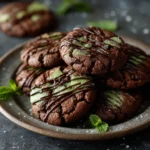
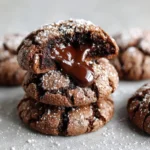
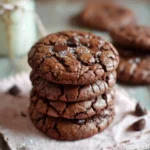
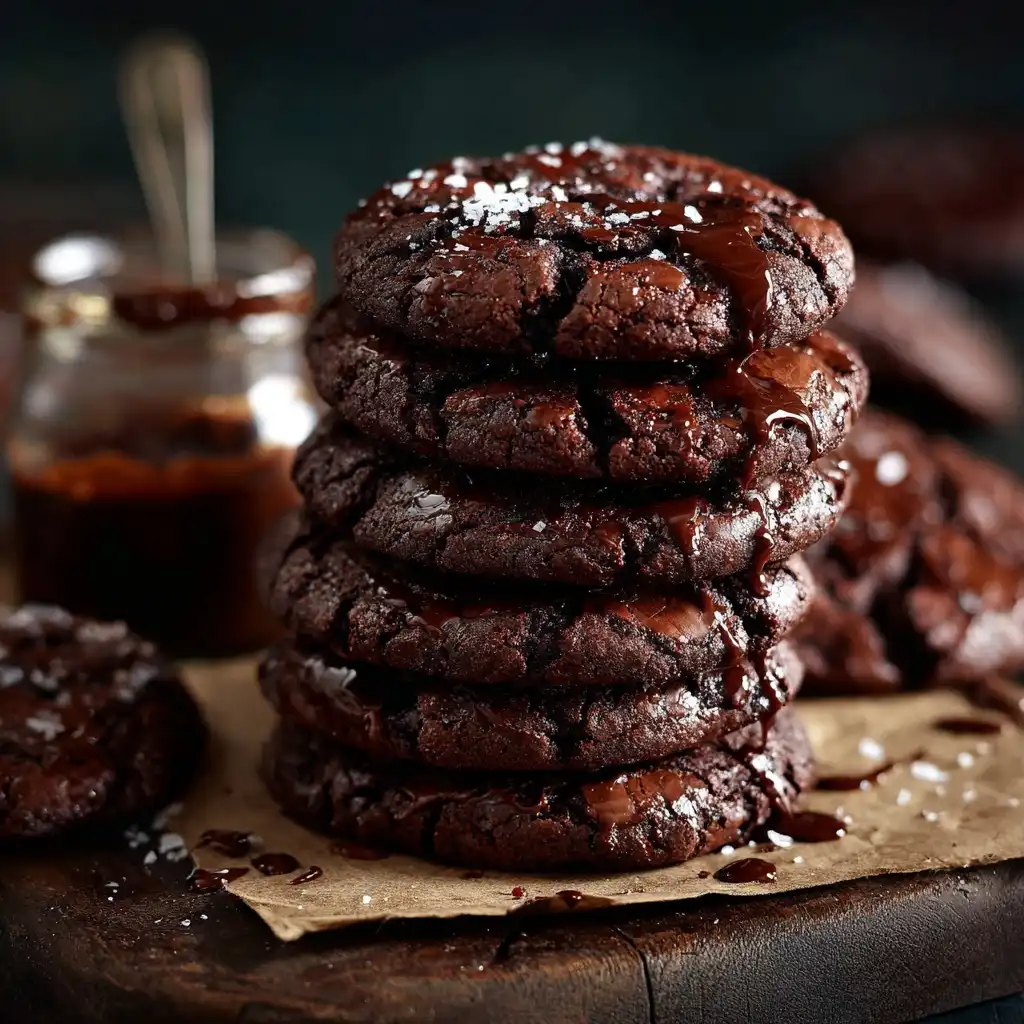
Chocolate Brownie Cookies are the ultimate dessert hybrid—a luscious, fudgy marriage of rich brownie texture and the convenient, portable charm of a cookie. They deliver the deep cocoa intensity and melt-in-your-mouth density of a classic brownie, yet boast the slightly crisp edges, chewy center, and satisfying bite of a well-baked cookie. Unlike traditional drop cookies that spread and flatten, brownie cookies hold their thick, substantial shape—often with a glossy, crackled top reminiscent of a brownie’s signature crust. Whether you’re craving indulgence without the fuss of cutting and serving a full pan, or seeking a crowd-pleasing treat that bridges generations and occasions, these decadent morsels check every box. They’re equally at home on a holiday cookie platter, packed in a child’s lunchbox (with parental approval!), served warm with vanilla ice cream, or enjoyed solo with a tall glass of cold milk. Their versatility, nostalgic flavor profile, and surprisingly forgiving nature make them a beloved staple in modern home baking.
The History
The origins of Chocolate Brownie Cookies lie not in a single “eureka” moment but in the delicious, inevitable evolution of two iconic American desserts: the brownie and the chocolate chip cookie. The brownie itself emerged in the late 19th century—first appearing in cookbooks like the 1896 Boston Cooking-School Cook Book by Fannie Farmer as a “brownie” (a dense, molasses- or date-based bar), evolving into the cocoa-and-chocolate version we know by the early 1900s, popularized by recipes from Palmer House Hotel in Chicago (1893) and the iconic “Betty Crocker’s Picture Cook Book” (1950). Meanwhile, Ruth Wakefield’s accidental 1938 invention of the chocolate chip cookie at the Toll House Inn cemented America’s love affair with chunky, buttery, oven-spreading treats. As home bakers experimented through the mid-to-late 20th century, they began adapting brownie batter—traditionally baked in a pan—to drop-cookie form, reducing leavening, increasing fat, and adjusting sugar ratios to preserve density. By the 1980s and 1990s, food magazines like Bon Appétit and Martha Stewart Living featured “brownie cookies” as a gourmet twist, often highlighting their “best-of-both-worlds” appeal. The rise of food blogging in the 2000s accelerated their popularity, with viral recipes emphasizing ultra-fudgy centers, oversized chocolate chunks, and sea salt finishes. Today, Chocolate Brownie Cookies represent a cultural shorthand for comfort, creativity, and culinary nostalgia—honoring tradition while embracing playful reinvention.
Ingredients Breakdown
Every exceptional Chocolate Brownie Cookie hinges on precise ingredient roles—not just measurements. Here’s a comprehensive functional analysis:
- Unsalted Butter (1 cup / 2 sticks): Provides richness, moisture, and structure. Melted (not browned) butter enhances fudginess and promotes minimal spread. Its water content aids steam development for a tender crumb; its fat coats flour proteins, limiting gluten formation for chewiness—not toughness.
- Granulated Sugar (1 cup): Adds sweetness, aids in spreading (slightly), and contributes to crisp edges via caramelization. It also helps incorporate air when creamed—but since we melt the butter, its primary role here is moisture retention and tenderness.
- Packed Light Brown Sugar (½ cup): Brings molasses notes, acidity, and extra moisture. Its hygroscopic nature locks in humidity, ensuring a soft, chewy center long after cooling. The slight acidity also gently activates baking soda if used.
- Eggs (2 large, room temperature): Act as emulsifiers and binders. The yolks add fat and richness; the whites provide structure and lift. Room temperature eggs blend more evenly into warm batter, preventing separation and ensuring uniform texture.
- Pure Vanilla Extract (2 tsp): Enhances and rounds out chocolate flavor. Alcohol-based vanilla also subtly affects gluten development and contributes to aroma volatility during baking.
- All-Purpose Flour (¾ cup + 2 tbsp): The structural backbone. Too much = cakey or dry cookies; too little = greasy, flat slumps. Spoon-and-level method is non-negotiable. A small amount of cornstarch (1–2 tsp, optional) can further inhibit gluten for ultra-tender results.
- Natural Unsweetened Cocoa Powder (⅓ cup, Dutch-process preferred): The soul of the recipe. Dutch-process cocoa is alkalized, yielding deeper color, smoother bitterness, and better solubility in fat—resulting in more intense, balanced chocolate flavor and superior dispersion. Natural cocoa works but yields a sharper, fruitier note and may require acid adjustment.
- Instant Espresso Powder (1 tsp, optional but highly recommended): Not for coffee flavor—it amplifies chocolate’s inherent complexity, darkens color, and adds subtle depth without detectable coffee notes. A true baker’s secret weapon.
- Baking Powder (¼ tsp): A *tiny* amount provides just enough lift to prevent leaden density—without turning the cookie cakey. Omitting it yields flatter, denser (but still delicious) results; doubling it invites unwanted puffiness.
- Fine Sea Salt (¾ tsp): Crucial for flavor balance. Salt suppresses bitterness, heightens sweetness perception, and harmonizes all components. Flaky finishing salt (like Maldon) added post-bake enhances contrast.
- High-Quality Semi-Sweet or Bittersweet Chocolate (1½ cups total): Use a mix: 1 cup finely chopped bars (60–70% cacao) for melty pools and textural interest, plus ½ cup chocolate chips for consistent melting and structure. Avoid low-cocoa “chocolate-flavored” chips—they contain stabilizers that resist melting and dull flavor.
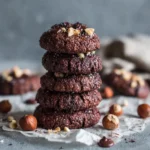
- Optional Add-Ins: Toasted walnuts or pecans (¾ cup, chopped), dried cherries (¼ cup, chopped and tossed in flour), espresso beans (1 tbsp, finely crushed), orange zest (1 tsp), or a swirl of peanut butter (1 tbsp per cookie, swirled in before baking).
Step-by-Step Recipe
- Prep Work (15 minutes): Position oven racks in upper and lower thirds. Preheat oven to 350°F (175°C). Line two large baking sheets with parchment paper or silicone baking mats—do NOT grease directly, as excess fat causes spreading. Chop chocolate and nuts (if using); measure all ingredients precisely. Let eggs sit in warm water for 5 minutes to reach room temperature.
- Melt Butter & Bloom Cocoa (5 minutes): In a medium heatproof bowl, combine butter, cocoa powder, espresso powder, and salt. Microwave in 30-second bursts, stirring vigorously between each, until butter is fully melted and mixture is smooth and glossy (about 1½–2 minutes total). Alternatively, use a double boiler over simmering water. Let cool slightly—mixture should be warm to the touch (about 110°F), not hot, to avoid cooking eggs.
- Whisk Wet Ingredients (3 minutes): Whisk granulated sugar and brown sugar into the warm cocoa mixture until fully dissolved and no graininess remains (~1 minute). Whisk in eggs one at a time, fully incorporating each before adding the next (30 seconds per egg). Whisk in vanilla until smooth and slightly thickened.
- Combine Dry Ingredients (2 minutes): In a separate small bowl, whisk together flour, baking powder, and any additional dry spices (e.g., pinch of cinnamon). Sift if lumps are present—this ensures even distribution and prevents pockets of raw flour.
- Fold Gently (2 minutes): Using a silicone spatula, fold dry ingredients into wet mixture in two additions, mixing *just until no streaks remain*. Overmixing develops gluten and leads to toughness. Then, fold in chopped chocolate (and nuts/cherries) until evenly distributed—about 10–12 folds. Batter will be thick, glossy, and resemble fudgy pudding.
- Chill (Non-Negotiable — 30–60 minutes): Cover bowl tightly and refrigerate dough. This solidifies the butter, prevents excessive spreading, enhances flavor development, and allows gluten to relax. For maximum fudginess and defined edges, chill up to 2 hours—or freeze scooped dough for up to 3 months.
- Scoop & Space (3 minutes): Using a 1.5–2 tablespoon cookie scoop (or heaping tablespoon), portion chilled dough into rounded balls. Place 3 inches apart on prepared sheets (no more than 12 per standard half-sheet pan). Gently press down *slightly* to create a ¾-inch thick disc—do not flatten completely. Optional: Sprinkle tops with flaky sea salt.
- Bake Strategically (12–14 minutes): Bake sheets on upper and lower racks, swapping positions halfway through. Cookies are done when edges are set and appear matte (not shiny), tops are deeply cracked and slightly puffed, and centers look *just barely* set—jiggling slightly when pan is gently shaken. Underbaking is key: they firm up as they cool. Rotate pans front-to-back at the 7-minute mark for even baking.
- Cool Completely (20–25 minutes): Let cookies cool on baking sheets for 10 minutes—this allows residual heat to finish cooking centers without drying edges. Then, carefully transfer to wire racks using a thin spatula. Cool fully (at least 15 more minutes) before eating. Patience yields optimal texture: crisp edge, chewy-soft center, and cohesive structure.
Tips
- Measure Flour Correctly: Use the spoon-and-level method—fluff flour in bag, spoon into measuring cup, level with straight edge. Scooping directly packs flour and adds up to 25% extra, causing dryness and hardness.
- Chilling Is Not Optional: Skipping the chill guarantees flat, greasy, overly spread cookies. Even 20 minutes helps—but 45+ minutes delivers ideal thickness and chew.
- Don’t Overbake: Remove cookies when centers still look soft and underdone. They carryover-cook on the hot sheet. Overbaked brownie cookies become crumbly and lose their signature fudge.
- Use Quality Chocolate: Cheap chocolate contains vegetable fats and less cocoa butter, resulting in waxy texture and muted flavor. Opt for brands like Ghirardelli, Valrhona, Callebaut, or Guittard.
- Room-Temperature Eggs Matter: Cold eggs cause the warm cocoa-butter mixture to seize or harden into clumps, leading to uneven texture and speckled appearance.
- Rotate Pans Mid-Bake: Home ovens have hot spots. Rotating ensures even browning and consistent doneness across all cookies.
- Let Them Cool Fully: Cutting or biting too soon releases steam and collapses structure. Wait until completely cool for clean edges and maximum chew.
- Store Properly: Keep in an airtight container at room temperature for up to 4 days. For longer storage, freeze baked cookies (layered with parchment) for up to 3 months. Thaw at room temp or warm briefly in oven.
- Double-Batch Smartly: Chill dough in portions—wrap logs or scoop and freeze individual balls. That way, you can bake fresh cookies anytime without making a full batch.
- Invest in a Cookie Scoop: A 1.5-tablespoon scoop ensures uniform size, even baking, and professional presentation. Look for stainless steel with a release lever.
Variations and Customizations
The Chocolate Brownie Cookie is a remarkably adaptable canvas—ideal for seasonal flair, dietary needs, or pure whimsy. Here are rigorously tested, bakery-worthy variations:
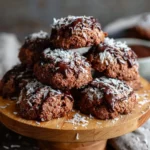
- Blondie Brownie Hybrid: Replace cocoa powder with ⅓ cup toasted almond flour + 2 tbsp cornstarch; swap chocolate for 1 cup white chocolate chunks + ½ cup toasted sliced almonds. Add ½ tsp almond extract with vanilla.
- Espresso Crunch: Increase espresso powder to 2 tsp; stir in ⅔ cup coarsely crushed toffee bits (like Heath) with chocolate. Finish with flaky salt and a dusting of instant espresso.
- Orange-Dark Chocolate: Add 1 tbsp finely grated orange zest + 1 tsp orange extract to wet ingredients. Use 70% dark chocolate and fold in ¼ cup dried candied orange peel (chopped and tossed in flour).
- Peanut Butter Swirl: After scooping dough, place ½ tsp creamy peanut butter on top of each ball and drag a toothpick through in a figure-eight pattern. Optional: sprinkle with roasted peanuts.
- Gluten-Free: Substitute ¾ cup + 2 tbsp King Arthur Gluten-Free Measure-for-Measure Flour. Add ½ tsp xanthan gum if not included in blend. Ensure cocoa and chocolate are certified GF.
- Vegan: Use vegan butter (Miyoko’s or Earth Balance), flax eggs (2 tbsp ground flax + 5 tbsp water, rested 10 min), and dairy-free chocolate. Add 1 tsp apple cider vinegar to batter to react with baking powder for lift.
- Lower-Sugar: Reduce granulated sugar to ¾ cup and brown sugar to ⅓ cup; boost flavor with 2 tsp vanilla, 1 tsp cinnamon, and 1 tbsp blackstrap molasses (replaces some brown sugar moisture). Expect slightly denser texture.
- Spiced Mexican Hot Chocolate: Add 1 tsp ground cinnamon, ¼ tsp chipotle powder, ⅛ tsp cayenne, and 1 tsp orange zest. Top with a pinch of smoked sea salt.
- Mini Bite-Sized: Scoop with a 1-teaspoon scoop; bake at 350°F for 8–9 minutes. Perfect for parties, dessert tables, or portion control.
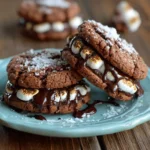
- Stuffed Surprise: Flatten a dough ball, place ½ tsp dulce de leche or Nutella in center, seal, and roll into ball. Chill 15 min before baking. Results in gooey, molten core.
Health Considerations and Nutritional Value
While Chocolate Brownie Cookies are undeniably indulgent—and best enjoyed mindfully as part of a balanced diet—they do offer nuanced nutritional attributes worth acknowledging. A standard 3-inch cookie (recipe yields ~24) contains approximately:
- Calories: 185–210 kcal (varies with add-ins and chocolate %)
- Total Fat: 11–13 g (mostly unsaturated from cocoa butter and nuts; saturated fat ~6–7 g)
- Carbohydrates: 22–25 g (including 16–18 g sugars, 1 g fiber)
- Protein: 2–3 g
- Key Micronutrients: Iron (from cocoa), magnesium (cocoa and dark chocolate), potassium, and antioxidants (flavanols in cocoa linked to vascular health)
Health-Conscious Notes:
- Cocoa Benefits: High-flavanol cocoa (especially 70%+ dark chocolate) supports endothelial function and may modestly improve blood flow and insulin sensitivity—though benefits depend on processing and dosage. Dutch-process retains more flavanols than heavily alkalized versions.
- Sugar Awareness: These cookies are naturally high in added sugars. For those managing diabetes or metabolic health, consider pairing with protein (e.g., Greek yogurt dip) or enjoying one with a meal to blunt glycemic response.
- Fat Profile: Butter contributes saturated fat, but cocoa butter contains stearic acid—a neutral fatty acid that doesn’t raise LDL cholesterol like other saturates. Adding walnuts introduces heart-healthy omega-3 ALA.
- Dietary Modifications: Gluten-free and vegan versions expand accessibility, though always verify labels for cross-contamination (especially for celiac disease). Lower-sugar adaptations may sacrifice texture—experiment with erythritol blends or monk fruit, but avoid stevia alone (bitter aftertaste).
- Mindful Enjoyment: Savor slowly. The richness satisfies in smaller portions. Store extras out of immediate sight to reduce impulsive snacking. Pair with herbal tea or black coffee instead of sugary beverages.
Ultimately, these cookies embody the principle of *joyful nourishment*: they fuel moments of connection, celebration, and comfort—essential elements of holistic wellness that extend far beyond macronutrients.
Ingredients
- 1 cup (2 sticks / 227g) unsalted butter
- ⅓ cup (30g) natural or Dutch-process unsweetened cocoa powder
- 1 tsp instant espresso powder (optional but recommended)
- ¾ tsp fine sea salt
- 1 cup (200g) granulated sugar
- ½ cup (100g) packed light brown sugar
- 2 large eggs, room temperature
- 2 tsp pure vanilla extract
- ¾ cup + 2 tbsp (115g) all-purpose flour, spooned & leveled
- ¼ tsp baking powder
- 1½ cups (270g) high-quality semi-sweet or bittersweet chocolate, finely chopped (plus ½ cup chocolate chips for consistency)
- Flaky sea salt, for finishing (optional)
Directions
- Preheat oven to 350°F (175°C). Line two large baking sheets with parchment paper or silicone baking mats.
- In a medium microwave-safe bowl, combine butter, cocoa powder, espresso powder, and salt. Microwave in 30-second intervals, stirring vigorously between each, until butter is fully melted and mixture is smooth and glossy (about 1½–2 minutes). Let cool slightly until warm to the touch (~110°F).
- Add granulated and brown sugars to cocoa mixture; whisk until fully dissolved and no grit remains (about 1 minute). Whisk in eggs one at a time, fully incorporating each before adding the next. Whisk in vanilla until smooth and slightly thickened.
- In a small bowl, whisk together flour and baking powder. Sift if needed.
- Fold dry ingredients into wet mixture in two additions, mixing just until no flour streaks remain. Fold in chopped chocolate and chips until evenly distributed. Batter will be thick and glossy.
- Cover bowl tightly and refrigerate dough for at least 30 minutes (up to 2 hours for optimal texture).
- Using a 1.5-tablespoon cookie scoop, portion chilled dough into balls. Place 3 inches apart on prepared sheets. Gently press down to ¾-inch thickness. Optional: sprinkle lightly with flaky sea salt.
- Bake on upper and lower oven racks for 12–14 minutes, rotating pans front-to-back and switching rack positions at the 7-minute mark. Cookies are done when edges are set and matte, tops are cracked and puffed, and centers still jiggle slightly.
- Let cool on baking sheets for 10 minutes, then transfer to wire racks to cool completely (at least 15 more minutes) before serving.
FAQ
- Can I make these ahead and freeze the dough?
- Absolutely! Scoop chilled dough onto parchment-lined trays, freeze until solid (1–2 hours), then transfer to a freezer bag. Bake straight from frozen—add 1–2 minutes to bake time. Dough keeps for up to 3 months.
- Why did my cookies spread too much?
- Most common causes: butter too warm (should be melted but cooled), insufficient chilling time, using too little flour (scooping vs. spoon-and-level), or expired leavening. Also check oven temperature with an oven thermometer—many run hot or cold.
- Can I use oil instead of butter?
- Not recommended. Oil lacks the emulsifying properties and water content of butter, resulting in greasier, flatter, less structured cookies with diminished flavor complexity.
- My cookies turned out cakey—what went wrong?
- Likely too much flour, overmixing the batter, excessive baking powder, or using cold eggs that caused the butter to seize and create uneven texture. Also, overbaking dries them out and mimics cake-like crumbliness.
- How do I get that perfect crackled top?
- Cracks form from rapid expansion and surface drying. Ensure your batter has the right sugar ratio (brown sugar helps), bake at correct temperature (350°F), and avoid opening the oven early. The initial burst of heat creates steam that lifts and cracks the surface.
- Can I substitute whole wheat flour?
- You can replace up to ¼ cup of AP flour with whole wheat pastry flour for nuttiness and fiber—but expect denser, heartier cookies. Avoid regular whole wheat flour; its high gluten content yields toughness.
- Are these suitable for mailing or gifting?
- Yes! Once completely cool, layer cookies in an airtight tin with parchment between layers. They travel well for up to 5 days. For longer shipping, include a silica gel packet to absorb ambient moisture.
- Can I make them nut-free?
- Easily—just omit nuts and ensure your chocolate and cocoa are processed in nut-free facilities if allergies are severe. Sunflower seed butter swirl or toasted coconut flakes make excellent substitutions.
- What’s the best way to reheat leftovers?
- For fudgy revival: 5–8 seconds in the microwave, or 3–4 minutes in a 325°F oven. Serve warm with a scoop of ice cream for ultimate decadence.
- Why does the recipe call for both granulated and brown sugar?
- Granulated sugar promotes spread and crisp edges; brown sugar adds moisture, chew, and complex molasses depth. Together, they create the ideal textural duality—crisp exterior, tender-chewy interior.
Summary
Chocolate Brownie Cookies are the brilliant, fudgy fusion of brownie luxury and cookie convenience—rich with premium cocoa, perfectly balanced sweeteners, and crowned with melty chocolate pools and a signature crackled top. Baked with care, chilled with patience, and savored with joy, they transform everyday moments into celebrations of flavor, texture, and timeless comfort.
Whether you follow the classic recipe to the letter or explore vibrant variations—from espresso crunch to orange-dark chocolate—they remain a testament to the magic that happens when tradition meets thoughtful innovation in the humble, heartwarming realm of home baking.