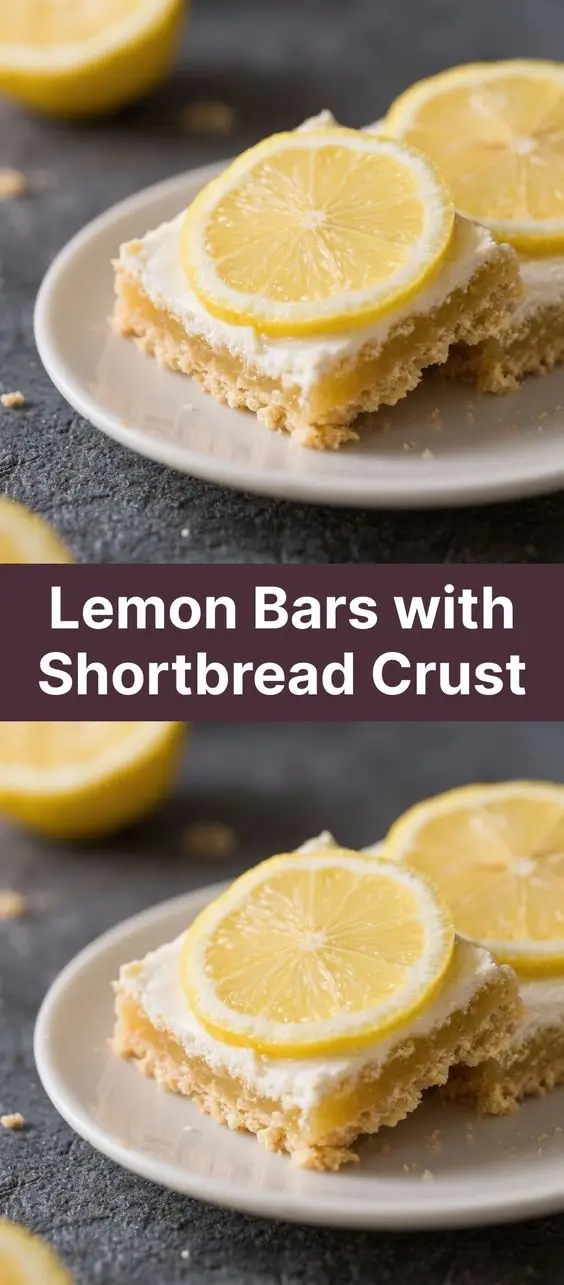
Lemon Bars with Shortbread Crust: A Zesty Classic Dessert Perfection
The History of Lemon Bars
Lemon bars, those bright, tangy confections beloved across American kitchens and bakeries, have a surprisingly modern origin. While lemon-based desserts trace their roots to ancient Mediterranean civilizations—where lemons were first cultivated in regions like Persia and later spread through the Arab world to Europe—it wasn’t until the 20th century that the now-iconic lemon bar with a shortbread crust took shape.
The earliest known version of what we now recognize as a lemon bar appeared in American cookbooks during the 1950s. However, it gained widespread popularity in the 1970s and 1980s, particularly after being featured in community cookbooks and women’s magazines. The recipe was simple, used common pantry ingredients, and delivered a striking contrast between sweet and tart flavors—making it an instant favorite at potlucks, bake sales, and holiday gatherings.
One pivotal moment in lemon bar history came when the recipe was published in the Betty Crocker Cookbook, which helped standardize the format: a buttery shortbread base topped with a smooth, vibrant lemon curd filling, baked until set, then dusted generously with powdered sugar. Over time, regional variations emerged, but the core concept remained unchanged—a celebration of citrus sunshine in dessert form.
Today, lemon bars are considered a staple of American baking tradition. They’re often associated with spring and summer due to their refreshing flavor profile, though they’re enjoyed year-round. From gourmet patisseries to home kitchens, bakers continue to experiment with enhancements like lavender-infused crusts, Meyer lemon substitutions, or even vegan adaptations—all while honoring the original simplicity that made them a classic.
Ingredients Breakdown: What Makes These Lemon Bars Shine?
The magic of a perfect lemon bar lies not just in its flavor but in the balance and quality of its ingredients. Each component plays a crucial role in delivering texture, structure, and taste. Let’s break down every ingredient for both the shortbread crust and the luscious lemon filling.
For the Shortbread Crust:
- All-Purpose Flour: Provides the structural foundation. Its moderate protein content ensures a tender crumb without toughness. Sift before measuring for accuracy and lightness.
- Powdered Sugar (Confectioners’ Sugar): Adds sweetness while contributing to a fine, melt-in-your-mouth texture. Unlike granulated sugar, it dissolves more readily into the dough.
- Salted Butter: Brings richness, flavor, and tenderness. The salt enhances overall taste and balances the tart filling. Use high-quality European-style butter for a creamier, more luxurious crust.
- Cold Butter is Key: Keeping the butter cold prevents overworking the dough and helps create flakiness upon baking.
- Pinch of Salt (if using unsalted butter): Enhances flavor complexity and counterbalances sweetness.
For the Lemon Filling:
- Fresh Lemons: The star! Always use fresh juice and zest—not bottled—for maximum brightness and aromatic depth. One medium lemon yields about 2–3 tablespoons of juice and 1 teaspoon of zest.
- Granulated Sugar: Sweetens the tart lemon juice. The ratio of sugar to lemon juice is critical; too little sugar makes the bars mouth-puckeringly sour, while too much dulls the citrus zing.
- Eggs: Act as a binder and thickener. Whole eggs give body, while some recipes include extra yolks for a silkier texture. Eggs must be room temperature for even mixing and smooth emulsification.
- All-Purpose Flour (again): Used in small amounts to stabilize the filling and prevent curdling during baking. It gives the lemon layer a custard-like consistency rather than a runny one.
- Cornstarch (optional enhancement): Some bakers add a teaspoon to ensure a firmer set, especially in humid climates where moisture can affect texture.
- Vanilla Extract (optional): A splash adds subtle warmth and rounds out sharp acidity, though purists may prefer to omit it to let the lemon shine.
Finishing Touch: Powdered Sugar Dusting
A final snowfall of powdered sugar not only looks elegant but also tempers the intense tartness of the lemon top layer. For best results, sift the sugar through a fine mesh sieve right before serving to avoid clumping.
Step-by-Step Recipe: How to Make Perfect Lemon Bars with Shortbread Crust
Follow these detailed instructions carefully to achieve lemon bars with a crisp, buttery crust and a perfectly set, tangy-sweet lemon layer on top. Precision matters here—especially in timing and temperature control.
Ingredients You’ll Need:
- 1 cup (2 sticks / 226g) unsalted butter, cold and cubed
- 2 cups (250g) all-purpose flour, plus more for dusting
- 1/2 cup (60g) powdered sugar, plus more for dusting
- 1/4 teaspoon salt (omit if using salted butter)
- 4 large eggs, room temperature
- 1 1/2 cups (300g) granulated sugar
- 1/4 cup (30g) all-purpose flour
- 1/2 teaspoon baking powder (optional, for slight lift)
- 1/4 cup (30g) cornstarch (optional, for firmer set)
- 2/3 cup (160ml) freshly squeezed lemon juice (about 3–4 medium lemons)
- 1 tablespoon finely grated lemon zest (from about 2 lemons)
- 1/2 teaspoon pure vanilla extract (optional)
Equipment Checklist:
- 9×13-inch baking pan (glass or metal)
- Parchment paper
- Pastry cutter or food processor
- Mixing bowls (large and medium)
- Whisk
- Microplane grater (for zest)
- Juicer or reamer
- Sifter (for powdered sugar)
- Cooling rack
Directions:
- Preheat Oven & Prepare Pan: Preheat your oven to 350°F (175°C). Line a 9×13-inch baking dish with parchment paper, leaving an overhang on two opposite sides for easy removal. Lightly grease any exposed pan areas.
- Make the Crust Dough: In a large bowl, combine 2 cups flour, 1/2 cup powdered sugar, and salt. Cut in the cold cubed butter using a pastry blender or pulse in a food processor until the mixture resembles coarse sand with pea-sized butter clumps.
- Press Into Pan: Transfer the crumbly dough to the prepared pan. Use your fingers or the bottom of a glass to press it evenly into the base, creating a smooth, compact layer. Chill in the freezer for 10 minutes to prevent puffing during baking.
- Bake the Crust: Bake for 20–25 minutes, or until lightly golden around the edges. Do not skip this step—fully pre-baking the crust ensures it stays crisp under the moist filling. Remove and let cool slightly while preparing the filling.
- Prepare Lemon Filling: In a medium bowl, whisk together granulated sugar, 1/4 cup flour, cornstarch (if using), and baking powder. Add eggs one at a time, whisking well after each addition. Stir in lemon juice, zest, and vanilla extract. Whisk until completely smooth and no streaks remain.
- Pour Over Crust: Carefully pour the lemon mixture over the warm (not hot) crust. Return the pan to the oven.
- Bake the Filling: Bake for 20–25 minutes, rotating halfway through. The filling should be set with only a slight jiggle in the center when gently shaken. Overbaking leads to cracking; underbaking results in a runny center.
- Cool Completely: Allow the lemon bars to cool at room temperature for 30 minutes, then transfer to the refrigerator and chill for at least 2 hours—or ideally overnight. This chilling phase is essential for clean slicing and optimal texture.
- Cut and Serve: Using the parchment overhang, lift the entire slab onto a cutting board. Trim edges for neatness. Dip a sharp knife in hot water and wipe dry between cuts for smooth slices. Dust generously with powdered sugar just before serving.
Pro Tips for Flawless Lemon Bars
- Use Fresh Lemons Only: Bottled lemon juice lacks the vibrant acidity and aroma of fresh-squeezed. Roll lemons on the counter before juicing to maximize yield.
- Zest Before Juicing: It’s easier to grate the peel when the lemon is whole and firm.
- Room Temperature Eggs: Cold eggs can cause the batter to seize or result in uneven baking.
- Don’t Skip the Chill Time: Cutting warm lemon bars will lead to smearing and messy layers. Patience pays off.
- Wipe Knife Between Cuts: Prevent sticky residue from dragging across the surface by cleaning the blade frequently.
- Freeze for Longer Storage: Lemon bars freeze beautifully for up to 3 months. Wrap individually or store in an airtight container with parchment between layers.
- Dust Sugar Right Before Serving: If applied too early, the powdered sugar will dissolve into the lemon layer. For presentation, you can re-dust before photos or parties.
- Rotate the Pan: Ovens have hot spots. Rotate the pan halfway through baking for even color and doneness.
Variations and Customizations: Make It Your Own!
While traditional lemon bars are timeless, feel free to get creative with these inspired twists:
1. Meyer Lemon Bars
Swap regular lemons for Meyer lemons—they’re sweeter, less acidic, and have floral notes. Reduce sugar by 1/4 cup for a more balanced flavor. The zest is thinner and more fragrant, adding elegance to every bite.
2. Vegan Lemon Bars
- Replace butter with vegan stick butter (like Earth Balance).
- Use flax eggs (1 tbsp ground flax + 3 tbsp water per egg) or commercial egg replacer.
- Ensure powdered sugar is vegan (some brands use bone char).
3. Gluten-Free Version
Substitute all-purpose flour with a 1:1 gluten-free blend (such as Bob’s Red Mill). Add 1/4 tsp xanthan gum if not included in the mix to help bind the crust.
4. Lavender-Infused Lemon Bars
Add 1/2 teaspoon culinary-grade dried lavender to the crust or infuse it into the melted butter before mixing. Strain if desired. Pairs beautifully with honey-sweetened versions.
5. Coconut-Lime Bars
Replace half the lemon juice with lime juice and add 1/2 cup toasted coconut to the crust. Top with lime zest and coconut flakes for tropical flair.
6. Berry Swirl Lemon Bars
Before baking the filling, drop spoonfuls of raspberry or strawberry puree on top and swirl with a toothpick. Adds color and a fruity twist.
7. Mini Lemon Bars
Use a muffin tin lined with parchment cups. Fill each with pre-baked crust and lemon mixture. Bake for 15–18 minutes. Perfect for parties!
8. Chocolate-Dipped Lemon Bars
After cutting, dip half of each bar in melted white or dark chocolate. Sprinkle with zest or sea salt for gourmet appeal.
9. Herb-Infused Variants
Try basil, thyme, or rosemary infused into the butter for a savory edge. Use sparingly—just a sprig while melting butter, then strain.
Health Considerations and Nutritional Value
Lemon bars are undeniably indulgent, but understanding their nutritional makeup helps you enjoy them mindfully.
Nutrition Facts (per 1 of 15 bars, approximate):
- Calories: ~220
- Total Fat: 12g (Saturated Fat: 7g)
- Cholesterol: 60mg
- Sodium: 80mg
- Total Carbohydrates: 27g (Dietary Fiber: 0.5g, Sugars: 18g)
- Protein: 2g
What to Know:
- High in Added Sugars: The filling relies heavily on granulated sugar. Those monitoring blood sugar may want to reduce sugar slightly or use erythritol-based substitutes (though texture may vary).
- Rich in Saturated Fat: Due to butter content. Consider using a portion of olive oil in the crust for heart-healthy fats, though flavor shifts.
- Source of Vitamin C: Thanks to fresh lemon juice—about 15–20% of daily value per serving.
- Gluten and Dairy Containing: Not suitable for those with celiac disease or lactose intolerance unless modified.
- Egg-Based: Contains animal protein and cholesterol. Not appropriate for strict vegans without substitution.
- Portion Control Matters: One square satisfies; larger pieces increase calorie load significantly.
Healthier Tweaks:
- Reduce sugar in filling by 1/4 cup and add a touch of honey or maple syrup for natural sweetness.
- Use half butter, half applesauce in the crust to lower fat content.
- Add chia seeds or oat flour for fiber boost (adjust liquid accordingly).
- Top with fresh berries instead of extra powdered sugar.
Frequently Asked Questions (FAQ)
Why did my lemon bars crack?
Cracking usually occurs from overbaking or rapid cooling. Remove from oven when the center still has a slight wobble. Avoid placing near drafts or opening the oven door frequently.
Can I make lemon bars ahead of time?
Yes! They keep well refrigerated for up to 5 days. In fact, they taste better the next day as flavors meld. Freeze for longer storage.
Why is my crust soggy?
You likely didn’t bake the crust long enough before adding the filling. Ensure it’s golden and firm to the touch. Also, don’t let the filling sit too long before baking.
Can I use lime or orange instead?
Absolutely! Limes make key lime bars (reduce sugar slightly). Oranges are sweeter—try with blood oranges for dramatic color. Adjust sugar to taste.
Can I double the recipe?
Yes, but use a larger pan (10×15-inch) or make two batches. Doubling in a 9×13 may require extended baking time and risks uneven cooking.
Are lemon bars safe to leave out?
No. Because they contain eggs and dairy, they should be refrigerated within 2 hours of baking.
How do I transport lemon bars?
Use an airtight container with parchment between layers. Dust with powdered sugar at destination to maintain appearance.
Can I use bottled lemon juice?
Not recommended. It lacks freshness and can taste metallic or flat. Fresh is always superior in both flavor and aroma.
Why did my filling not set?
Possible causes: underbaking, inaccurate measurements (especially flour/cornstarch), or cold filling poured onto a cooled crust. Always pour filling onto a warm crust and measure precisely.
Can I make them without eggs?
Yes, but the texture changes. Try agar-agar, silken tofu blended with lemon juice, or commercial egg replacers. Results vary.
Summary
Lemon bars with a shortbread crust are the ultimate balance of rich, buttery decadence and bright, citrusy tang—baked to perfection and chilled for clean slicing. A timeless dessert that brings sunshine to every bite, ideal for sharing at gatherings or savoring solo with a cup of tea.