No-Bake Oreo Dream Pie: A Decadent, Creamy Delight
Introduction
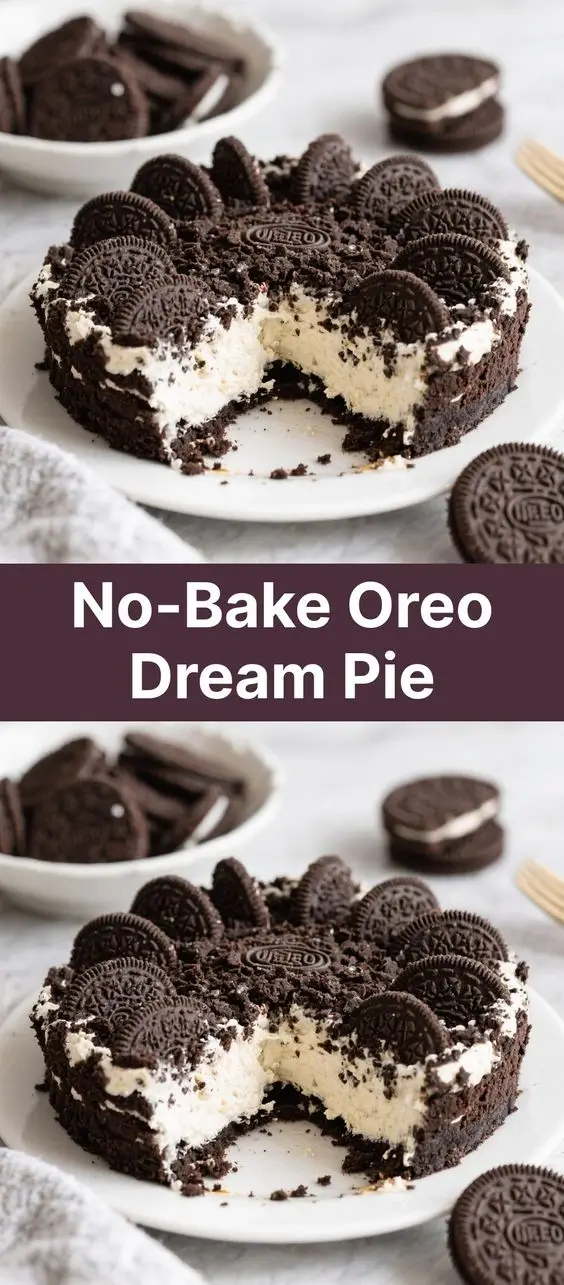
If you’re craving a dessert that’s rich, creamy, and effortlessly easy to make, the No-Bake Oreo Dream Pie is your ultimate go-to treat. This luscious pie combines the classic flavor of chocolate sandwich cookies with a silky, no-fuss filling that sets in the refrigerator—no oven required! Perfect for summer gatherings, potlucks, or simply satisfying a late-night sweet tooth, this dreamy confection delivers maximum indulgence with minimal effort. Whether you’re a seasoned baker or a kitchen novice, this recipe is guaranteed to impress without demanding hours in the kitchen.
The History
The origins of the No-Bake Oreo Dream Pie trace back to American home cooking traditions in the mid-20th century, when convenience and creativity merged in suburban kitchens. As refrigeration became widespread and processed ingredients like cream cheese, whipped topping, and ready-made cookie crusts gained popularity, no-bake desserts surged in favor. Recipes began circulating through women’s magazines, community cookbooks, and church fundraisers, emphasizing simplicity and crowd-pleasing flavors.
Oreo cookies, first introduced by Nabisco in 1912, quickly became a beloved staple. By the 1970s and 80s, their versatility inspired countless dessert innovations—including no-bake pies. The “Dream Pie” moniker likely emerged from its ethereal texture—light, fluffy, and almost too good to be true. Over time, variations evolved, but the core concept remained: crush Oreos, blend with creamy fillings, chill, and serve. Today, this nostalgic favorite enjoys renewed popularity on social media and food blogs, celebrated for its retro charm and irresistible taste.
Ingredients Breakdown
To truly appreciate the magic of the No-Bake Oreo Dream Pie, let’s explore each component and its role in creating the perfect balance of texture and flavor:
- Oreo Cookies (40–45 cookies): These form both the crust and the mix-ins. Their cocoa-infused wafers and sweet cream filling dissolve into the creamy base, delivering signature flavor and crunch.
- Butter (½ cup unsalted, melted): Binds the crust together, adding richness and helping it set firmly once chilled.
- Cream Cheese (16 oz, full-fat, softened): Provides body, tang, and smoothness. Full-fat ensures a velvety texture and prevents iciness.
- Heavy Whipping Cream (1½ cups): When whipped, it gives the pie its cloud-like fluffiness and helps it set properly.
- Powdered Sugar (½ cup): Sweetens without adding graininess; dissolves seamlessly into the filling.
- Vanilla Extract (1 tsp): Enhances overall flavor, rounding out the sweetness and complementing the chocolate notes.
- Cool Whip (8 oz tub, thawed): Adds airiness and stability. While optional, it extends shelf life and keeps the pie light.
Each ingredient plays a vital role—whether structural, textural, or flavorful—and substitutions should be made thoughtfully to preserve the pie’s iconic character.
Step-by-Step Recipe
- Prepare the Crust: In a food processor or sealed plastic bag, crush about 24 Oreo cookies (just the wafers—scrape off filling if desired, though most leave it in) into fine crumbs. Transfer to a bowl and mix with ½ cup melted butter until evenly moistened. Press the mixture firmly into the bottom and up the sides of a 9-inch pie dish using the back of a spoon or measuring cup. Chill in the refrigerator for at least 20 minutes to set.
- Whip the Cream Cheese: In a large mixing bowl, beat the softened cream cheese with an electric mixer on medium speed until smooth and creamy (about 2 minutes). Scrape down the sides as needed.
- Add Sweetener and Flavor: Gradually add the powdered sugar, beating on low at first to avoid clouds of sugar, then increasing to medium. Mix in the vanilla extract until fully incorporated.
- Whip the Heavy Cream: In a separate clean bowl, use a whisk attachment to beat the heavy cream until stiff peaks form. This step is crucial for volume and structure—don’t under-whip.
- Fold in Cream and Cool Whip: Gently fold half of the whipped cream into the cream cheese mixture until mostly combined. Add the remaining cream and the entire tub of thawed Cool Whip, folding gently with a spatula until smooth and uniform.
- Incorporate Crushed Oreos: Crush 12–15 additional Oreo cookies into small chunks or coarse crumbs. Fold them into the filling, reserving a few pieces for garnish if desired.
- Assemble the Pie: Pour the filling into the chilled crust, spreading evenly with a spatula. Smooth the top for a polished look.
- Chill Thoroughly: Cover loosely with plastic wrap and refrigerate for at least 6 hours, preferably overnight. This allows the filling to firm up and flavors to meld.
- Garnish and Serve: Before serving, decorate with extra crushed Oreos, whole cookies, or whipped cream rosettes. Slice with a warm knife for clean cuts.
Tips
- Use room temperature cream cheese: Cold cream cheese leads to lumps. Let it sit out for 30–60 minutes before starting.
- Don’t skip chilling the crust: A pre-chilled crust prevents sogginess and helps maintain structure.
- Whip cream to stiff peaks: Under-whipped cream results in a dense, soft filling. Ensure peaks hold their shape when the whisk is lifted.
- Fold, don’t stir: When combining whipped cream and filling, use a gentle folding motion to preserve airiness.
- Chill the pie dish beforehand: For faster setting, place the pie dish in the freezer for 10 minutes before assembling.
- Prevent weeping: Avoid overmixing after adding Cool Whip, and always cover the pie directly with plastic wrap touching the surface to prevent condensation.
- Slice cleanly: Dip a sharp knife in hot water and wipe dry between cuts for neat slices.
- Make ahead friendly: This pie can be made 2–3 days in advance. Store covered in the fridge.
Variations and Customizations
The beauty of the No-Bake Oreo Dream Pie lies in its adaptability. Here are some creative twists to suit different tastes and occasions:
- Double Chocolate Version: Use chocolate cream cheese or add ¼ cup cocoa powder to the filling. Top with chocolate shavings.
- Peanut Butter Swirl: Swirl ½ cup melted peanut butter or peanut butter cup pieces into the filling before chilling.
- Mint Oreo Dream Pie: Substitute mint-flavored sandwich cookies or add ¼ tsp peppermint extract to the filling.
- Cookie Dough Lover’s: Fold in edible cookie dough bits or mini chocolate chips along with the Oreos.
- Fruity Twist: Layer with fresh raspberries or strawberries at the base before adding the filling.
- S’mores Style: Use graham cracker crust, mix in crushed graham crackers, and top with toasted marshmallows and chocolate drizzle.
- Dairy-Free/Vegan Option: Use plant-based cream cheese (e.g., Kite Hill), coconut cream instead of heavy cream, and vegan Oreos with dairy-free butter.
- Gluten-Free: Substitute gluten-free chocolate sandwich cookies and ensure all ingredients are certified GF.
- Mini Jar Pies: Make individual servings in mason jars or parfait glasses—perfect for parties!
- Boozy Upgrade: Add 1–2 tbsp Baileys, Kahlua, or bourbon to the filling for an adult twist.
Health Considerations and Nutritional Value
While undeniably delicious, the No-Bake Oreo Dream Pie is a dessert best enjoyed in moderation due to its high sugar, fat, and calorie content. Here’s a general nutritional breakdown per slice (based on 8 servings):
- Calories: ~450–500
- Total Fat: 28–32g (mostly saturated from butter, cream, and cream cheese)
- Carbohydrates: 45–50g
- Sugars: 30–35g (primarily from Oreos, powdered sugar, and fillings)
- Protein: 4–6g
- Sodium: 300–400mg
Considerations:
- High in Saturated Fat: Heavy cream and butter contribute significantly. Opt for reduced-fat cream cheese or Greek yogurt substitutes if desired, though texture may change.
- Sugar Content: Contains added sugars from multiple sources. To reduce, try using low-sugar Oreos and cutting powdered sugar to ⅓ cup.
- Allergens: Contains dairy, wheat/gluten, and soy (in most Oreos). Always check labels for allergen statements.
- Dietary Modifications: Suitable for occasional indulgence in balanced diets. Not recommended for low-carb, keto, or diabetic diets unless significantly altered.
- Portion Control: Serve smaller slices with fresh berries to balance richness.
Ingredients
- 40–45 Oreo cookies, divided
- ½ cup (1 stick) unsalted butter, melted
- 16 oz (2 packages) full-fat cream cheese, softened
- ½ cup powdered sugar, sifted
- 1½ cups heavy whipping cream, cold
- 1 teaspoon pure vanilla extract
- 8 oz (1 tub) frozen whipped topping (e.g., Cool Whip), thawed
Directions
- Crush 24 Oreo cookies into fine crumbs using a food processor or rolling pin in a sealed bag. Mix with melted butter until combined.
- Press mixture firmly into a 9-inch pie dish, covering bottom and sides evenly. Refrigerate for 20 minutes.
- In a large bowl, beat cream cheese with an electric mixer until smooth (about 2 minutes).
- Add powdered sugar and vanilla extract; beat on low until incorporated, then increase to medium until creamy.
- In another bowl, whip the heavy cream until stiff peaks form.
- Fold half the whipped cream into the cream cheese mixture. Then gently fold in the remaining cream and thawed Cool Whip until smooth.
- Fold in 12–15 crushed Oreos (coarsely broken).
- Pour filling into the chilled crust and spread evenly. Smooth the top with a spatula.
- Cover with plastic wrap, ensuring it touches the surface to prevent cracks. Refrigerate for at least 6 hours or overnight.
- Before serving, garnish with additional crushed Oreos or whipped cream. Slice and enjoy cold.
FAQ
Can I make this pie ahead of time?
Yes! This pie keeps well for 3–4 days in the refrigerator. Make it 1–2 days in advance for best flavor development.
Can I freeze No-Bake Oreo Dream Pie?
Yes, but texture may slightly change. Wrap tightly in plastic and foil. Freeze for up to 1 month. Thaw in the refrigerator for 4–6 hours before serving.
Why is my pie runny?
Possible causes: under-whipped cream, warm ingredients, or insufficient chilling time. Ensure cream is cold and whipped to stiff peaks, and chill for at least 6 hours.
Can I use homemade whipped cream instead of Cool Whip?
Absolutely. Replace the Cool Whip with an additional 1 cup of whipped cream. The pie will be richer and less stable over several days, so consume within 2–3 days.
Do I need to remove the Oreo filling for the crust?
Not necessary. Most people keep the filling for extra sweetness and binding. Removing it yields a more intense chocolate crust but may require slightly more butter.
Can I make this without cream cheese?
Traditional texture relies on cream cheese. For alternatives, try mascarpone or a blend of Greek yogurt and cream cheese, though results may vary.
How many Oreos do I need total?
Approximately 40–45: 24 for the crust and 12–15 folded into the filling. Extra for garnish as desired.
Can I use low-fat ingredients?
You can, but the pie may not set as firmly and could lack richness. Low-fat cream cheese and milk-based whipped toppings often result in a softer, sometimes watery texture.
Summary
The No-Bake Oreo Dream Pie is a heavenly fusion of crunchy chocolate crust, creamy filling, and nostalgic flavor—effortlessly assembled and unforgettable in every bite.
Perfect for any occasion, this make-ahead marvel proves that the simplest desserts often leave the sweetest dreams.