Introduction
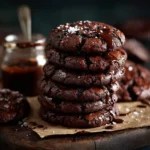
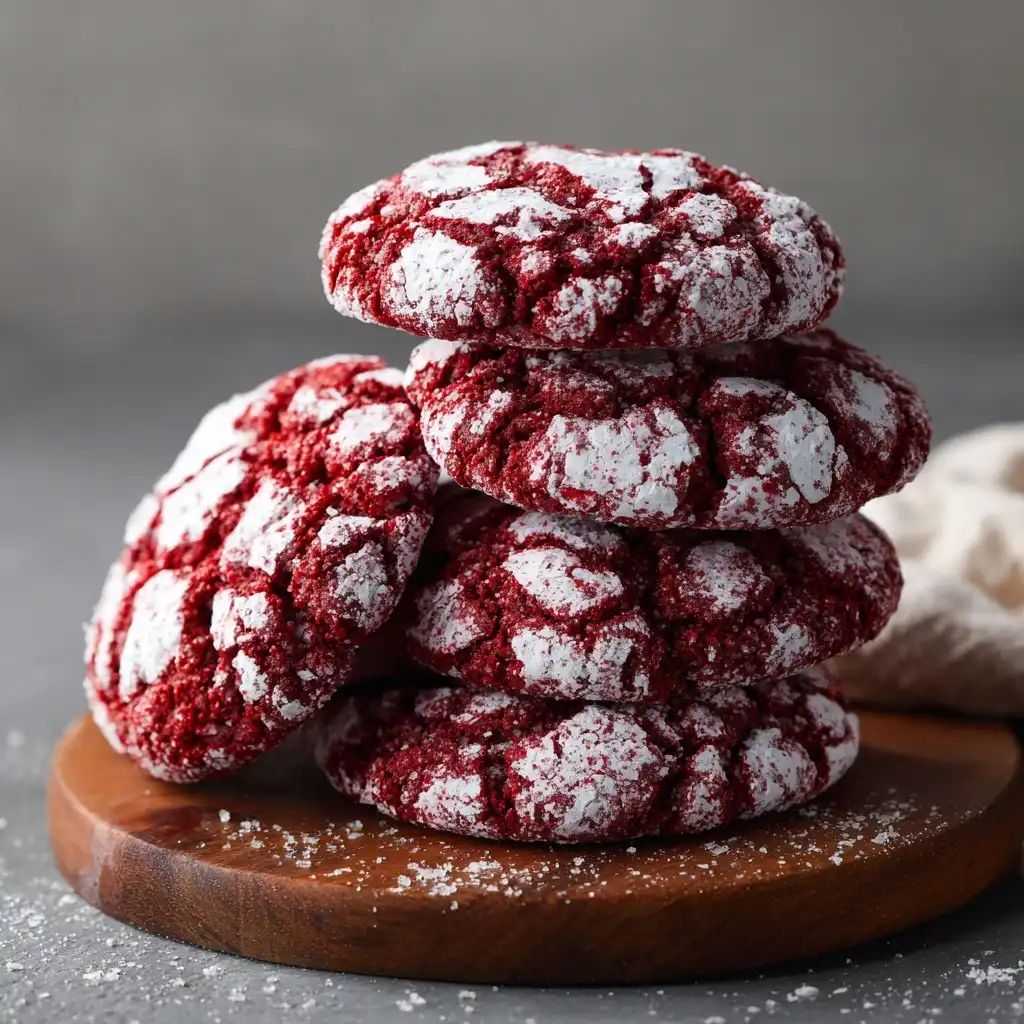
Red Velvet Crinkle Cookies are a dazzling fusion of two beloved American classics: the rich, cocoa-kissed elegance of red velvet cake and the irresistible, crackled charm of crinkle cookies. With their deep crimson hue, velvety crumb, subtle tang from buttermilk or vinegar, and signature snowy dusting of powdered sugar that fractures into delicate, web-like crevices as they bake, these cookies deliver visual drama and sensory delight in every bite. More than just festive holiday fare, they’ve evolved into year-round staples—adorned on bakery display cases, featured in food magazines, and recreated in home kitchens from coast to coast. Their allure lies not only in their photogenic appearance but also in their sophisticated balance: not overly sweet, deeply chocolatey yet uniquely tart, tender without being cakey, and luxuriously soft with just enough structural integrity to hold their iconic crinkles. Whether served at a Valentine’s Day soirée, a Christmas cookie swap, or simply as an indulgent midweek treat, Red Velvet Crinkle Cookies embody celebration, nostalgia, and refined confectionery craftsmanship—all baked into one perfect, crumbling, sugar-dusted morsel.
The History
The origins of Red Velvet Crinkle Cookies are best understood as a delicious convergence of culinary evolution rather than a single documented invention. To trace their lineage, we must first revisit the storied past of their foundational elements. Red velvet cake emerged in the early 20th century—likely in the American South—where natural cocoa (rich in anthocyanins) reacted with acidic ingredients like buttermilk and vinegar, producing a subtle reddish tint. The advent of beetroot juice as a natural colorant in Depression-era baking further deepened this hue, while the post–World War II introduction of synthetic red food coloring (especially after the 1940s, when Adams Extract launched its iconic red dye) cemented the cake’s vibrant identity. Meanwhile, crinkle cookies—characterized by their cracked, parchment-like surface—gained popularity in the 1950s and ’60s, often appearing in community cookbooks and women’s magazines as easy, elegant drop cookies whose dramatic appearance belied their simple preparation. The marriage of these two concepts likely began organically in home kitchens during the 1980s and ’90s, as bakers experimented with adapting red velvet cake batter into cookie form. However, it wasn’t until the rise of food blogging (mid-2000s), Pinterest-driven recipe sharing (early 2010s), and viral social media moments—like a 2013 viral Instagram post featuring crimson cookies glistening under studio lighting—that Red Velvet Crinkle Cookies exploded into mainstream consciousness. Major brands took note: Betty Crocker released a limited-edition Red Velvet Cookie Mix in 2015; Magnolia Bakery added them to seasonal menus; and grocery chains like Kroger and Target began stocking red velvet–flavored baking kits. Today, they stand as a cultural touchstone—a testament to how tradition, technology, and taste converge to create something both deeply nostalgic and unmistakably modern.
Ingredients Breakdown
Every exceptional Red Velvet Crinkle Cookie begins with intentionality—not just in measurement, but in understanding the functional role each ingredient plays in texture, color, flavor, and structure:
- Unsalted Butter (1 cup / 2 sticks, softened): Provides richness, moisture, and flakiness in the crumb. Softened (not melted) butter ensures proper creaming with sugar for optimal aeration and lift. European-style butter (higher fat content) yields even more tenderness.
- Granulated Sugar (1 cup): Adds sweetness and aids in creaming to incorporate air. Its coarse crystals help create micro-tunnels during baking—contributing to the crinkled surface.
- Brown Sugar (½ cup, packed light or dark): Introduces molasses notes, moisture retention, and chewiness. Dark brown sugar adds deeper caramel complexity; light offers subtler warmth.
- Egg (1 large, room temperature): Acts as binder and emulsifier. Room temperature ensures uniform incorporation and prevents curdling. The yolk contributes fat and richness; the white adds slight structure.
- Vanilla Extract (2 tsp, pure): Enhances aromatic depth and rounds out acidity. Avoid imitation vanilla—it lacks nuance and can clash with the cocoa’s bitterness.
- Distilled White Vinegar (1 tsp) or Apple Cider Vinegar (1 tsp): The secret catalyst. Reacts with baking soda to produce carbon dioxide (leavening), while also enhancing the red color by activating cocoa’s natural pigments (anthocyanins). Must be paired with baking soda—not powder—for full effect.
- Buttermilk (2 tbsp, full-fat, room temperature): Adds tang, tenderness, and moisture. Its acidity works synergistically with vinegar and cocoa. For dairy-free versions, use cultured coconut milk or lemon-milk substitute (1 tsp lemon juice + 1 tbsp non-dairy milk, rested 5 minutes).
- Unsweetened Natural Cocoa Powder (¼ cup, NOT Dutch-processed): Critical for authentic red velvet color and flavor. Natural cocoa is acidic and reacts with vinegar/baking soda to deepen red tones. Dutch-processed cocoa is alkalized and neutral—resulting in muted color and flat flavor. Recommended brands: Hershey’s Natural, Ghirardelli Natural, or Valrhona Cocoa Powder.
- All-Purpose Flour (2¼ cups, spooned & leveled): Provides gluten structure. Too much leads to toughness; too little causes spreading. Spooning (not scooping) prevents compaction. For gluten-free adaptation, use a 1:1 GF blend with xanthan gum (e.g., Bob’s Red Mill or King Arthur).
- Baking Soda (½ tsp): Leavening agent activated by acid (vinegar + buttermilk + cocoa). Essential for lift and crinkle formation. Do not substitute with baking powder unless reformulating entirely—baking powder contains its own acid and won’t yield the same reaction or color boost.
- Salt (¾ tsp, fine sea or kosher): Balances sweetness and intensifies all flavors. A small but indispensable element—omit at your peril.
- Red Food Coloring (1–2 tbsp liquid, or 1½ tsp gel): The chromatic cornerstone. Gel coloring (Wilton, AmeriColor, Chefmaster) is highly concentrated and introduces minimal extra liquid—preserving dough consistency and maximizing vibrancy. Liquid coloring requires larger quantities, increasing moisture and risking spread. “No-dye” versions exist using beet powder (2 tbsp), but color is earthier and less intense; add 1 tsp extra vinegar to brighten.
- Powdered Sugar (1½ cups, sifted, for rolling): Creates the signature snow-draped crinkle. Sifting eliminates lumps that could inhibit even coating. Confectioners’ sugar’s fine granulation melts slightly on the hot cookie surface, then re-crystallizes into delicate fissures as it cools. For vegan versions, ensure it’s bone-char free (e.g., Wholesome Organic or Florida Crystals).
Step-by-Step Recipe
- Prepare Your Workspace: Line two large baking sheets with parchment paper or silicone baking mats. Preheat oven to 350°F (175°C). Position racks in upper and lower thirds for even heat circulation. Place 1½ cups powdered sugar in a wide, shallow bowl—sift if lumpy—and set aside.
- Cream Butter & Sugars: In a large bowl of a stand mixer fitted with paddle attachment (or use hand mixer), beat softened unsalted butter, granulated sugar, and brown sugar on medium-high speed for 3–4 minutes until pale, fluffy, and thoroughly combined. Scrape down bowl halfway through. Proper creaming incorporates air—essential for lift and crinkling.
- Add Wet Ingredients: Beat in room-temperature egg until fully incorporated (~30 seconds). Add pure vanilla extract and mix 15 seconds more. Then, beat in distilled white vinegar and buttermilk—mix just until smooth and homogenous (no more than 20 seconds). Overmixing at this stage develops excess gluten and dulls crinkles.
- Whisk Dry Ingredients: In a separate medium bowl, whisk together natural unsweetened cocoa powder, all-purpose flour, baking soda, and salt until no streaks remain. This step ensures even distribution and prevents pockets of leavening or salt.
- Combine Wet & Dry: Gradually add dry mixture to wet mixture in three additions, mixing on low speed *just* until no dry flour remains after each addition. Pause mixer and scrape bowl thoroughly between additions. The dough will be thick, glossy, and slightly sticky—do not overmix. Overworked dough becomes dense and resists cracking.
- Incorporate Color: Add red food coloring in two stages: first 1 tbsp (or 1 tsp gel), mix on low 10 seconds. Assess intensity. Add remaining coloring incrementally until desired deep ruby-red hue is achieved. Gel colors require less volume; liquid may necessitate up to 2 tbsp. Note: Dough will appear darker than final baked cookie—color intensifies with heat.
- Chill the Dough: Cover bowl tightly with plastic wrap and refrigerate for *minimum 2 hours*, ideally 3–4 hours or overnight. Chilling solidifies butter, preventing excessive spread, firms dough for easier handling, and allows flavors to meld. It also hydrates the flour fully—critical for clean crinkles.
- Portion & Roll: Using a 1.5-tablespoon cookie scoop or rounded tablespoon, portion chilled dough into balls (~1.5 inches in diameter). Working with 4–6 balls at a time (to prevent warming), gently roll each firmly between palms into smooth spheres. Immediately drop into powdered sugar and roll thoroughly until completely coated—press lightly to adhere sugar. Return coated balls to parchment-lined sheet, spacing 2 inches apart. Re-coat any thinly covered areas.
- Bake Strategically: Bake one sheet at a time in preheated 350°F oven for 11–13 minutes. Rotate sheet front-to-back at 8 minutes for even browning. Cookies are done when edges are set and tops appear puffed and cracked—but centers still look soft and slightly underbaked. They will continue to set as they cool. Overbaking yields dry, hard cookies with diminished crinkles.
- Cool Completely: Remove sheet from oven and let cookies rest undisturbed on parchment for 5 minutes—this allows internal structure to stabilize. Then, carefully transfer with a thin spatula to wire racks. Cool completely (at least 30 minutes) before serving. Warm cookies are fragile; cooling sets the crinkles permanently.
Tips
- Temperature Is Non-Negotiable: Butter must be softened to 65–68°F—cool to the touch but yielding to gentle pressure. Too warm = greasy, flat cookies. Too cold = poor creaming = dense texture. Use an instant-read thermometer for precision.
- Measure Flour Correctly: Spoon flour into measuring cup, then level with straight edge. Scooping packs flour, adding up to 25% extra—and guaranteeing tough, dry cookies.
- Gel > Liquid Coloring: Invest in high-quality gel food coloring. It delivers superior color saturation without altering dough hydration. Liquid dyes dilute the batter, encouraging spread and weakening crinkle definition.
- Chill Twice for Perfection: After initial chilling, re-chill rolled, sugar-coated cookies for 10 minutes before baking. This extra step locks in shape, maximizes crinkle contrast, and prevents sugar from melting prematurely.
- Baking Sheet Matters: Use heavy-gauge, light-colored aluminum sheets. Dark sheets absorb excess heat → burnt bottoms. Thin sheets warp and conduct unevenly → inconsistent bake. Never bake on insulated sheets—they inhibit bottom heat needed for crinkling.
- Don’t Skip the Rest: Letting cookies sit 5 minutes post-bake is crucial. Removing them too soon breaks the delicate sugar crust; waiting too long makes them stick. Set a timer!
- Revive Stale Crinkles: If cookies lose crispness, place on parchment and bake at 300°F for 3–4 minutes. The sugar recrystallizes, restoring visual and textural contrast.
- Freeze Like a Pro: Portion unrolled dough balls, freeze solid on tray, then bag. When ready, roll frozen balls in powdered sugar (they’ll hold shape better) and bake 1–2 minutes longer. No thawing needed.
- Consistency Check: Ideal dough should hold its shape when scooped, feel tacky but not wet, and slowly indent when pressed—not ooze. If too soft, chill 15–30 minutes. If crumbly, add ½ tsp buttermilk and knead gently.
- Oven Thermometer Required: Most home ovens run hot or cold. An inexpensive oven thermometer ensures accurate 350°F—deviations of ±25°F dramatically affect spread and crinkle formation.
Variations and Customizations
Red Velvet Crinkle Cookies are a canvas for creativity—respecting their core identity while inviting thoughtful innovation:
- White Chocolate Chunk: Fold in 1 cup high-quality white chocolate chunks (not chips) after combining wet and dry ingredients. Their creamy sweetness complements the tangy cocoa and creates melty pockets.
- Double Chocolate Swirl: Melt 4 oz semisweet chocolate with 1 tbsp coconut oil. Drop teaspoonfuls onto dough balls before rolling in powdered sugar. Swirl gently with toothpick for marbled effect—bakes into rich veins.
- Maple Pecan: Replace brown sugar with an equal amount of pure maple syrup (reduce buttermilk by 1 tbsp) and fold in ¾ cup toasted, chopped pecans. Adds autumnal warmth and crunch.
- Espresso-Infused: Dissolve 1 tsp instant espresso powder in the buttermilk before adding to batter. Deepens chocolate notes without adding bitterness—ideal for coffee lovers.
- Gluten-Free: Substitute 2¼ cups certified gluten-free 1:1 baking flour (with xanthan gum). Add ¼ tsp additional xanthan gum if blend doesn’t include it. Chill dough 30 minutes longer.
- Vegan: Use vegan butter (Miyoko’s or Earth Balance), flax egg (1 tbsp ground flax + 2.5 tbsp water, rested 5 min), plant-based buttermilk (soy or oat milk + 1 tsp vinegar), and vegan powdered sugar. Ensure cocoa and coloring are vegan-certified.
- Mini Crinkles: Use a 1-teaspoon scoop for bite-sized versions. Bake 7–9 minutes. Perfect for parties or portion control—yields ~60 cookies.
- Lemon-Rose: Replace vinegar with fresh lemon juice, add 1 tbsp rose water with vanilla, and garnish cooled cookies with edible rose petals and lemon zest. A floral-citrus twist ideal for spring.
- Spiced Velvet: Add ½ tsp ground cinnamon, ¼ tsp ground cardamom, and a pinch of black pepper to dry ingredients. Warm, complex, and unexpected.
- Stuffed Surprise: Flatten dough ball, place ½ tsp cream cheese filling (full-fat, room temp, mixed with 1 tsp powdered sugar and pinch of salt), seal, and roll. Bakes into gooey, tangy center.
Health Considerations and Nutritional Value
While Red Velvet Crinkle Cookies are inherently indulgent, mindful preparation allows for thoughtful enjoyment within a balanced diet. A standard 2.5-inch cookie (recipe yields ~24) contains approximately:
- Calories: 180–210 kcal
- Total Fat: 9–11g (5–6g saturated)
- Carbohydrates: 25–28g (18–21g sugars)
- Protein: 2–3g
- Fiber: <1g (increases with whole wheat or oat flour substitutions)
- Sodium: 110–130mg
Key Considerations:
- Sugar Content: Two types of sugar (granulated + brown) plus powdered sugar contribute significantly to total sugars. To reduce: decrease granulated sugar by ¼ cup and add 1 tbsp unsweetened applesauce for moisture; or replace brown sugar with coconut sugar (same volume, lower glycemic index).
- Food Coloring Safety: FDA-approved red dyes (Red #40) are deemed safe for consumption in typical amounts. However, sensitive individuals (especially children) may experience mild behavioral responses. Natural alternatives include beet juice (adds earthy note), raspberry purée (reduces sugar, adds vitamin C), or spirulina (for violet undertones—pair with extra cocoa).
- Butter vs. Oil: Butter provides superior flavor and texture. Substituting with neutral oil (e.g., avocado) yields greasier, less structured cookies. If reducing saturated fat, opt for grass-fed butter (higher in CLA and omega-3s) rather than margarine.
- Flour Options: Whole wheat pastry flour (substitute ½ cup for AP) adds fiber and B vitamins without heaviness. Oat flour (¼ cup) boosts soluble fiber and promotes satiety.
- Portion Mindfulness: Their visual impact encourages slower, more intentional eating—a built-in pause that supports satisfaction with smaller servings. Serve 1–2 per person alongside herbal tea or sparkling water.
- Allergen Notes: Naturally nut-free and soy-free (if using soy-free butter). Always verify labels on food coloring, cocoa, and powdered sugar for allergen statements.
- Dietary Accommodations: These cookies adapt beautifully to keto (almond/coconut flour + erythritol + beet powder), paleo (tigernut flour + maple sugar + carob), or low-FODMAP (lactose-free butter + coconut sugar + certified low-FODMAP cocoa) frameworks—with appropriate recipe recalibration.
Ultimately, nutrition is contextual. Enjoyed occasionally as part of a varied, whole-food-based diet—and paired with movement, hydration, and joy—their psychological benefits (comfort, celebration, connection) hold meaningful value beyond macronutrients.
Ingredients
- 1 cup (227g) unsalted butter, softened to 65–68°F
- 1 cup (200g) granulated sugar
- ½ cup (100g) packed light brown sugar
- 1 large egg, room temperature
- 2 teaspoons pure vanilla extract
- 1 teaspoon distilled white vinegar
- 2 tablespoons (30ml) full-fat buttermilk, room temperature
- ¼ cup (20g) natural unsweetened cocoa powder (NOT Dutch-processed)
- 2¼ cups (270g) all-purpose flour, spooned & leveled
- ½ teaspoon baking soda
- ¾ teaspoon fine sea salt
- 1–2 tablespoons (15–30ml) liquid red food coloring or 1½ teaspoons high-quality red gel food coloring
- 1½ cups (180g) powdered sugar, sifted (for rolling)
Directions
- Line two large baking sheets with parchment paper or silicone baking mats. Preheat oven to 350°F (175°C). Arrange oven racks in upper and lower thirds.
- In the bowl of a stand mixer fitted with paddle attachment, combine softened butter, granulated sugar, and brown sugar. Beat on medium-high speed for 3–4 minutes until light, fluffy, and pale in color. Scrape down sides and bottom of bowl halfway through.
- Add egg, vanilla extract, vinegar, and buttermilk. Beat on medium speed for 45–60 seconds until fully combined and smooth. Do not overmix.
- In a separate medium bowl, whisk together cocoa powder, flour, baking soda, and salt until thoroughly blended and no streaks remain.
- Gradually add dry ingredients to wet ingredients in three equal portions, mixing on low speed after each addition just until no dry flour is visible. Scrape bowl well between additions. Batter will be thick and cohesive.
- Add red food coloring in two stages, mixing on low for 10 seconds after each addition, until deep, even ruby-red color is achieved. Gel coloring typically requires 1½ tsp; liquid may need up to 2 tbsp.
- Cover bowl tightly with plastic wrap and refrigerate dough for at least 2 hours, or up to 72 hours for optimal flavor development and texture.
- When ready to bake, place 1½ cups sifted powdered sugar in a wide, shallow bowl. Scoop chilled dough using a 1.5-tablespoon cookie scoop (about 30g per ball). Roll each portion firmly between palms into a smooth sphere.
- Immediately place dough ball into powdered sugar and roll thoroughly until completely coated. Gently press to adhere sugar. Place on prepared baking sheet, spaced 2 inches apart. Repeat, re-coating any thinly covered areas.
- Bake one sheet at a time in preheated 350°F oven for 11–13 minutes. Rotate sheet front-to-back at 8 minutes. Cookies are done when edges are set, tops are puffed and deeply cracked, and centers appear soft but not wet.
- Remove sheet from oven and let cookies rest undisturbed on parchment for exactly 5 minutes. Then, carefully transfer to wire cooling racks using a thin, flexible spatula. Cool completely (30+ minutes) before serving.
- Store cooled cookies in an airtight container at room temperature for up to 5 days. For longer storage, freeze in single layers separated by parchment for up to 3 months. Thaw at room temperature 15 minutes before serving.
FAQ
- Why aren’t my cookies cracking?
- Most commonly due to insufficient chilling (dough too warm), inadequate powdered sugar coating (too thin or uneven), or incorrect oven temperature (too low). Ensure dough is chilled ≥2 hours, roll generously in sifted powdered sugar, and verify oven temp with thermometer.
- Can I use Dutch-process cocoa?
- No. Dutch-process cocoa is alkalized and neutral in pH—it will not react with vinegar and baking soda, resulting in dull color, flat flavor, and weak rise. Natural cocoa is essential.
- My cookies spread too much—what went wrong?
- Over-softened butter, insufficient chilling, excess liquid (too much food coloring or buttermilk), or warm baking sheets are common culprits. Chill dough thoroughly, measure liquids precisely, and always use cool, parchment-lined sheets.
- Can I make these ahead of time?
- Absolutely. Chilled dough keeps refrigerated for 5 days or frozen for 3 months. Baked cookies stay fresh in airtight containers for 5 days—or freeze for 2 months. For best crinkles, bake from frozen (add 1–2 min to bake time).
- Why does the recipe call for vinegar AND buttermilk?
- Both provide acidity to activate baking soda for maximum lift and to enhance the red pigment in natural cocoa. Together, they create a more complex tang and superior crinkle formation than either alone.
- Are Red Velvet Crinkle Cookies the same as Red Velvet Cake Cookies?
- Not quite. Traditional “Red Velvet Cake Cookies” often aim to mimic cake texture—lighter, cakier, sometimes leavened with baking powder. Crinkle cookies prioritize dense-yet-tender crumb, pronounced cracks, and bold color—achieved through specific ratios and technique.
- Can I use a different food coloring brand?
- Yes—but performance varies. Wilton gel works reliably. For brighter, more stable hues, professional-grade gels (AmeriColor Super Red, Chefmaster Liqua-Gel) are preferred. Avoid “no-stain” or washable dyes—they lack pigment strength.
- How do I prevent the powdered sugar from disappearing?
- Roll generously and press gently to adhere. Ensure cookies are chilled before rolling. If sugar seems to vanish during baking, your oven may be too hot—try lowering to 340°F and extending bake time by 1 minute.
- What’s the best way to transport these for gifting?
- Layer cookies between parchment or wax paper in a rigid tin or box. Include a silica gel packet to absorb ambient moisture and preserve crinkle integrity. Avoid plastic bags—they trap humidity and soften edges.
- Can I add cream cheese frosting?
- Traditionally, no—the crinkle’s magic lies in its simplicity. However, for special occasions, pipe a tiny dot (¼ tsp) of stabilized cream cheese frosting (not whipped) onto fully cooled cookies. Refrigerate 15 minutes before serving to set.
Summary
Red Velvet Crinkle Cookies are a masterclass in contrast—vibrant yet refined, tender yet textured, nostalgic yet innovative—born from the alchemy of natural cocoa, acid, and precise temperature control.
With their signature crimson crags dusted in snowy sugar, they deliver not just flavor, but feeling: celebration in every crack, comfort in every crumb, and the quiet joy of baking executed with care and confidence.