Introduction
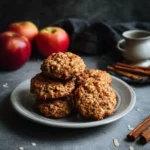
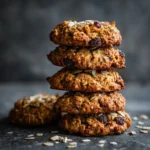
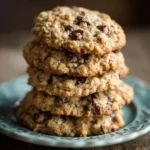
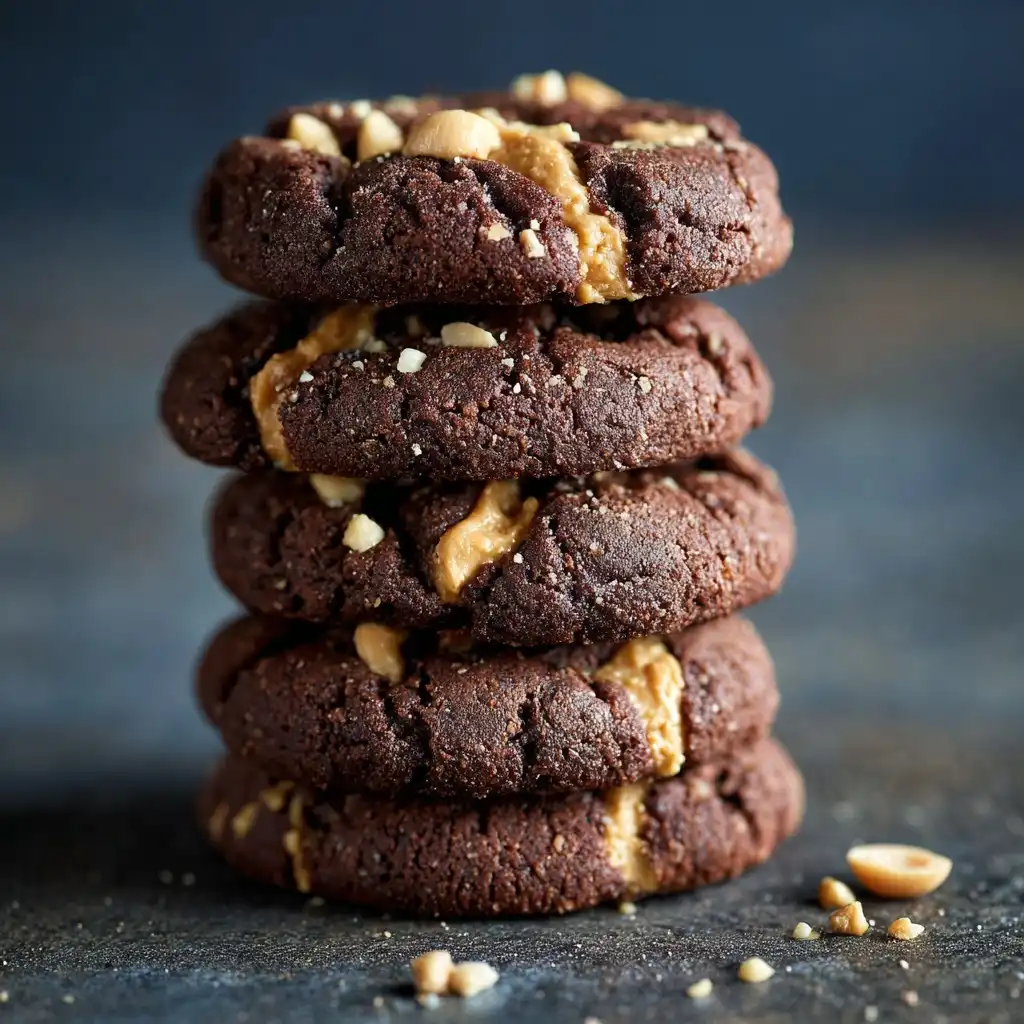
Chocolate Peanut Butter Cookies are the ultimate marriage of two beloved American flavors—rich, velvety chocolate and creamy, salty-sweet peanut butter. These cookies strike a perfect balance between indulgence and comfort: chewy edges, soft centers, deep cocoa notes, and bursts of nutty richness in every bite. Whether you’re baking for a school bake sale, a cozy Sunday afternoon treat, or an elegant dessert platter with a gourmet twist, this recipe delivers consistent, crowd-pleasing results. Their nostalgic charm evokes childhood lunchboxes and holiday cookie swaps, yet their sophisticated texture and layered flavor profile make them worthy of modern, mindful baking. With pantry-friendly ingredients and adaptable techniques, they’re as approachable for first-time bakers as they are rewarding for seasoned home chefs.
The History
The origins of Chocolate Peanut Butter Cookies trace back to the early-to-mid 20th century—a golden era of American culinary innovation fueled by ingredient accessibility, wartime rationing ingenuity, and the rise of branded pantry staples. Peanut butter, patented by Dr. John Harvey Kellogg in 1895 and popularized by companies like Skippy (1932) and Jif (1956), became a protein-rich, shelf-stable staple during the Great Depression and WWII. Simultaneously, mass-produced cocoa powder and semi-sweet chocolate chips (Nestlé’s Toll House breakthrough in 1939) democratized chocolate baking. While no single “inventor” is credited, early printed versions appeared in community cookbooks from the 1940s—often titled “Peanut Butter Chocolate Drop Cookies” or “Fudge-Nut Bars”—featuring simplified, egg-free, or shortening-based formulas adapted for scarcity. By the 1960s and ’70s, glossy food magazines and Betty Crocker publications elevated the combo into mainstream dessert culture, frequently pairing it with innovations like crisscross fork patterns (borrowed from classic peanut butter cookies) and double-chocolate upgrades (cocoa + chips). Today, the cookie symbolizes American fusion baking at its most intuitive—and continues to evolve through vegan reinterpretations, gluten-free adaptations, and artisanal small-batch variations featuring heirloom cocoa and stone-ground nut butters.
Ingredients Breakdown
Understanding each ingredient’s functional role ensures consistent success—and empowers confident customization:
- All-Purpose Flour (2 ¼ cups / 280g): Provides essential gluten structure for chewiness without toughness. Measured correctly (spoon-and-level method) prevents dryness; over-measuring is the #1 cause of crumbly cookies.
- Unsweetened Natural Cocoa Powder (¾ cup / 75g): Use Dutch-processed for mellow acidity and deep color, or natural for brighter, fruitier notes. Sifted to eliminate lumps and ensure even dispersion.
- Baking Soda (1 tsp): Reacts with acidic components (brown sugar, cocoa, peanut butter) to lift and spread. Critical for that signature crinkled top and tender crumb.
- Salt (1 tsp fine sea salt): Enhances all flavors, balances sweetness, and strengthens gluten slightly. Do not omit—even in “sweet” cookies, salt is foundational.
- Unsalted Butter (1 cup / 227g, softened): Adds richness, moisture, and flakiness when creamed properly. Softened to 65–68°F (18–20°C)—cool to the touch but yielding to gentle pressure. Salted butter may be substituted, but reduce added salt by ¼ tsp.
- Firmly Packed Light Brown Sugar (1 cup / 220g): Moisture-rich molasses content yields chewiness and caramel depth. Dark brown sugar increases intensity and softness; granulated sugar alone would create crispier, thinner cookies.
- Granulated Sugar (½ cup / 100g): Promotes spreading and adds delicate crunch to edges while balancing brown sugar’s density.
- Creamy Peanut Butter (1 cup / 250g): Must be *standard shelf-stable* (e.g., Jif, Skippy, Peter Pan) — not natural/oil-separated types, which add excess grease and cause overspreading. Stir well before measuring. Crunchy peanut butter adds delightful texture variation (see Variations).
- Large Eggs (2, room temperature): Bind ingredients, add structure via proteins, and contribute moisture and emulsification. Cold eggs can seize butter; room temp ensures smooth, homogenous batter.
- Pure Vanilla Extract (2 tsp): Elevates aroma and rounds out chocolate-peanut butter notes. Imitation vanilla lacks complexity and may taste artificial under heat.
- Semi-Sweet Chocolate Chips (1 ½ cups / 270g): High-quality chips (Ghirardelli, Guittard, or chopped baking bars) contain more cocoa butter for superior melt and shine. Mini chips distribute more evenly; dark chocolate (60–70%) deepens bitterness; milk chocolate adds sweetness and creaminess.
- Optional Add-Ins: Flaky sea salt for finishing, roasted peanuts for crunch, espresso powder (1 tsp) to intensify chocolate, or a tablespoon of bourbon for nuanced warmth.
Step-by-Step Recipe
- Prep & Preheat: Line two large baking sheets with parchment paper or silicone baking mats. Position oven racks in upper and lower thirds. Preheat oven to 350°F (175°C). Allow all ingredients—especially butter and eggs—to reach room temperature (65–70°F) for optimal emulsification.
- Whisk Dry Ingredients: In a medium bowl, sift together flour, cocoa powder, baking soda, and salt. Whisk vigorously for 30 seconds to fully aerate and combine. Set aside.
- Cream Butter & Sugars: In a large bowl using a stand mixer fitted with paddle attachment (or hand mixer), beat softened butter on medium speed for 1 minute until smooth and shiny. Add both sugars and beat on medium-high for 3–4 minutes until light, fluffy, and pale in color—scraping bowl halfway. This step incorporates air critical for lift and texture.
- Incorporate Peanut Butter & Wet Ingredients: Add peanut butter and beat on medium for 1 minute until fully blended and uniform. Add eggs one at a time, beating for 30 seconds after each until fully absorbed. Stir in vanilla. Mixture should be thick, glossy, and cohesive.
- Combine Wet & Dry: Reduce mixer speed to low. Gradually add dry ingredients in three additions, mixing just until no flour streaks remain—about 15–20 seconds per addition. Overmixing develops gluten and causes toughness. Batter will be thick, sticky, and deeply brown.
- Fold in Chocolate Chips: Using a silicone spatula, gently fold in chocolate chips until evenly distributed. For extra decadence, reserve ¼ cup chips to press onto tops of dough balls before baking.
- Portion & Chill (Critical Step): Use a 1.5-tablespoon cookie scoop (or heaping tablespoon) to portion dough into 1.5-inch balls. Place 2 inches apart on prepared sheets. Refrigerate unbaked sheets for *at least 30 minutes* (up to 72 hours). Chilling solidifies butter, prevents overspreading, enhances flavor development, and improves chewiness.
- Bake Strategically: Bake chilled cookies one sheet at a time in preheated 350°F oven for 10–12 minutes. Rotate sheet front-to-back at 6 minutes. Cookies are done when edges are set and slightly cracked, centers look soft and slightly underdone (they’ll firm as they cool), and surface has developed fine crinkles. Avoid overbaking—they continue cooking on hot sheets.
- Cool Completely: Let cookies rest on baking sheet for 5 minutes—this sets their structure. Then carefully transfer to wire racks using a thin spatula. Cool completely (20+ minutes) before storing or serving. Warm cookies are fragile and overly soft.
Tips
- Measure Flour Accurately: Spoon flour into measuring cup and level with a knife—never scoop directly from bag (can add up to 25% extra flour).
- Chill Dough Without Compromise: For longer storage, freeze portioned dough balls on a tray, then transfer to freezer bags for up to 3 months. Bake frozen—add 1–2 minutes to bake time.
- Room Temperature Matters: If butter is too warm, refrigerate bowl for 10 minutes before creaming. If eggs are cold, place in warm water for 5 minutes.
- Consistent Size = Even Baking: Use a digital kitchen scale for precision—each dough ball should weigh ~45g for uniform 3-inch cookies.
- Rotate & Position Wisely: Convection ovens? Reduce temp to 325°F and check at 8 minutes. Oven hot spots? Swap sheet positions halfway through.
- Don’t Skip the Rest: Cooling on sheet allows carryover cooking and structural setting—rushing this leads to breakage and loss of chew.
- Enhance Flavor Depth: Toasting cocoa powder in a dry skillet over medium-low heat for 2 minutes before sifting deepens its aroma and reduces raw bitterness.
- Fix Common Issues: Flat cookies? Butter too warm or insufficient chill. Cakey texture? Too much flour or overbeaten eggs. Greasy bottoms? Natural peanut butter used or dough underchilled.
- Storage Pro-Tip: Store cooled cookies in an airtight container with a slice of plain white bread—bread absorbs excess moisture, keeping cookies soft for up to 1 week.
Variations and Customizations
This versatile base invites endless creativity—always start with the core technique, then adapt thoughtfully:
- Gluten-Free: Substitute 1:1 gluten-free all-purpose flour blend (like King Arthur or Bob’s Red Mill) + ½ tsp xanthan gum. Add 1 tbsp ground flaxseed for binding if blend lacks gum.
- Vegan: Replace butter with vegan butter (Miyoko’s or Earth Balance), eggs with flax eggs (2 tbsp ground flax + 5 tbsp water, rested 10 mins), and use dairy-free chocolate chips. Ensure peanut butter contains no honey.
- Protein-Packed: Add ¼ cup unflavored whey or plant-based protein powder to dry ingredients; increase milk (1–2 tsp non-dairy) if dough feels too stiff.
- Crunchy Texture: Fold in ½ cup chopped roasted peanuts, pretzel pieces, or toasted coconut. Press whole peanuts onto dough balls before baking.
- Double Chocolate Intensity: Replace 2 tbsp flour with additional cocoa powder and stir in 2 oz finely chopped dark chocolate (70%) with chips.
- Spiced & Complex: Add 1 tsp ground cinnamon, ¼ tsp cayenne (for subtle heat), or 1 tbsp instant espresso powder to dry ingredients.
- Stuffed Surprise: Flatten dough balls, place ½ tsp peanut butter cup or Nutella dollop in center, seal tightly, and roll into ball before chilling.
- Mini Cookies: Scoop 1-teaspoon portions; bake 7–9 minutes. Perfect for parties, lunchboxes, or portion control.
- Bar Version: Press dough evenly into a greased 9×13-inch pan. Bake at 350°F for 22–25 minutes until edges pull from sides. Cool completely before cutting into squares.
- Gourmet Swirl: After scooping, swirl ½ tsp melted peanut butter or salted caramel into each dough ball with a toothpick for marbled effect.
Health Considerations and Nutritional Value
While undeniably indulgent, Chocolate Peanut Butter Cookies offer meaningful nutritional benefits when enjoyed mindfully—and can be adapted for specific dietary needs:
- Protein Powerhouse: Peanut butter contributes ~4g protein per cookie (based on standard 3-inch size), supporting satiety and muscle maintenance. Pairing with eggs further boosts high-quality protein.
- Heart-Healthy Fats: Monounsaturated fats in peanut butter and cocoa butter support healthy cholesterol levels when consumed as part of a balanced diet—especially when replacing saturated fats like palm oil or hydrogenated shortenings.
- Antioxidant-Rich Cocoa: Unsweetened cocoa is packed with flavanols linked to improved blood flow, reduced inflammation, and cognitive support. Choose minimally processed, high-cocoa-content varieties for maximum benefit.
- Mineral Contributions: Contains magnesium (muscle/nerve function), iron (oxygen transport), zinc (immune health), and potassium (blood pressure regulation)—all naturally present in cocoa, peanuts, and whole grains (if using whole wheat flour).
- Considerations: Naturally high in calories (~180–220 per cookie), added sugars (from brown/granulated sugar and chocolate chips), and sodium (from peanut butter and added salt). Moderation is key—enjoy 1–2 cookies as part of a balanced meal or snack.
- Lower-Sugar Options: Reduce granulated sugar by 2 tbsp and add 1–2 tbsp unsweetened applesauce for moisture. Use low-sugar chocolate chips (Lily’s Stevia-sweetened) or cacao nibs.
- Dietary Accommodations: Naturally nut-free alternatives aren’t feasible (peanut butter is core), but sunflower seed butter works for peanut allergy—though flavor and texture differ significantly. Always verify labels for cross-contamination warnings.
- Portion Awareness: Baking smaller cookies (2 inches) reduces calorie density per piece and supports intuitive eating practices.
Ingredients
- 2 ¼ cups (280g) all-purpose flour, spooned & leveled
- ¾ cup (75g) unsweetened cocoa powder (Dutch-processed preferred)
- 1 teaspoon baking soda
- 1 teaspoon fine sea salt
- 1 cup (227g / 2 sticks) unsalted butter, softened to 65–68°F
- 1 cup (220g) firmly packed light brown sugar
- ½ cup (100g) granulated sugar
- 1 cup (250g) creamy, shelf-stable peanut butter (not natural/oil-separated)
- 2 large eggs, room temperature
- 2 teaspoons pure vanilla extract
- 1 ½ cups (270g) semi-sweet chocolate chips (or high-quality chopped chocolate)
- Flaky sea salt, for finishing (optional)
Directions
- Preheat oven to 350°F (175°C). Line two large baking sheets with parchment paper or silicone baking mats.
- In a medium bowl, sift together flour, cocoa powder, baking soda, and salt. Whisk thoroughly and set aside.
- In a large bowl, beat softened butter with an electric mixer on medium speed for 1 minute until smooth. Add brown and granulated sugars; beat on medium-high for 3–4 minutes until light, fluffy, and pale—scraping bowl halfway.
- Add peanut butter and beat on medium for 1 minute until fully incorporated. Add eggs one at a time, beating 30 seconds after each. Stir in vanilla.
- Reduce mixer speed to low. Gradually add dry ingredients in three parts, mixing just until no flour remains—do not overmix.
- Fold in chocolate chips with a spatula until evenly distributed.
- Use a 1.5-tablespoon scoop to portion dough into balls. Place 2 inches apart on prepared sheets. Refrigerate for at least 30 minutes (or up to 72 hours).
- Bake chilled cookies one sheet at a time for 10–12 minutes, rotating sheet halfway. Edges should be set and cracked; centers soft and slightly underdone.
- Let cookies cool on baking sheet for 5 minutes, then transfer to wire racks to cool completely before serving or storing.
FAQ
- Can I use natural peanut butter?
- No—natural peanut butter separates into oil and solids. Its high oil content causes excessive spreading, greasy cookies, and poor structure. Stick with conventional, stabilized brands unless using a tested natural-butter adaptation (which requires additional flour and chilling).
- Why did my cookies spread too much?
- Most common causes: butter too warm, insufficient chilling, using natural peanut butter, under-measuring flour, or baking on hot/uncooled sheets. Always chill dough minimum 30 minutes and use room-temp—not melted—butter.
- Can I make these ahead?
- Absolutely! Portioned, unbaked dough balls freeze beautifully for up to 3 months. Bake straight from frozen—add 1–2 minutes to bake time. Baked cookies stay fresh in airtight containers for 1 week at room temp or 3 months frozen.
- What’s the best way to store baked cookies?
- In an airtight container at room temperature. For optimal softness, add a slice of plain white bread—it releases moisture slowly. Replace bread every 2 days. Avoid refrigeration, which dries them out.
- Can I substitute oil for butter?
- Not recommended. Butter provides flavor, structure, and steam for lift. Oil creates greasier, denser, less flavorful cookies. Vegan butter is the only acceptable 1:1 replacement.
- My cookies turned out cakey—what went wrong?
- Likely causes: too much flour (scooped instead of spooned), overbeaten eggs introducing excess air, using cake flour instead of all-purpose, or adding extra leavening. Also check expiration dates—old baking soda loses potency.
- Are these cookies safe for peanut allergies?
- No. Peanut butter is integral. For true peanut allergy safety, use sunflower seed butter—but note this changes flavor, color, and texture significantly, and cross-contamination risk remains in shared facilities.
- Can I add nuts or other mix-ins?
- Yes! Fold in up to ¾ cup chopped roasted peanuts, pretzels, dried cherries, or toasted coconut. Avoid overly moist add-ins (like fresh fruit) which disrupt texture.
- How do I get the perfect crinkled top?
- Key factors: proper creaming (light, fluffy butter-sugar), adequate chilling (solidifies fat), correct oven temp (350°F), and baking until edges are set but centers still soft. The crinkles form as the surface dries and contracts during cooling.
- Can I double the batch?
- Yes—with caution. Double all ingredients precisely, but mix in two separate batches to avoid overworking the mixer motor or undermixing. Chill dough thoroughly before baking in rotation to prevent warm-sheet spreading.
Summary
Chocolate Peanut Butter Cookies are a timeless, deeply satisfying fusion of rich cocoa, creamy-salty peanut butter, and chewy-crisp texture—crafted through precise creaming, strategic chilling, and quality ingredients.
Whether enjoyed warm with a glass of cold milk or gifted in a festive tin, they embody joyful baking tradition while inviting thoughtful customization for dietary needs, flavor curiosity, and modern wellness priorities.