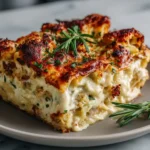
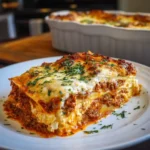
Red Velvet Cheesecake Brownies: A Decadent Fusion of Flavors
If you’re a fan of rich chocolate, tangy cream cheese, and the elegant allure of red velvet, then Red Velvet Cheesecake Brownies are your ultimate dessert dream come true. This indulgent hybrid treat combines the fudgy density of brownies with the velvety smoothness of cheesecake and the signature crimson hue and subtle cocoa-vanilla flavor of red velvet cake. Perfect for holidays, birthdays, or any occasion that calls for show-stopping desserts, these layered delights are as visually stunning as they are delicious.
The History: Where Did Red Velvet Cheesecake Brownies Come From?
The story of Red Velvet Cheesecake Brownies begins with its two iconic ancestors: brownies and red velvet cake. Brownies were first invented in the United States around the turn of the 20th century, with the earliest known recipe appearing in the 1896 edition of the Boston Cooking-School Cook Book. Their dense, chewy texture quickly made them a favorite across American households.
Red velvet cake, on the other hand, gained popularity in the early 1900s, particularly in the Southern United States. Originally, the “red” hue came from a chemical reaction between natural cocoa powder (which contains anthocyanin) and acidic ingredients like buttermilk and vinegar. The reaction produced a faint reddish tint. Later, food coloring was added to enhance this color, especially after a clever marketing campaign by the Adams Extract Company helped popularize the now-iconic bright red version.
Cheesecake has ancient roots, dating back to Greece, but the modern creamy version we know today evolved in New York during the 20th century. Combining cheesecake with other desserts became a trend in the late 1900s and early 2000s, giving rise to creations like cheesecake-swirled brownies and cupcakes.
Red Velvet Cheesecake Brownies emerged as part of this culinary fusion wave—likely in the 2010s—with home bakers and dessert bloggers experimenting with layering flavors and textures. The result? A luxurious confection that marries the moist crumb of red velvet, the deep richness of chocolate brownie, and the cool, creamy swirl of cheesecake. It’s a dessert that represents innovation, indulgence, and the joy of combining beloved classics into one unforgettable bite.
Ingredients Breakdown: What Makes These Brownies So Irresistible?
The magic of Red Velvet Cheesecake Brownies lies in their carefully balanced layers, each contributing unique textures and flavors. Let’s break down the key components:
- Unsweetened Cocoa Powder: Provides deep chocolate flavor without adding sweetness. Natural cocoa is preferred for its acidity, which enhances the red color when combined with food coloring.
- Red Food Coloring: Typically gel-based for vibrant, concentrated color without thinning the batter. Some recipes use beet juice or natural alternatives for a healthier twist.
- Butter and Chocolate: High-quality unsalted butter and semi-sweet chocolate create a rich, fudgy brownie base that holds up well under the cheesecake layer.
- Granulated Sugar: Sweetens the brownie while helping achieve that glossy, crackly top.
- Eggs: Bind the ingredients together and add structure. They also help the brownie layer rise slightly and contribute to its chewy texture.
- Flour: All-purpose flour gives the brownies structure. Too much can make them cakey; too little makes them greasy. Precision matters.
- Salt and Vanilla Extract: Enhance overall flavor and balance sweetness.
- Cream Cheese: Full-fat block cream cheese is essential for the cheesecake layer—avoid tub-style spreadable kinds, as they contain more moisture and can cause cracking.
- Sugar and Egg for Cheesecake: Adds sweetness and helps set the cheesecake swirl.
- Sour Cream or Heavy Cream: Optional but recommended for extra creaminess and tang in the cheesecake layer.
Optional additions include white chocolate chips, chopped pecans, or a drizzle of white chocolate on top for garnish.
Step-by-Step Recipe: How to Make Red Velvet Cheesecake Brownies
Follow these detailed instructions to create bakery-worthy Red Velvet Cheesecake Brownies at home. Patience and precision are key!
Ingredients
For the Red Velvet Brownie Layer:
- 1 cup (2 sticks / 226g) unsalted butter
- 8 oz (225g) high-quality semi-sweet chocolate, chopped
- 1 ½ cups (300g) granulated sugar
- 1 tablespoon pure vanilla extract
- 3 large eggs, at room temperature
- ⅔ cup (65g) unsweetened cocoa powder (natural, not Dutch-processed)
- 1 ¼ cups (155g) all-purpose flour
- ½ teaspoon salt
- 1 ½ teaspoons red gel food coloring (adjust for deeper color)
- 1 teaspoon white vinegar (optional, enhances red hue)
For the Cheesecake Swirl Layer:
- 16 oz (450g) full-fat cream cheese, softened
- ⅓ cup (65g) granulated sugar
- 1 large egg, at room temperature
- 1 teaspoon vanilla extract
- 2 tablespoons sour cream or heavy cream (for smoothness)
- Pinch of salt
Directions
- Preheat and Prepare: Preheat your oven to 350°F (175°C). Line a 9×13-inch baking pan with parchment paper, leaving overhang on two sides for easy removal. Lightly grease the parchment.
- Melt Chocolate and Butter: In a heatproof bowl set over a simmering pot of water (double boiler), melt the butter and chopped chocolate together, stirring until smooth. Remove from heat and let cool slightly.
- Mix Wet Ingredients: Stir in the sugar, vanilla extract, and red food coloring into the chocolate mixture. Add the eggs one at a time, mixing well after each addition until glossy and fully incorporated.
- Add Dry Ingredients: Sift in the cocoa powder, flour, and salt. Gently fold until just combined. Avoid overmixing to prevent toughness. If using, stir in vinegar now. Set aside.
- Prepare Cheesecake Mixture: In a separate bowl, beat the softened cream cheese with an electric mixer until smooth and creamy. Add sugar and mix until incorporated. Add the egg, vanilla, sour cream, and pinch of salt. Mix until smooth and lump-free. Do not overbeat.
- Layer the Batter: Pour the red velvet brownie batter into the prepared pan and spread evenly. Spoon the cheesecake mixture in dollops over the brownie layer. Use a knife or skewer to gently swirl the cheesecake into the brownie base—do not over-swirl, or the layers will blend too much.
- Bake: Bake for 35–40 minutes, or until the edges are set and the center still has a slight jiggle (it will firm up as it cools). Avoid overbaking, as this can dry out the brownies and crack the cheesecake.
- Cool Completely: Allow the brownies to cool in the pan for 1 hour, then transfer to the refrigerator and chill for at least 3 hours (preferably overnight) before cutting. This ensures clean slices and proper texture setting.
- Slice and Serve: Use the parchment overhang to lift the slab out. Cut into squares with a sharp knife wiped clean between cuts for neat edges.
Tips for Perfect Red Velvet Cheesecake Brownies
- Use Room Temperature Ingredients: Cold eggs or cream cheese can lead to lumpy batter. Take them out an hour before baking.
- Gel Food Coloring: Liquid food coloring adds excess moisture. Gel provides vibrant color with minimal volume.
- Don’t Overmix: Once flour is added, mix only until combined to avoid developing gluten, which can toughen the brownies.
- Swirling Technique: Use a toothpick, knife, or chopstick to create figure-eight patterns. Less is more—just enough to create marbling.
- Chill Before Cutting: Warm brownies will smear and tear. Refrigeration firms up both layers for clean cuts.
- Avoid Overbaking: The center should wobble slightly when shaken. Residual heat will continue cooking it.
- Water Bath (Optional): For ultra-smooth, crack-free cheesecake swirls, place the pan in a larger roasting tray filled with 1 inch of hot water during baking.
- Parchment Paper is Key: Ensures effortless removal and prevents sticking, especially important with the delicate cheesecake layer.
Variations and Customizations
Make this recipe your own with these creative twists:
- Gluten-Free Version: Substitute all-purpose flour with a 1:1 gluten-free baking blend. Ensure cocoa powder is certified gluten-free.
- Dairy-Free Option: Use dairy-free chocolate, vegan butter, and coconut cream cheese alternative. Note: texture may vary.
- Low-Sugar or Keto-Friendly: Replace sugar with erythritol or monk fruit sweetener. Use sugar-free chocolate and low-carb cream cheese.
- Mini Brownies: Bake in a muffin tin lined with cupcake liners for individual portions. Reduce baking time to 20–25 minutes.
- Add-Ins
: Fold chopped pecans, walnuts, or white chocolate chips into the brownie batter before adding the cheesecake.
- White Chocolate Drizzle: Melt white chocolate and drizzle over cooled brownies for elegance and extra sweetness.
- Festive Themes: Use green food coloring for St. Patrick’s Day, pastels for Easter, or omit coloring for “Chocolate Cheesecake Swirl Brownies.”
- Spiced Red Velvet: Add a pinch of cinnamon or pumpkin spice to the brownie batter for a warm, seasonal twist.
Health Considerations and Nutritional Value
While undeniably indulgent, it’s helpful to understand the nutritional profile of Red Velvet Cheesecake Brownies so you can enjoy them mindfully.
Nutritional Breakdown (Per Serving, Approx. 1 of 15)
- Calories: ~380–420 kcal
- Total Fat: 25–30g (Saturated: 14–16g)
- Carbohydrates: 38–42g (Sugars: 28–32g)
- Protein: 5–6g
- Cholesterol: ~70mg
- Sodium: ~180mg
Considerations:
- High in Sugar and Fat: Due to butter, chocolate, sugar, and cream cheese. Best enjoyed in moderation.
- Contains Dairy and Eggs: Not suitable for vegans or those with allergies unless substitutions are made.
- Gluten Content: Standard version uses wheat flour. Gluten-sensitive individuals should use certified GF flour.
- Food Coloring: Artificial dyes like Red 40 are controversial. For natural color, try beet puree (adds moisture, so adjust accordingly).
- Portion Control: Cut into smaller squares and serve with berries or whipped cream to balance richness.
- Storage: Keep refrigerated in an airtight container for up to 5 days. Freeze for up to 3 months (wrap tightly in plastic and foil).
Frequently Asked Questions (FAQ)
Can I make these brownies ahead of time?
Yes! These brownies actually taste better the next day after chilling. Prepare up to 2 days in advance and store covered in the fridge.
Why did my cheesecake layer crack?
Cracking usually results from overbaking, overbeating the cheesecake mixture, or rapid cooling. Bake until just set and cool gradually in the oven with the door ajar.
Can I use cake mix instead of making the brownie from scratch?
You can, but the texture may be lighter and less fudgy. Use a double-layer chocolate fudge mix and follow package directions, reducing oil/butter slightly to account for added moisture from the cheesecake.
Is Dutch-process cocoa okay?
It can be used, but natural cocoa is preferred because its acidity reacts with the vinegar (if used) to enhance the red color. Dutch-process is neutral and won’t produce the same effect.
Can I freeze Red Velvet Cheesecake Brownies?
Absolutely. Wrap tightly in plastic wrap and then foil. Thaw in the refrigerator overnight before serving.
How do I get clean cuts?
Use a sharp knife dipped in hot water and wiped dry between each cut. Chilling thoroughly is crucial.
Can I make this in a different pan size?
Yes. An 8×8-inch pan will yield thicker brownies and require 5–10 minutes more baking time. A 9×9-inch pan offers a middle ground.
Can I add espresso powder?
Yes! A teaspoon of instant espresso powder enhances chocolate flavor without making it taste like coffee.
Summary
Red Velvet Cheesecake Brownies are a luxurious fusion of fudgy chocolate brownies, tangy cream cheese swirls, and the iconic look and flavor of red velvet cake. Baking them requires attention to detail, but the result is a stunning, decadent dessert perfect for celebrations or treating yourself.