Introduction
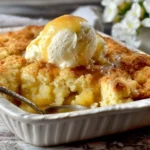
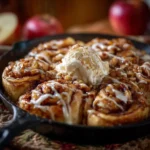
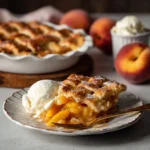
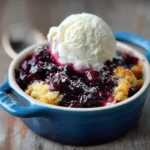
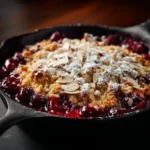
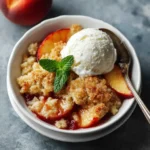
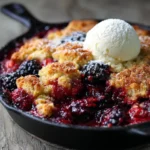
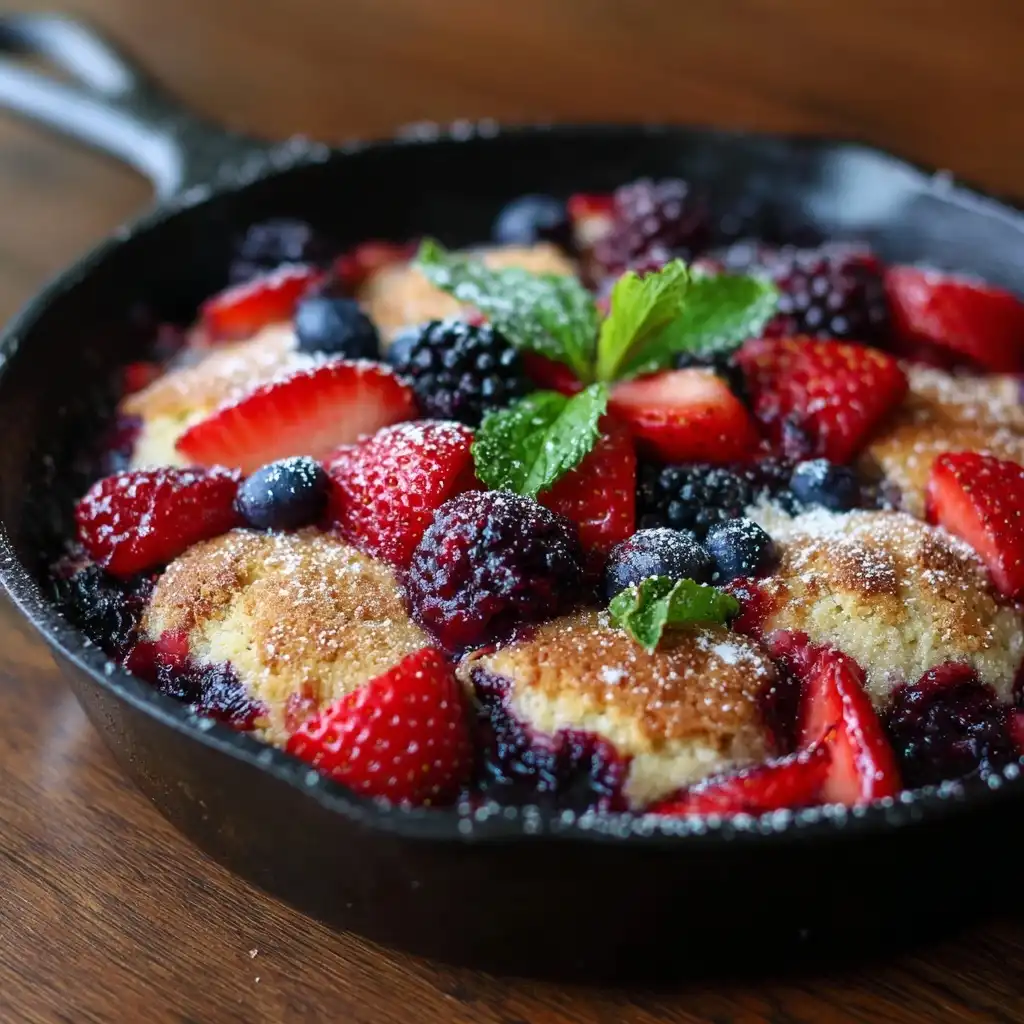
Welcome to the warm, comforting world of Skillet Mixed Berry Cobbler — a rustic, soul-soothing dessert that marries the vibrant tang of seasonal berries with the buttery, golden embrace of a tender biscuit or cake-like topping. Baked in a single cast-iron skillet, this classic American treat embodies simplicity, nostalgia, and culinary ingenuity: it requires no fancy equipment, minimal prep time, and delivers maximum flavor and visual appeal. Whether served piping hot from the oven with a scoop of vanilla bean ice cream melting luxuriously into its juicy filling or enjoyed slightly cooled with a drizzle of local honey and fresh mint, this cobbler is more than dessert — it’s an experience steeped in tradition, adaptability, and heartfelt hospitality.
The History
The origins of the cobbler trace back to 17th-century England, where early versions were known as “cobblers” — a colloquial term referencing the “cobbled” or uneven, lumpy appearance of the dropped-biscuit or pastry topping. When English settlers arrived in colonial America, they adapted the dish using native ingredients and available tools: lacking pie tins or rolling pins, resourceful cooks turned to heavy-bottomed kettles and, eventually, cast-iron skillets — durable, heat-retentive vessels ideal for open-hearth cooking. By the mid-1800s, cobblers had become staples across rural America, especially in the South and Midwest, where seasonal fruit harvests inspired countless regional iterations — peach in Georgia, blackberry in Arkansas, and mixed berry wherever wild or cultivated raspberries, blueberries, strawberries, and blackberries flourished together. The skillet method gained renewed popularity in the 20th century thanks to home economists and community cookbooks (like those published by church groups and agricultural extensions), which emphasized one-pot efficiency and visual charm. Today, the Skillet Mixed Berry Cobbler stands as both a tribute to frontier ingenuity and a beloved centerpiece at potlucks, summer barbecues, holiday brunches, and cozy weeknight gatherings — a testament to how humble ingredients, thoughtful technique, and cast-iron craftsmanship can yield extraordinary comfort.
Ingredients Breakdown
Every exceptional Skillet Mixed Berry Cobbler begins with intentionality — selecting high-quality, balanced components that harmonize sweetness, acidity, texture, and aroma. Below is a detailed breakdown of each ingredient’s role and why it matters:
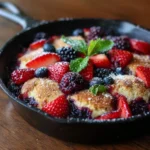
- Fresh or Frozen Mixed Berries (6–7 cups total): A dynamic blend — typically 1½ cups each of blueberries, raspberries, and blackberries, plus 1 cup of sliced strawberries — provides layered complexity. Blueberries lend earthy sweetness and natural pectin for thickening; raspberries contribute bright tartness and floral notes; blackberries add bold, jammy depth; and strawberries bring juiciness and aromatic brightness. Frozen berries work beautifully year-round (no need to thaw — their icy moisture helps regulate oven temperature and prevents scorching), while peak-season fresh berries deliver unparalleled fragrance and delicate texture.
- Granulated Sugar (¾–1 cup): Serves dual purposes — sweetening the fruit *and* balancing its natural acidity. The exact amount depends on berry ripeness and personal preference; underripe or tart berries may require closer to 1 cup, while ultra-sweet late-summer berries may need only ¾ cup. Optional addition of 1–2 tablespoons raw turbinado or demerara sugar sprinkled over the topping before baking adds delightful caramelized crunch.
- Light Brown Sugar (¼ cup, packed): Imparts subtle molasses warmth and enhances browning in the biscuit layer. Its trace acidity also helps activate baking soda if used, contributing to lift and tenderness.
- All-Purpose Flour (2 cups): The structural backbone of the biscuit topping. For optimal tenderness, measure by spoon-and-level (not scooping) to avoid compaction. Gluten-free bakers can substitute a 1:1 certified GF blend containing xanthan gum — but note that texture will be slightly more crumbly and less elastic.
- Baking Powder (2 tsp) + Baking Soda (¼ tsp): This dual-leavening system ensures reliable rise and airy texture. Baking powder provides most of the lift, while baking soda neutralizes acidity from berries and brown sugar, enhancing browning and tenderness. Always verify freshness — test baking powder by mixing ½ tsp with ¼ cup hot water (should fizz vigorously); test baking soda by mixing ¼ tsp with 2 tsp vinegar (should bubble immediately).
- Salt (¾ tsp fine sea salt): Not merely for seasoning — salt heightens all other flavors, controls gluten development for tenderness, and balances sweetness. Use non-iodized salt for clean flavor; kosher salt may be substituted at 1¼ tsp due to lower density.
- Unsalted Butter (½ cup / 1 stick, very cold): Cut into small cubes and kept chilled until mixing. Cold fat creates steam pockets during baking, yielding flaky, tender layers within the biscuit. European-style butter (82–86% fat) yields even richer, more tender results. For dairy-free, use chilled refined coconut oil or a high-fat vegan butter stick (avoid spreads — too much water content causes sogginess).
- Heavy Cream or Full-Fat Buttermilk (¾ cup): Adds moisture, richness, and acidity (especially buttermilk, which further activates leaveners). Heavy cream yields a more luxurious, slightly denser crumb; buttermilk lends subtle tang and extra lift. Half-and-half or whole milk may be substituted in a pinch, though the topping will be less rich and slightly less tender.
- Vanilla Extract (1½ tsp pure, not imitation): Enhances fruit aroma and rounds out the entire profile. Madagascar bourbon vanilla is ideal; for elevated depth, infuse 1 split vanilla bean pod into warm cream for 15 minutes before using.
- Lemon Zest (from 1 medium lemon): A secret weapon — bright citrus oils cut through richness, amplify berry fragrance, and prevent cloying sweetness. Microplane only the yellow zest, avoiding bitter white pith.
- Lemon Juice (1 tbsp freshly squeezed): Provides essential acidity to balance sugar and enhance fruit brightness. Bottled juice lacks volatile aromatic compounds and often contains preservatives that mute flavor.
- Unsalted Butter (2 tbsp, melted): Brushed over the unbaked topping to promote deep golden browning and glossy sheen. Optional flaky sea salt sprinkle post-bake elevates finish.
Step-by-Step Recipe
- Preheat & Prep Skillet: Position oven rack in the lower-middle position. Preheat oven to 375°F (190°C). Place a 10-inch cast-iron skillet (oven-safe, with handle wrapped in silicone or towel if needed) in the oven while it heats — this ensures even thermal transfer and jumpstarts caramelization.
- Prepare Berry Filling: In a large bowl, gently combine mixed berries, granulated sugar, cornstarch (4 tbsp — see Tips section), lemon juice, lemon zest, and a pinch of salt. Stir just until evenly coated — avoid crushing berries. Let macerate 15–20 minutes at room temperature to draw out juices and dissolve sugar.
- Mix Dry Topping Ingredients: In a separate large bowl, whisk together flour, brown sugar, baking powder, baking soda, and salt until fully aerated and lump-free (about 30 seconds).
- Incorporate Cold Butter: Add chilled, cubed butter. Using a pastry cutter, two forks, or fingertips, cut butter into flour mixture until it resembles coarse crumbs with some pea-sized pieces remaining. Work quickly to keep butter cold — if mixture warms and becomes greasy, refrigerate 5 minutes.
- Add Wet Ingredients: Pour in heavy cream (or buttermilk), vanilla, and stir with a silicone spatula or wooden spoon just until a shaggy, slightly sticky dough forms — about 12–15 turns. Do *not* overmix; streaks of flour are acceptable. Overworking develops gluten and yields tough biscuits.
- Assemble in Hot Skillet: Carefully remove preheated skillet from oven using oven mitts. Immediately pour macerated berry mixture into center — it will sizzle and bubble at edges. Quickly and evenly drop dough by heaping tablespoonfuls over berries, leaving small gaps between mounds for steam escape and even baking. Gently press dough pieces together at edges to form a mostly continuous, rustic layer — do not smooth flat; preserve height for rise.
- Finish & Bake: Brush entire surface with melted butter. Sprinkle generously with turbinado sugar and a light pinch of flaky sea salt. Place skillet back in oven. Bake 45–55 minutes — rotating halfway — until topping is deeply golden brown, puffed, and firm to gentle touch, and filling bubbles thickly around edges (bubbling should be slow and syrupy, not watery). A toothpick inserted into center of topping should emerge with moist crumbs (not wet batter).
- Cool & Set: Remove from oven and place skillet on a wire rack. Let rest undisturbed for *at least 30 minutes* — critical for filling to thicken and topping to settle. Cutting too soon releases precious juices and collapses structure.
- Serve: Scoop directly from skillet into wide bowls. Serve warm (ideal temperature: 140–150°F) with accompaniments of choice. Leftovers reheat beautifully in a 325°F oven for 12–15 minutes or in the microwave at 50% power for 45–60 seconds per serving.
Tips
- Skillet Selection Matters: Use a true 10-inch cast-iron skillet (not nonstick or ceramic-coated) — its thermal mass ensures bottom crust caramelization and even baking. Avoid skillets with plastic or phenolic handles unless verified oven-safe to 400°F. If unsure, wrap handle securely in double-thick foil or silicone handle guard.
- Cornstarch Is Non-Negotiable: While flour can thicken, cornstarch yields a clearer, glossier, more stable berry gel that clings to fruit without turning cloudy or stringy. For 6–7 cups berries, 4 tbsp cornstarch is ideal; reduce to 3 tbsp for very ripe, juicy berries or increase to 5 tbsp for frozen (which release more water).
- Chill Everything: Cold butter, cold cream, and even chilling the mixed dry ingredients for 10 minutes before adding fat prevents premature melting and guarantees flaky, tender layers. On hot days, refrigerate bowl and utensils beforehand.
- Don’t Fear the Sizzle: Pouring berries into the hot skillet causes vigorous sizzling — this is intentional and beneficial! It jumpstarts evaporation, concentrates flavor, and begins forming a light caramelized base layer. Stand back slightly and use long-handled utensils.
- Steam Vents Are Essential: Leaving small gaps between dough mounds or gently poking 3–4 holes with a chopstick before baking allows steam to escape, preventing soggy centers and ensuring even rise. Skipping this step risks a gummy, underbaked topping.
- Golden Brown ≠ Done: Visual cues alone aren’t enough. The true test is bubbling — when thick, slow, jammy bubbles break steadily at the skillet’s edge (not rapid, thin bubbles), the filling has reached optimal gel point (220°F). An instant-read thermometer inserted into the filling at edge should read 215–220°F.
- Cooling Is Part of Baking: That 30-minute rest isn’t optional — residual heat continues thickening the filling via cornstarch retrogradation, while the topping firms up. Cutting earlier floods the plate with syrup and collapses the biscuit’s airy structure.
- Storage Wisdom: Store uncovered at room temperature up to 2 days (the crisp topping stays surprisingly intact), or cover loosely with parchment-lined foil and refrigerate up to 5 days. Reheat only what you’ll serve — repeated heating degrades texture.
- Make-Ahead Friendly: Assemble filling up to 24 hours ahead and refrigerate covered. Prepare dry biscuit mix 2 days ahead and store airtight at room temperature; add cold butter and wet ingredients just before baking. For freezer prep: bake fully, cool completely, wrap tightly in freezer paper + foil, freeze up to 3 months; thaw overnight in fridge, then reheat covered at 325°F for 25 minutes, uncover last 10 minutes to recrisp.
Variations and Customizations
The beauty of Skillet Mixed Berry Cobbler lies in its joyful versatility — a canvas for seasonal abundance, dietary needs, and creative flair. Here are thoughtfully tested, chef-approved adaptations:
- Stone Fruit Swirl: Replace 2 cups berries with 2 cups peeled, pitted, and sliced ripe peaches or plums. Add ½ tsp ground ginger and 1 tsp almond extract to filling for aromatic harmony.
- Maple-Bourbon Berry: Substitute ¼ cup pure maple syrup for ¼ cup granulated sugar in filling; add 1½ tbsp aged bourbon and ¼ tsp grated orange zest. Brush topping with maple-butter glaze (2 tbsp melted butter + 1 tbsp maple) before baking.
- Herb-Infused: Fold 1 tbsp finely chopped fresh basil, lemon verbena, or thyme into macerating berries. Or infuse cream with herbs (steep 2 tbsp leaves in warm cream 20 min, strain) for floral elegance.
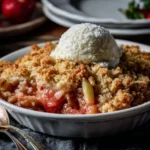
- Oat-Top Crisp Variation: Replace ½ cup flour in topping with old-fashioned rolled oats (not quick oats) and add 2 tbsp honey to wet ingredients. Yields a heartier, nuttier, chewier crown with superb textural contrast.
- Vegan Delight: Use cold refined coconut oil or vegan butter sticks; swap heavy cream for full-fat canned coconut milk (chilled, solid part only); replace brown sugar with coconut sugar; ensure cornstarch is non-GMO and vegan-certified. Add 1 tsp apple cider vinegar to plant milk to mimic buttermilk tang.
- Gluten-Free Grace: Use 2 cups 1:1 gluten-free flour blend (with xanthan gum), add ½ tsp xanthan gum if blend lacks it, and increase cream by 1 tbsp for moisture retention. Let dough rest 10 minutes before dropping for improved cohesion.
- Spiced Chai Berry: Add 1 tsp chai spice blend (cinnamon, cardamom, ginger, cloves, black pepper) to dry topping ingredients. Steep 1 chai tea bag in warm cream for 5 minutes before using.
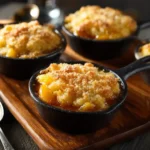
- Mini Skillet Individual Servings: Divide filling and topping among six 6-inch oiled cast-iron skillets or oven-safe ramekins. Reduce baking time to 28–35 minutes; check at 25 minutes. Perfect for portion control and presentation.
- Savory-Sweet Twist: Add 2 tbsp crumbled goat cheese or feta to topping dough before dropping; garnish baked cobbler with micro arugula and drizzle of balsamic reduction — ideal for brunch or cheese course pairing.
- No-Sugar-Added (Diabetic-Friendly): Use ⅔ cup erythritol or monk fruit blend (1:1 sugar substitute) in filling and topping; add 1 tsp stevia glycerite for depth. Thicken with 1 tbsp arrowroot + 1 tbsp tapioca starch. Serve with unsweetened coconut yogurt.
Health Considerations and Nutritional Value
A 1-serving portion (approximately 1/8 of recipe, ~1 cup with moderate topping) contains roughly 320–360 calories, making it a mindful indulgence when enjoyed intentionally. Nutritionally, this cobbler offers meaningful benefits beyond comfort:
- Antioxidant Powerhouse: Mixed berries are among the highest natural sources of anthocyanins (blue/purple pigments), ellagic acid (raspberries/blackberries), and vitamin C (strawberries). These compounds combat oxidative stress, support cardiovascular health, and exhibit neuroprotective properties in emerging research.
- Fiber-Rich Foundation: One serving delivers 5–7g of dietary fiber — primarily soluble fiber from berries and insoluble from whole-grain flour variations — promoting satiety, gut microbiome diversity, and healthy digestion. Frozen berries retain nearly identical fiber content to fresh.
- Smart Fat Profile: Using unsalted butter in moderation contributes beneficial short- and medium-chain fatty acids, fat-soluble vitamins (A, D, E, K), and conjugated linoleic acid (CLA), linked in studies to anti-inflammatory effects. Opting for grass-fed butter increases omega-3s and CLA concentration.
- Lower Glycemic Impact: The combination of fiber, acid (lemon), and fat slows glucose absorption versus fruit-only desserts. Substituting half the sugar with erythritol or using 100% fruit-sweetened versions (mashed ripe banana + date paste) further lowers glycemic load.
- Calcium & Vitamin K Synergy: Dairy-based cream and butter supply bioavailable calcium and vitamin K2 (especially in grass-fed sources), supporting bone mineral density and arterial health — nutrients often under-consumed in Western diets.
- Dietary Adaptability: Naturally free of nuts, eggs, and soy (in base recipe), it’s easily modified for common allergens. Vegan, GF, and low-sugar versions maintain nutritional integrity when substitutions are evidence-informed (e.g., GF blends with added psyllium for fiber, coconut milk for lauric acid).
- Portion Mindfulness: Serving in smaller portions (¾ cup), emphasizing berries over topping, and pairing with protein-rich accompaniments (Greek yogurt, cottage cheese, or toasted nuts) transforms it into a balanced, nutrient-dense treat rather than empty-calorie dessert.
- Psychological Wellness: Beyond physical nutrition, shared preparation and communal enjoyment of such a sensory-rich food supports emotional well-being, reduces stress biomarkers, and strengthens social connection — validated by nutritional psychiatry research linking traditional, minimally processed foods to improved mood regulation.
Note: Values vary based on specific ingredients and portion size. For precise tracking, input your exact brands and measurements into a trusted nutrition calculator like Cronometer or MyFitnessPal.
Ingredients
- 6–7 cups mixed berries (fresh or frozen — e.g., 1½ cups blueberries, 1½ cups raspberries, 1½ cups blackberries, 1 cup sliced strawberries)
- ¾–1 cup granulated sugar (adjust to taste and berry tartness)
- ¼ cup packed light brown sugar
- 4 tablespoons cornstarch
- 1 tablespoon freshly squeezed lemon juice
- 1 teaspoon finely grated lemon zest
- ¼ teaspoon fine sea salt (for filling)
- 2 cups all-purpose flour (spooned & leveled)
- 2 teaspoons baking powder
- ¼ teaspoon baking soda
- ¾ teaspoon fine sea salt (for topping)
- ½ cup (1 stick) unsalted butter, very cold and cubed
- ¾ cup heavy cream or full-fat buttermilk, cold
- 1½ teaspoons pure vanilla extract
- 2 tablespoons unsalted butter, melted (for brushing)
- Turbinado or demerara sugar, for sprinkling
- Flaky sea salt, for finishing (optional)
Directions
- Preheat oven to 375°F (190°C). Place a 10-inch oven-safe cast-iron skillet in oven to heat.
- In a large bowl, gently toss berries with granulated sugar, cornstarch, lemon juice, lemon zest, and ¼ tsp salt. Let sit 15–20 minutes.
- In another large bowl, whisk flour, brown sugar, baking powder, baking soda, and ¾ tsp salt.
- Add cold cubed butter; cut in with pastry cutter or fingers until mixture resembles coarse crumbs with pea-sized butter pieces.
- Stir in cold cream (or buttermilk) and vanilla with a spatula until just combined and shaggy dough forms — about 12–15 strokes. Do not overmix.
- Carefully remove hot skillet from oven. Pour berry mixture into center — it will sizzle vigorously.
- Drop dough by heaping tablespoonfuls over berries, spacing evenly. Gently press edges to connect slightly (do not flatten).
- Brush top generously with melted butter. Sprinkle with turbinado sugar and a pinch of flaky salt.
- Bake 45–55 minutes, rotating halfway, until topping is deep golden and filling bubbles thickly at edges.
- Let cool on wire rack for at least 30 minutes before serving.
- Serve warm, ideally with vanilla ice cream, whipped cream, or plain Greek yogurt.
FAQ
- Can I use all frozen berries?
- Absolutely — and often preferred for consistent texture and year-round availability. Do not thaw; toss frozen berries directly with sugar and cornstarch. They’ll release moisture gradually during baking, preventing a soggy base. Increase cornstarch to 4½ tbsp if using exclusively frozen fruit.
- Why does my topping sink or get soggy?
- Most commonly due to: (1) Underbaking — filling must bubble thickly for 3+ minutes before removing; (2) Overmixing dough — develops gluten, causing toughness and poor rise; (3) Adding warm cream/butter — melts fat prematurely; (4) Skipping the hot skillet step — no initial sear means excess liquid pools beneath topping.
- Can I make this ahead for a party?
- Yes! Assemble filling and refrigerate up to 24 hours. Prepare dry topping mix 2 days ahead. Combine cold butter and wet ingredients just before baking. Fully baked cobbler reheats beautifully — cover with foil, warm at 325°F for 20 minutes, then uncover for 5 minutes to crisp.
- What’s the best way to store leftovers?
- Cool completely, then cover loosely with parchment-lined foil (prevents condensation) and refrigerate up to 5 days. Reheat individual servings in oven (325°F, 12–15 min) or microwave (50% power, 45–60 sec). Avoid storing at room temperature beyond 2 days in warm climates.
- Can I use different thickening agents?
- Yes — 3 tbsp quick-cooking tapioca yields a clear, glossy, chewy gel ideal for berry fillings. 4 tsp arrowroot works well but requires immediate baking after mixing (it breaks down if held). Avoid flour alone — it clouds the filling and requires longer baking to eliminate raw taste.
- Is there a lower-fat version?
- You can substitute ½ cup cold full-fat Greek yogurt + ¼ cup milk for the cream, and reduce butter in topping to ⅓ cup. Expect a slightly denser, less flaky result — but still delicious. Top with lightly sweetened ricotta instead of ice cream for added protein.
- My berries are super tart — how do I fix that?
- First, ensure adequate sugar — start with 1 cup. Second, add 1 tsp honey or maple syrup to filling for rounded sweetness. Third, include ¼ tsp ground cinnamon or cardamom — warm spices temper sharp acidity. Fourth, a pinch of baking soda (⅛ tsp) in filling neutralizes excess acid without altering flavor.
- Can I double this recipe?
- Yes — use a 12-inch skillet and increase all ingredients by 1.5x (not 2x, to prevent overflow). Bake at same temperature but extend time to 55–65 minutes, checking for thick bubbling and golden topping. Rotate pan twice for even baking.
- Why use both baking powder AND baking soda?
- Baking powder provides primary lift (acid + base reaction), while baking soda neutralizes the acidity from berries, lemon, and brown sugar — preventing metallic aftertaste, enhancing browning (Maillard reaction), and improving tenderness. Omitting soda risks dull flavor and pale, dense topping.
- Can I bake this in a Dutch oven or glass dish?
- A heavy 5–6 quart Dutch oven works well — reduce oven temp to 350°F and increase time by 5–10 minutes. Glass baking dishes (like 9×13) can be used but lack the skillet’s caramelizing power; grease well and expect softer bottom crust. Never use thin metal pans — they warp and scorch.
Summary
Skillet Mixed Berry Cobbler is a timeless, adaptable American dessert that transforms simple, seasonal fruit and pantry staples into a stunning, deeply flavorful celebration of rustic elegance — all in one gloriously versatile cast-iron vessel.
With its vibrant, antioxidant-rich berry filling, tender golden biscuit topping, and endless possibilities for customization, it’s equally at home on a weeknight table, a holiday dessert buffet, or as a make-ahead centerpiece that nourishes both body and spirit.