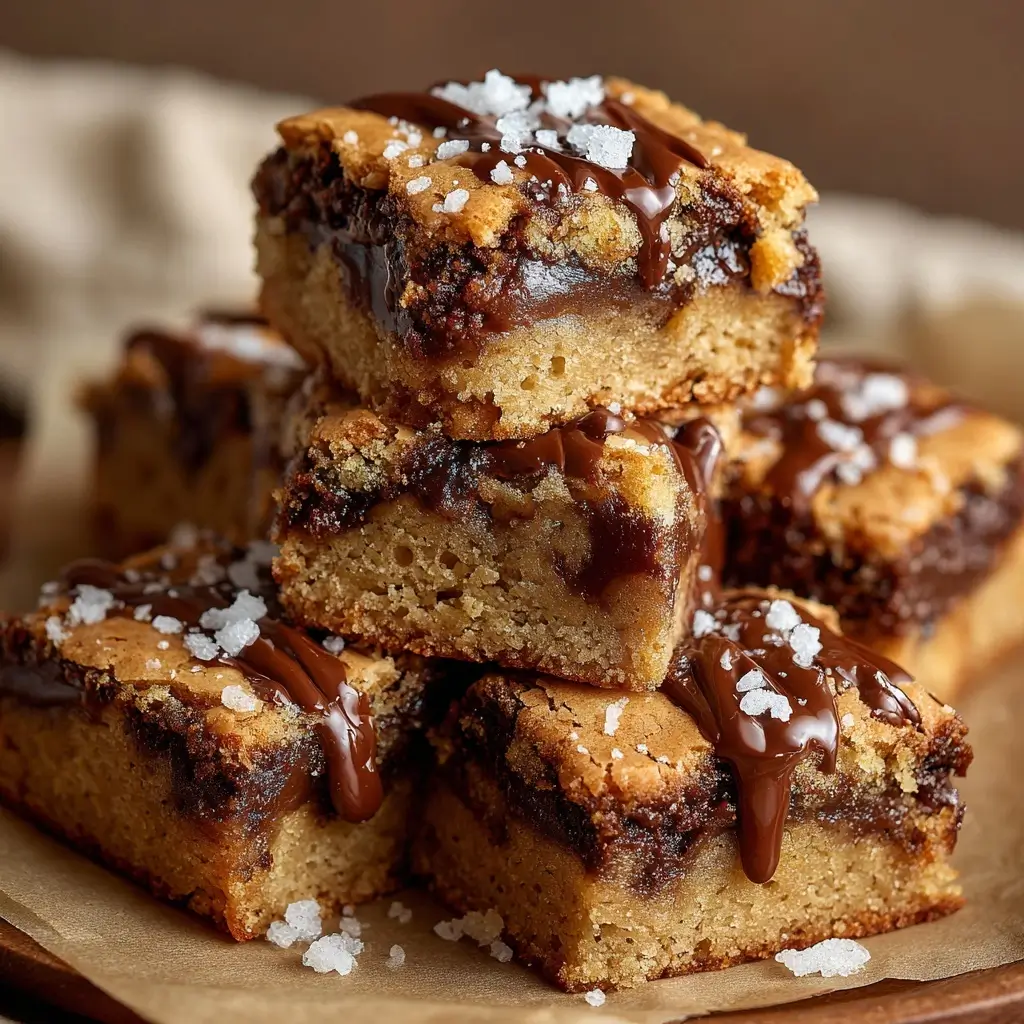
Brown Butter Blondie Bites: A Decadent Treat with a Nutty Twist
The History of Blondies and the Rise of Brown Butter Magic
The story of blondies begins in the early 20th century, as a cousin to the classic chocolate brownie. While brownies rely on cocoa or melted chocolate for their rich, dark flavor, blondies stand out with their buttery, caramel-like sweetness derived from brown sugar, vanilla, and flour. The first known mention of a “blondie” recipe dates back to 1896 in the Chicago Daily Tribune, though it wasn’t until the 1950s that they gained widespread popularity across American home kitchens.
Blondies were originally seen as a golden-hued alternative for those who preferred less chocolate or wanted to highlight the warm notes of brown sugar and vanilla. Over time, bakers began experimenting—adding white chocolate chips, nuts, dried fruit, and even swirls of peanut butter. But one of the most transformative innovations in modern blondie-making has been the incorporation of browned butter.
Browning butter—also known as beurre noisette in French cuisine—has long been used in gourmet cooking and pastry making for its deep, nutty aroma and rich complexity. When unsalted butter is heated just enough to toast the milk solids without burning, it transforms from a pale yellow fat into an aromatic, amber liquid that elevates any baked good. In recent years, this technique has become a hallmark of elevated home baking, especially in cookies, cakes, and bar desserts like these Brown Butter Blondie Bites.
By combining the nostalgic charm of old-fashioned blondies with the sophisticated depth of browned butter, these bite-sized treats represent the perfect harmony between tradition and innovation. They are ideal for dessert platters, holiday gifting, afternoon tea, or simply satisfying a sweet craving with a gourmet twist.
Ingredients Breakdown: Why Every Component Matters
The magic of Brown Butter Blondie Bites lies not only in technique but also in the careful selection and balance of ingredients. Each plays a specific role in creating a tender crumb, chewy texture, and rich flavor profile.
- Unsalted Butter (for browning): The star of the show. Using unsalted butter allows you to control the salt content and ensures freshness. When browned, it develops overtones of toasted nuts and butterscotch, enhancing the overall depth of flavor.
- Brown Sugar (dark and light): Dark brown sugar adds intense molasses notes, moisture, and chewiness, while light brown sugar balances sweetness and structure. Together, they create the signature caramelized taste blondies are known for.
- Granulated Sugar: Adds sweetness and helps with browning during baking. It also contributes to the slight crackle on top when combined with eggs.
- Eggs: Provide structure, moisture, and leavening. Room temperature eggs blend more smoothly into the batter, preventing curdling when mixed with warm browned butter.
- Vanilla Extract: High-quality pure vanilla extract amplifies warmth and complements the nuttiness of brown butter. For extra luxury, consider adding a splash of vanilla bean paste.
- All-Purpose Flour: Offers the necessary gluten structure without making the blondies tough. Sifted for consistency, it ensures a soft, even crumb.
- Salt: Balances sweetness and enhances all other flavors. Fine sea salt or kosher salt works best for even distribution.
- Baking Powder: A small amount adds slight lift and tenderness, helping the blondies rise gently without becoming cakey.
- White Chocolate Chips: Melt-in-your-mouth pockets of sweetness that contrast beautifully with the nutty base. You can substitute with butterscotch, milk chocolate, or even chopped dark chocolate if desired.
- Pecans or Walnuts (optional): Toasted nuts add crunch, texture contrast, and reinforce the toasty notes from the browned butter. Pecans pair especially well due to their natural buttery flavor.
- Flaky Sea Salt (for finishing): A light sprinkle atop each bite after baking intensifies flavor and creates a restaurant-quality presentation.
Step-by-Step Recipe: How to Make Perfect Brown Butter Blondie Bites
Follow these detailed steps to achieve rich, fudgy, golden-brown bites with a crisp top and chewy interior.
- Brown the Butter: Place 1 cup (2 sticks / 227g) of unsalted butter in a light-colored saucepan (so you can see color changes). Heat over medium heat, swirling occasionally. The butter will melt, then foam, then begin to sizzle as the water evaporates. Continue cooking until the foam subsides and the milk solids at the bottom turn golden brown—about 6–8 minutes. Watch carefully; it can go from perfect to burnt quickly. Remove from heat immediately and pour into a heatproof bowl to stop cooking. Let cool slightly but remain liquid (warm, not hot).
- Preheat Oven & Prepare Pan: Preheat oven to 350°F (175°C). Line an 8×8-inch baking pan with parchment paper, leaving overhang on two sides for easy removal. Lightly grease the parchment if needed.
- Mix Sugars and Browned Butter: In a large mixing bowl, whisk together 1 cup (200g) packed dark brown sugar, ½ cup (100g) granulated sugar, and ¼ cup (50g) light brown sugar. Pour in the warm browned butter (including all the browned bits!) and stir until fully combined and glossy.
- Add Eggs and Vanilla: Add 2 large room-temperature eggs, one at a time, beating well after each addition. Stir in 2 teaspoons of pure vanilla extract until smooth and emulsified. The mixture should be shiny and thick.
- Incorporate Dry Ingredients: In a separate bowl, sift together 1 cup (125g) all-purpose flour, ½ teaspoon salt, and ¼ teaspoon baking powder. Gradually fold the dry ingredients into the wet mixture using a spatula. Mix just until no streaks of flour remain—do not overmix.
- Fold in Mix-ins: Gently stir in 1 cup (175g) white chocolate chips and ½ cup (50g) chopped toasted pecans or walnuts, if using. Reserve a few chips and nuts for topping if desired.
- Spread Batter: Pour the batter into the prepared pan. Use the spatula to spread evenly, smoothing the top. Sprinkle a few extra chocolate chips and nuts on top for visual appeal.
- Bake: Bake for 25–30 minutes, or until the edges are golden brown and the center is set but still slightly soft. A toothpick inserted near the center should come out with moist crumbs—not wet batter, but not completely clean either.
- Cool Completely: Allow the blondies to cool in the pan on a wire rack for at least 45 minutes. This is crucial for achieving the proper fudgy texture. Chilling them in the refrigerator for 30 minutes makes cutting cleaner.
- Cut into Bites: Use the parchment overhang to lift the slab out of the pan. Cut into 16 small squares (2-inch by 2-inch) or 25 mini bites (1.5-inch squares) depending on your preference.
- Finish with Flaky Salt: Just before serving, lightly sprinkle each bite with a pinch of flaky sea salt to enhance flavor and appearance.
Tips for Success: Expert Tricks for the Best Results
- Control the Browning Process: Use a light-colored pan so you can monitor the color of the butter. Stainless steel or enamel-coated pans work best. Avoid nonstick—they hide color changes.
- Don’t Burn the Butter: Once the milk solids turn golden brown, remove from heat immediately. Residual heat will continue cooking them. Burnt butter tastes bitter and ruins the delicate flavor balance.
- Cool Butter Slightly: Adding boiling-hot butter to sugar and eggs can cook the eggs prematurely. Let it cool for 5–10 minutes until warm but not scalding.
- Room Temperature Eggs: Cold eggs can cause the browned butter to seize or create lumps. Let them sit in warm water for 5 minutes if you forget to take them out ahead of time.
- Don’t Overmix: Overworking the batter activates gluten, leading to tough blondies. Fold just until combined.
- Use Parchment Paper: It prevents sticking and makes lifting the entire batch effortless. No need to grease excessively.
- Check Early: Ovens vary. Start checking at 22 minutes. Underbaked is better than overbaked—these improve as they cool.
- Cool Before Cutting: Warm blondies will crumble when cut. Patience ensures clean edges.
- Toast Your Nuts: Spread chopped nuts on a baking sheet and toast at 350°F for 6–8 minutes until fragrant. Cooling them before adding prevents melting the chocolate chips.
- Double Batch Tip: These freeze beautifully. Wrap individually or store in layers separated by parchment paper.
Variations and Customizations: Make Them Your Own
One of the joys of blondie recipes is their versatility. Here are creative ways to personalize your Brown Butter Blondie Bites:
- Chocolate Lovers’ Version: Swap white chocolate chips for semi-sweet, dark, or milk chocolate chunks. Or use a mix!
- Swirled Blondies: Drop spoonfuls of peanut butter, almond butter, or cream cheese onto the batter and gently swirl with a knife before baking.
- Coconut Bliss: Add ½ cup shredded coconut (toasted for extra flavor) along with the chocolate chips.
- Oatmeal Blondie Bites: Replace ¼ of the flour with old-fashioned rolled oats for a heartier texture.
- Gluten-Free Option: Substitute all-purpose flour with a high-quality 1:1 gluten-free baking blend (like Bob’s Red Mill or King Arthur). Add ¼ teaspoon xanthan gum if not included.
- Dairy-Free Adaptation: Use plant-based butter that browns well (e.g., Miyoko’s or Country Crock Plant Butter). Ensure chocolate chips are dairy-free too.
- Spiced Blondies: Add ½ teaspoon ground cinnamon, a pinch of nutmeg, or cardamom for a warm, autumnal twist.
- Fruity Notes: Stir in dried cranberries, cherries, or chopped apricots instead of nuts for a tangy contrast.
- Salted Caramel Swirl: Drizzle ⅓ cup of thick salted caramel sauce over the batter and swirl gently before baking.
- Mini Muffin Tin Version: Press batter into greased or lined mini muffin tins and bake for 12–15 minutes for adorable single-serving treats.
- Holiday Edition: Add red and green sprinkles, peppermint chips, or crushed candy canes after baking.
Health Considerations and Nutritional Value
While Brown Butter Blondie Bites are undeniably indulgent, understanding their nutritional makeup helps with mindful enjoyment.
Nutrition Facts (per bite, based on 16 servings):
- Calories: ~180–200
- Total Fat: 11g (Saturated Fat: 6g)
- Cholesterol: 35mg
- Sodium: 80–100mg
- Total Carbohydrates: 22g (Dietary Fiber: 0.5g, Sugars: 17g)
- Protein: 2g
Considerations:
- High in Sugar: Due to multiple types of sugar and chocolate, these are best enjoyed in moderation, especially for those managing blood sugar levels.
- Butter Content: Rich in saturated fat, which should be limited in heart-healthy diets. However, browned butter contains conjugated linoleic acid (CLA), which some studies suggest may have health benefits in moderation.
- Gluten and Allergens: Contains gluten, dairy, and eggs. Tree nuts (if added) are a common allergen. Always label accordingly when sharing.
- Portion Control: Cutting into smaller “bites” encourages savoring rather than overeating. One or two can satisfy a sweet tooth without excess.
- Balanced Pairing: Serve with fresh berries, Greek yogurt, or a glass of milk to add protein, fiber, and nutrients to the snack.
Ingredients
- 1 cup (2 sticks / 227g) unsalted butter
- 1 cup (200g) packed dark brown sugar
- ½ cup (100g) granulated sugar
- ¼ cup (50g) light brown sugar
- 2 large eggs, room temperature
- 2 teaspoons pure vanilla extract
- 1 cup (125g) all-purpose flour
- ½ teaspoon fine sea salt (plus extra for topping)
- ¼ teaspoon baking powder
- 1 cup (175g) white chocolate chips
- ½ cup (50g) chopped toasted pecans or walnuts (optional)
- Flaky sea salt, for finishing
Directions
- In a medium saucepan over medium heat, melt the butter. Continue cooking, swirling often, until it foams, then turns golden brown with a nutty aroma (6–8 minutes). Immediately transfer to a heatproof bowl and let cool slightly (5–10 minutes).
- Preheat oven to 350°F (175°C). Line an 8×8-inch baking pan with parchment paper, leaving overhang on two sides.
- In a large bowl, whisk together dark brown sugar, granulated sugar, and light brown sugar. Pour in the warm browned butter and stir until smooth and combined.
- Add eggs one at a time, beating well after each. Stir in vanilla extract until glossy.
- In another bowl, sift together flour, salt, and baking powder. Gradually fold into the wet ingredients using a spatula. Mix until just combined.
- Fold in white chocolate chips and toasted nuts (if using). Do not overmix.
- Transfer batter to the prepared pan. Spread evenly and smooth the top. Sprinkle extra chips or nuts on top if desired.
- Bake for 25–30 minutes, or until edges are golden and center is set with a slight jiggle.
- Cool completely in the pan on a wire rack (minimum 45 minutes). For cleaner cuts, chill in the fridge for 30 minutes.
- Lift out using parchment and cut into 16 squares or 25 mini bites.
- Lightly sprinkle each bite with flaky sea salt before serving.
FAQ
Can I make the browned butter ahead of time?
Yes! Browned butter can be made up to 3 days in advance. Cool completely, cover, and refrigerate. Re-melt gently before using.
Why did my blondies turn out cakey?
Overmixing the batter or using too much flour can lead to a cake-like texture. Always measure flour correctly (spoon and level) and mix gently.
Can I freeze Brown Butter Blondie Bites?
Absolutely. Store in an airtight container with parchment between layers. Freeze for up to 3 months. Thaw at room temperature for 30 minutes.
Can I use salted butter?
It’s best to use unsalted butter so you can control the salt level. If using salted, reduce added salt to ⅛ teaspoon and taste the batter before baking.
What does browned butter do to blondies?
It adds a deep, nutty, toffee-like flavor that elevates the entire dessert, making it richer and more complex than regular butter versions.
Can I double the recipe?
Yes! Double the ingredients and use a 9×13-inch pan. Increase baking time to 30–35 minutes and check for doneness.
How long do they stay fresh?
Stored in an airtight container at room temperature, they stay fresh for up to 5 days. For longer storage, refrigerate or freeze.
Are these chewy or fudgy?
They are both! A crisp top, dense and fudgy center, and slightly chewy edges make them incredibly satisfying.
Can I make them vegan?
Yes—with substitutions: use plant-based butter that browns well, flax eggs (1 tbsp ground flax + 3 tbsp water per egg), and vegan white chocolate chips.
Why did my butter burn?
Heat was too high or left unattended. Use medium heat, stay nearby, and watch closely once foaming begins. Swirl frequently for even browning.
Summary
Brown Butter Blondie Bites combine the nostalgic sweetness of classic blondies with the luxurious depth of nutty browned butter for an irresistibly rich, fudgy treat. Perfect for gatherings, gifts, or personal indulgence, these golden morsels deliver gourmet flavor in every bite.