Introduction
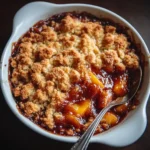
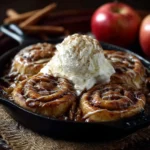
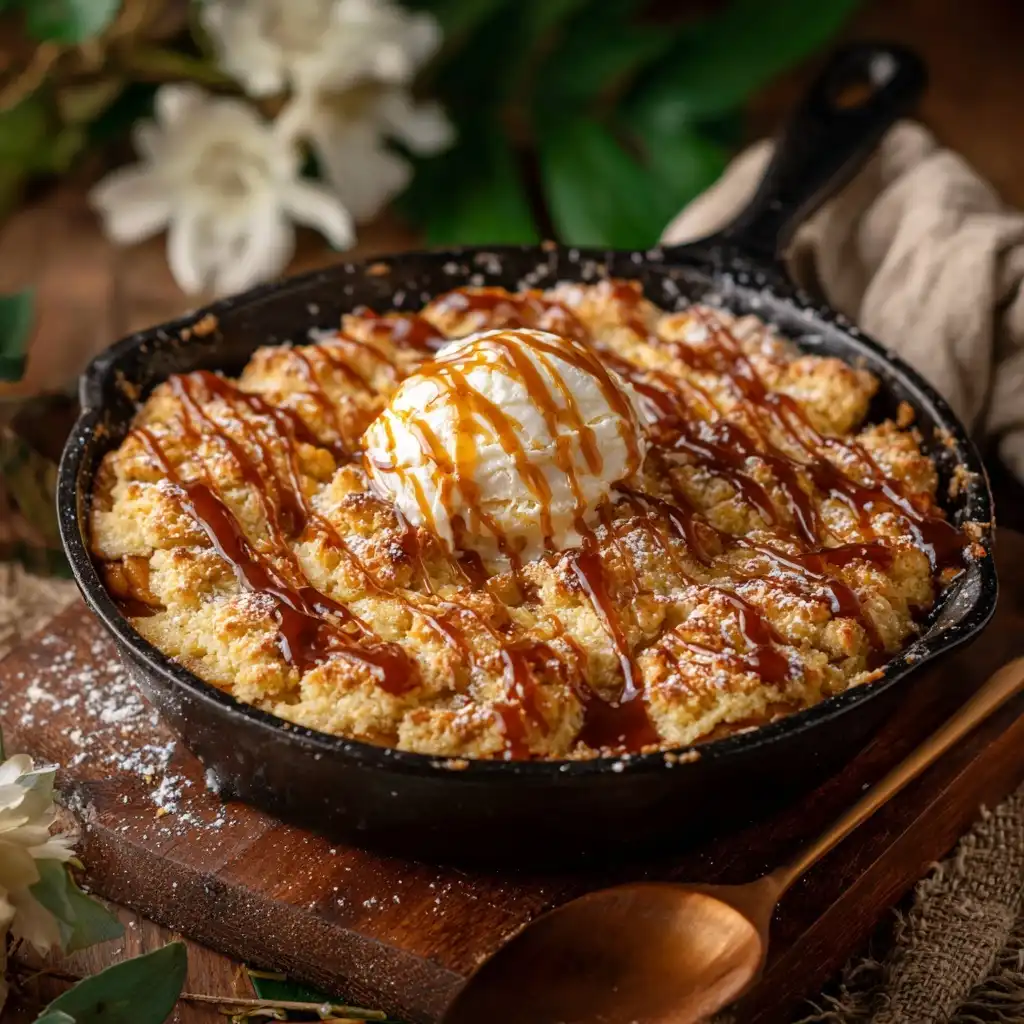
There’s something deeply comforting about the warm, buttery aroma of a Cast Iron Skillet Apple Cobbler wafting through the kitchen—evoking memories of harvest season, family gatherings, and hearthside baking. Unlike traditional baked apple desserts that require multiple pans and precise oven temperatures, this version harnesses the unparalleled heat retention and even browning capabilities of a well-seasoned cast iron skillet to create a rustic, golden-brown masterpiece with minimal fuss and maximum flavor. The skillet isn’t just cookware here—it’s a vessel for tradition, texture, and transformation: caramelizing the apples on the stovetop before transitioning seamlessly into the oven for a perfectly risen, tender-crisp biscuit topping. Whether you’re a seasoned baker or a curious beginner, this recipe celebrates simplicity without sacrificing sophistication—and honors the timeless synergy between fruit, spice, butter, and iron.
The History
The roots of apple cobbler stretch back centuries—to colonial America, where resourceful settlers adapted English “cobs” (a dialect term for lumps or rounded pieces) into a pragmatic dessert born from scarcity and ingenuity. With limited access to refined flour, leavening agents, or pie tins, early Americans turned to what they had: cast iron skillets (imported from England and later forged domestically), tart wild apples, coarse-ground wheat or cornmeal, and rendered lard or butter. These skillets—often passed down through generations—were multi-purpose workhorses used for frying, stewing, searing, and baking. By the 18th century, cobblers evolved into layered fruit-and-biscuit desserts baked directly in skillets over open hearths or in wood-fired ovens. The term “cobbler” itself likely refers to the uneven, cobblestone-like appearance of the dropped biscuit dough atop bubbling fruit—a visual hallmark that signaled home, hearth, and hospitality. In the American South and Midwest, cast iron apple cobbler became a seasonal staple—especially during autumn apple harvests—and was frequently served at church suppers, county fairs, and harvest festivals. Today, its resurgence reflects a broader cultural return to heritage cooking tools and slow-food values: honoring craftsmanship, sustainability, and the irreplaceable depth of flavor only a properly heated, well-loved cast iron skillet can impart.
Ingredients Breakdown
Every ingredient in this Cast Iron Skillet Apple Cobbler plays a deliberate, synergistic role—not merely as components, but as collaborators in texture, temperature, acidity, sweetness, and structure:
- Apples: A blend of tart and sweet varieties (e.g., Granny Smith + Honeycrisp or Braeburn) ensures balanced flavor and ideal texture—firm enough to hold shape during cooking yet tender enough to yield luxurious softness. Peeling is optional but recommended for refined mouthfeel; cores and stems must always be removed.
- Granulated Sugar & Brown Sugar: White sugar provides clean sweetness and aids in caramelization; brown sugar contributes molasses depth, moisture retention, and rich color—critical for that glossy, amber syrup pooling beneath the topping.
- Lemon Juice & Zest: Bright acidity cuts through richness, preserves apple color, and enhances aromatic complexity. Freshly squeezed juice is non-negotiable; zest adds volatile citrus oils that lift the entire profile.
- Warm Spices (Cinnamon, Nutmeg, Allspice, Cloves): Not mere background notes—these are carefully calibrated to echo the natural esters in apples while avoiding medicinal bitterness. Toasting whole spices before grinding (or using freshly ground) unlocks exponentially more nuanced warmth.
- Unsalted Butter: Used in two stages—first melted into the apple filling for silkiness and sheen, then cold and cubed into the biscuit dough for flakiness and steam-driven lift. European-style butter (82–84% fat) yields superior tenderness and browning.
- All-Purpose Flour (with optional pastry flour blend): Provides gluten structure for cohesive biscuits—but not too much. A small portion of low-protein pastry flour (or cake flour) can be substituted for extra tenderness without compromising integrity.
- Baking Powder & Baking Soda: Dual-acting leaveners ensure reliable rise—even in the dense, moist environment of a fruit-filled skillet. Baking soda also neutralizes excess acidity from lemon and apples, refining flavor balance.
- Heavy Cream & Buttermilk (optional hybrid): Heavy cream delivers fat-rich tenderness and browning; adding a splash of buttermilk introduces gentle tang and additional lift via acid–baking soda reaction. Whole milk works in a pinch—but never skim or low-fat.
- Coarse Turbinado Sugar (for topping): Adds textural contrast and sparkling crunch that persists even after baking—far superior to granulated for finishing sparkle and caramelized edges.
- Salt (Diamond Crystal preferred): Enhances every other flavor compound, reduces perceived bitterness, and strengthens gluten just enough for biscuit resilience without toughness.
Optional enhancements include a splash of Calvados or bourbon in the filling for aromatic complexity, a whisper of vanilla bean paste, or a scattering of toasted pecans or walnuts in the biscuit dough for nutty depth.
Step-by-Step Recipe
- Preheat & Prep: Place a 10- to 12-inch oven-safe cast iron skillet (well-seasoned, 4–5 mm thick) into a cold oven. Set oven to 375°F (190°C). Let skillet preheat *with* the oven for at least 25 minutes—this ensures thermal stability and prevents shocking the metal.
- Peel, Core & Slice Apples: Use a sharp Y-peeler and corer for speed and consistency. Slice apples ¼-inch thick—uniformity guarantees even cooking. Toss immediately in a large bowl with lemon juice to prevent oxidation.
- Build the Filling: In a separate bowl, whisk together sugars, spices, salt, and cornstarch (or tapioca starch for clearer, glossier syrup). Pour over apples and toss thoroughly until evenly coated. Let macerate 15 minutes—this draws out juices and begins softening.
- Stovetop Sauté (Key Step): Carefully remove hot skillet from oven using heavy-duty oven mitts. Add 2 tbsp unsalted butter and swirl until melted and foaming. Immediately add apple mixture in an even layer. Cook over medium-low heat for 6–8 minutes, stirring gently every 90 seconds—just until apples soften slightly at edges and juices begin to bubble and thicken (do *not* fully cook through; they’ll finish in oven). Remove from heat and let cool 5 minutes.
- Make the Biscuit Dough: In a chilled bowl, whisk dry ingredients (flour, leaveners, salt, spices). Cut in *very cold*, cubed butter using a pastry cutter or fingertips until mixture resembles coarse crumbs with pea-sized butter bits. Stir in cream gradually—just until shaggy clumps form. Do *not* overmix; dough should be moist but not wet, holding together when pinched.
- Assemble & Top: Spoon biscuit dough by heaping ¼-cup portions evenly over hot apple filling—no need to flatten; rustic mounds encourage crisp edges. Brush generously with remaining cream or an egg wash (1 egg + 1 tbsp cream) for golden sheen. Sprinkle turbinado sugar liberally over all.
- Bake with Precision: Return skillet to preheated oven. Bake 35–42 minutes—until biscuits are deep golden brown, spring back lightly when touched, and internal temperature reaches 205–210°F (96–99°C). Rotate skillet halfway for even browning. If topping browns too quickly, tent loosely with foil—but avoid sealing.
- Cool & Set: Remove from oven and rest *on a wire rack* for full 30 minutes—this allows syrup to reabsorb and set, preventing a soggy bottom and enabling clean slicing. Serve warm—not piping hot—for optimal texture contrast.
Tips
- Skip the Cold Oven Trap: Never place a cold skillet into a hot oven—it risks warping, cracking seasoning, or causing uneven heating. Always preheat skillet *with* oven.
- Seasoning Matters: Use a well-seasoned skillet (matte black, non-stick sheen). Avoid new or poorly seasoned skillets—they’ll stick fiercely and leach metallic flavors into the syrup.
- Butter Temperature Is Non-Negotiable: For biscuits: butter must be *cold* (35–40°F / 2–4°C)—store cubes in freezer 10 minutes before cutting in. For filling: butter should be *melted and foaming*, not browned or burnt.
- Don’t Overmix the Dough: Overworking develops gluten, yielding tough, dense biscuits. Mix only until no dry flour remains—lumps are welcome.
- Resist Cutting Too Soon: That glorious syrup needs time to thicken. Cutting at 5 minutes = soupy disaster. At 30 minutes = velvety, clingy perfection.
- Skillet Size Is Critical: A 10-inch skillet yields higher biscuit ratio and deeper apple layer; a 12-inch spreads thinner—adjust bake time ±5 minutes accordingly. Never use smaller than 10-inch or larger than 12-inch for this recipe.
- Acid Balance Check: If using very sweet apples (e.g., Fuji), increase lemon juice to 2 tsp and reduce granulated sugar by 2 tbsp to preserve brightness.
- Oven Thermometer Required: Most built-in oven thermostats are inaccurate by ±25°F. A standalone oven thermometer placed beside the skillet ensures precision.
- Stovetop Control Is Key: Sauté apples *just* until edges yield—overcooking leads to mushy filling and collapsed biscuits. Watch for visual cues: slight translucence at edges, syrup bubbling thickly—not watery.
- Resting = Texture Magic: That 30-minute rest isn’t passive—it’s when starches fully gel, biscuits firm up, and residual heat finishes cooking the centers without drying.
Variations and Customizations
This Cast Iron Skillet Apple Cobbler is gloriously adaptable—designed to reflect your pantry, preferences, and seasons:
- Vegan Adaptation: Replace butter with cold refined coconut oil (for biscuits) and vegan butter (for filling); use full-fat oat or soy cream; substitute brown rice syrup or maple syrup for part of the sugar to enhance binding. Add ½ tsp apple cider vinegar to mimic buttermilk tang.
- Gluten-Free Version: Use a 1:1 GF flour blend with xanthan gum (e.g., King Arthur or Bob’s Red Mill); add 1 tsp psyllium husk powder to dough for elasticity. Increase baking powder to 2¼ tsp for lift compensation.
- Spiced Pear-Ginger Variation: Swap half the apples for ripe Bartlett or Anjou pears; add 1 tbsp finely grated fresh ginger and ¼ tsp ground cardamom to spices; replace lemon with lime zest/juice.
- Apple-Blackberry Swirl: Fold in ¾ cup fresh or frozen blackberries (tossed in 1 tsp cornstarch) during final toss—creates jewel-toned pockets and bright acidity.
- Cheddar-Crusted Cobbler: Fold ½ cup finely shredded sharp white cheddar into biscuit dough—adds savory depth and umami richness that complements apples beautifully (a New England classic).
- Overnight Refrigerated Dough: Prepare biscuit dough, cover, and chill 8–12 hours. Assemble cold dough over warm (not hot) filling—bakes slower but yields exceptionally tender, layered biscuits.
- Brunch Cobbler: Add 2 tbsp bourbon and 1 tsp vanilla to filling; top biscuits with crumbled cooked bacon and chopped chives before baking.
- Deconstructed Individual Servings: Use four 6-inch mini skillets—portion filling and dough equally. Reduce bake time to 22–26 minutes. Perfect for dinner parties.
- Spiced Caramel Drizzle: Simmer ½ cup heavy cream, ¼ cup brown sugar, 1 tbsp butter, and ¼ tsp flaky salt until thickened (5 min); cool slightly and drizzle over servings.
- Fall Spice Infusion: Steep 1 cinnamon stick, 3 whole cloves, and 1 star anise in warm cream for 15 minutes before straining and using in biscuit dough.
Health Considerations and Nutritional Value
While undeniably indulgent, this Cast Iron Skillet Apple Cobbler offers meaningful nutritional merit when viewed holistically—and mindful modifications can elevate its wellness profile without compromising soul-satisfying appeal:
- Apples: Nature’s Fiber Powerhouse: One medium apple provides ~4g dietary fiber (mostly pectin), supporting gut microbiota diversity, cholesterol metabolism, and satiety. Rich in quercetin (anti-inflammatory flavonoid) and vitamin C—especially in skin, which contains up to 50% more antioxidants than flesh.
- Whole Grain Option: Substituting ¼–½ cup of the all-purpose flour with stone-ground whole wheat or spelt flour adds B vitamins, magnesium, and sustained-release energy—without sacrificing tenderness if balanced correctly.
- Reduced-Sugar Strategy: Cutting total sugar by ¼ (using ¾ cup instead of 1 cup) maintains structural integrity and browning while lowering glycemic load—enhanced further by pairing with Greek yogurt (high-protein, low-sugar) instead of ice cream.
- Healthy Fat Profile: Butter contributes conjugated linoleic acid (CLA) and fat-soluble vitamins (A, D, E, K2). For heart-health focus, replace half the butter in biscuits with cold avocado oil or walnut oil—rich in monounsaturated fats and omega-3s.
- Spice Synergy: Cinnamon improves insulin sensitivity; nutmeg contains myristicin (neuroprotective); cloves offer eugenol (potent antioxidant). These aren’t garnishes—they’re functional botanicals.
- Portion Mindfulness: A standard serving (⅛ of recipe) contains ~320–360 kcal, 5–7g fiber, 4–5g protein, and <15g added sugar—well within USDA Dietary Guidelines when enjoyed 1–2x/week as part of balanced eating.
- Avoiding Common Pitfalls: Skipping the stovetop sauté step increases required baking time, leading to dried-out biscuits and overly reduced, sticky syrup. Using underripe apples raises acidity imbalance; overripe ones disintegrate. Excessive sugar masks nuanced apple flavor and promotes rapid blood sugar spikes.
- Pairing for Balance: Serve with unsweetened almond milk–diluted Greek yogurt (1:1), a sprinkle of crushed walnuts (omega-3s + crunch), and a few fresh mint leaves—adds protein, healthy fats, and digestive enzymes.
Note: This dessert is not a “health food,” but rather a nutrient-dense, traditionally prepared treat rooted in real ingredients—where pleasure and nourishment coexist intentionally.
Ingredients
- 6 medium (about 2¼ lbs / 1 kg) mixed apples (e.g., 3 Granny Smith + 3 Honeycrisp), peeled, cored, and sliced ¼-inch thick
- 2 tbsp fresh lemon juice (plus zest of 1 lemon)
- ¾ cup (150g) granulated sugar
- ½ cup (100g) light brown sugar, packed
- 3 tbsp (24g) cornstarch or quick-cooking tapioca starch
- 1½ tsp ground cinnamon
- ¼ tsp freshly grated nutmeg
- ⅛ tsp ground allspice
- ⅛ tsp ground cloves
- ½ tsp Diamond Crystal kosher salt (or ¼ tsp table salt)
- 4 tbsp (57g) unsalted butter, divided
- 1¾ cups (210g) all-purpose flour (plus extra for dusting)
- 2 tsp baking powder
- ¼ tsp baking soda
- ½ cup (120ml) cold heavy cream (plus 2 tbsp for brushing)
- 1 large egg (optional, for richer wash)
- ¼ cup (50g) coarse turbinado sugar, for topping
Directions
- Preheat oven to 375°F (190°C). Place a 10- to 12-inch well-seasoned cast iron skillet in oven to preheat for 25 minutes.
- In a large bowl, combine apple slices and lemon juice; toss to coat. In another bowl, whisk granulated sugar, brown sugar, cornstarch, cinnamon, nutmeg, allspice, cloves, and salt. Pour over apples and toss until evenly coated. Let sit 15 minutes.
- Carefully remove hot skillet from oven. Add 2 tbsp butter; swirl until melted and foaming. Add apple mixture in an even layer. Cook over medium-low heat 6–8 minutes, stirring gently every 90 seconds, until apples soften slightly at edges and syrup bubbles thickly. Remove from heat; cool 5 minutes.
- Meanwhile, in a chilled bowl, whisk flour, baking powder, baking soda, and ¼ tsp salt. Cut in remaining 2 tbsp cold, cubed butter using a pastry cutter until mixture resembles coarse crumbs with visible pea-sized bits. Stir in ½ cup cold heavy cream with a fork until shaggy clumps form—do not overmix.
- Spoon dough by ¼-cup portions over warm apple filling. Gently press edges to seal gaps (do not flatten mounds). Brush tops with remaining cream (or egg wash: 1 egg + 2 tbsp cream). Sprinkle generously with turbinado sugar.
- Bake 35–42 minutes, rotating halfway, until biscuits are deep golden and spring back when lightly pressed. Internal temperature should read 205–210°F (96–99°C). If topping browns too fast, tent loosely with foil.
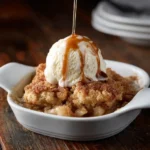
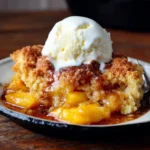
- Transfer skillet to a wire rack. Cool completely for 30 minutes before serving. Best enjoyed warm with unsweetened whipped cream, Greek yogurt, or a scoop of vanilla bean ice cream.
FAQ
- Can I make this ahead?
- Yes! Assemble filling up to 24 hours ahead—store covered in fridge. Biscuit dough can be made, shaped into rounds, and refrigerated up to 12 hours. Bring both to room temperature before assembling and baking. Fully baked cobbler keeps refrigerated 4 days—reheat covered with foil at 325°F (165°C) for 20 minutes.
- Why does my biscuit topping sink or get soggy?
- Most often due to: (1) Adding dough to *scalding-hot* filling—let fillings cool 5 minutes first; (2) Underbaking—biscuits must reach 205°F internally; (3) Overmixing dough—gluten development traps steam instead of releasing it; (4) Using skim milk or low-fat cream—fat is essential for steam pockets and structure.
- Can I use frozen apples?
- Yes—but thaw completely and drain *excess* liquid (press gently in a clean towel). Increase cornstarch by 1 tsp to compensate for extra moisture. Flavor and texture will be slightly less vibrant than fresh, but still delicious.
- My skillet stuck! How do I prevent that?
- Ensure your skillet is well-seasoned (matte black, slick surface). Never use soap or abrasive scrubbers—clean with hot water and stiff brush only. Dry immediately and rub with thin layer of neutral oil. Also: avoid acidic fillings (like tomatoes) for long storage—but brief apple contact is safe.
- Can I double this recipe?
- Not in one skillet. Use two skillets—or bake in a 9×13-inch ceramic dish (reduce stovetop sauté time by 2 minutes; bake 40–45 minutes). Skillet heat dynamics don’t scale linearly.
- What’s the best way to store leftovers?
- Cool completely, cover tightly with beeswax wrap or lid, and refrigerate up to 4 days. Reheat individual portions in toaster oven or air fryer (350°F / 175°C for 8–10 minutes) to restore crispness—microwaving makes biscuits rubbery.
- Can I freeze this?
- Freeze *unbaked* assembly only: After placing dough over filling, wrap skillet tightly in 2 layers plastic + foil. Freeze up to 3 months. Bake from frozen—add 12–15 minutes to bake time, tenting with foil first 20 minutes.
- Is there a dairy-free biscuit option that rises well?
- Absolutely: Use cold refined coconut oil (not virgin—too strong) + ½ tsp apple cider vinegar in plant-based milk (soy or oat) to activate baking soda. Add 1 tsp flaxseed meal mixed with 3 tbsp water as binder. Expect slightly denser—but flavorful—biscuits.
- Why use cornstarch instead of flour for thickening?
- Cornstarch creates a clearer, glossier, more stable syrup that doesn’t break down during prolonged baking. Flour can leave a raw, pasty taste and cloudy appearance unless cooked thoroughly—difficult to achieve uniformly beneath biscuit dough.
- Can I add nuts or oats?
- Yes! Fold ½ cup toasted walnuts or pecans into filling. Or stir ⅓ cup old-fashioned oats into biscuit dough for hearty chew and extra fiber. Toast oats first to deepen flavor and prevent gumminess.
Summary
A Cast Iron Skillet Apple Cobbler is more than dessert—it’s a masterclass in thermal science, seasonal reverence, and culinary patience, where a single versatile tool transforms humble apples into alchemy through precise heat management and intentional layering.
With its crackling turbinado crust, tender-spiced apples suspended in glossy amber syrup, and biscuits that are simultaneously crisp-edged and cloud-soft within, this recipe delivers profound comfort, nostalgic resonance, and surprising nutritional substance—all from one cherished, centuries-old piece of cookware.