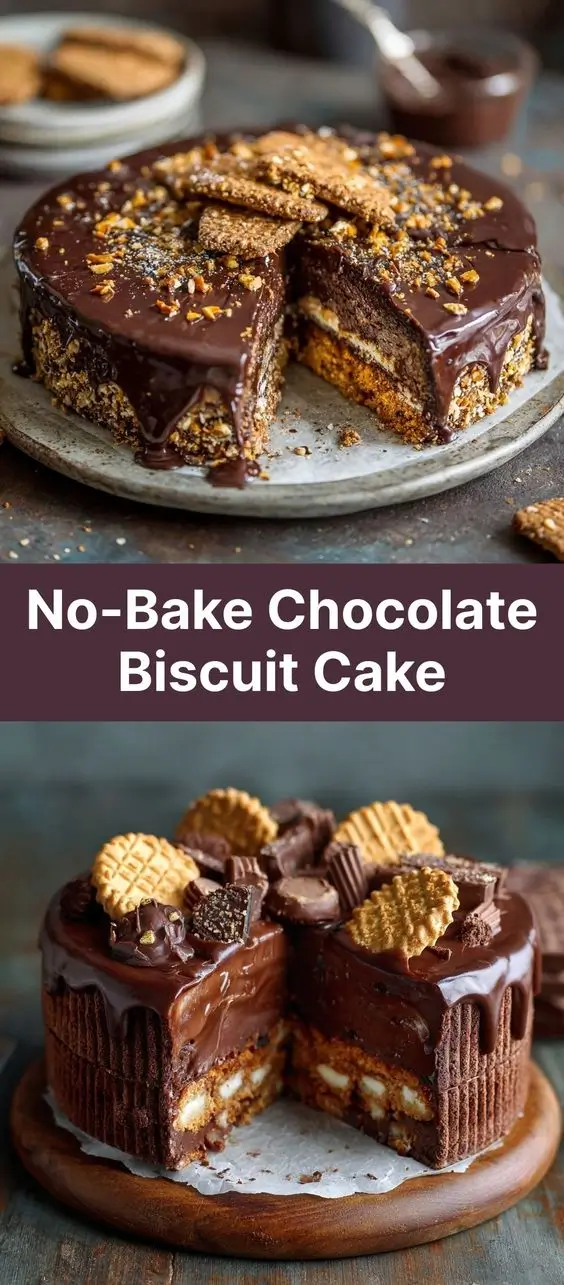
No-Bake Chocolate Biscuit Cake
The No-Bake Chocolate Biscuit Cake is a timeless dessert that has captured hearts across continents with its rich, indulgent flavor and effortless preparation. Loved by both children and adults, this cake requires no oven, making it perfect for warm weather, last-minute gatherings, or anyone who wants a decadent treat without the hassle of baking. Whether you’re a novice in the kitchen or a seasoned cook looking for a quick dessert, this recipe delivers satisfaction with minimal effort.
The History
The origins of the No-Bake Chocolate Biscuit Cake can be traced back to mid-20th century Britain, where home cooks began experimenting with accessible ingredients during times of rationing. With limited access to flour and sugar, people turned to pantry staples like digestive biscuits (a slightly sweet, whole wheat biscuit), cocoa, butter, and condensed milk to create satisfying desserts. The cake quickly gained popularity due to its simplicity, requiring only mixing and chilling—no oven needed.
Over time, variations spread throughout the Commonwealth, from Australia to South Africa and New Zealand, each region adding its own twist—whether using different types of biscuits, chocolate spreads, or additional layers. In recent years, the cake has seen a resurgence on social media platforms like Pinterest and Instagram, praised for its nostalgic charm and ease of preparation. Today, it’s considered a staple at picnics, school events, and holiday tables around the world.
Ingredients Breakdown
Understanding the role of each ingredient helps elevate your No-Bake Chocolate Biscuit Cake from good to exceptional:
- Digestive Biscuits (or Graham Crackers): These form the base structure of the cake. Their slightly nutty, malty flavor pairs perfectly with chocolate. They’re sturdy enough to absorb moisture without turning soggy.
- Unsweetened Cocoa Powder: Provides deep chocolate flavor without excessive sweetness. Opt for high-quality Dutch-processed cocoa for a smoother, richer taste.
- Butter: Adds richness and helps bind the mixture. Unsalted butter is preferred so you can control the salt content. It also contributes to the cake’s luxurious mouthfeel when chilled.
- Sweetened Condensed Milk: Acts as both a sweetener and binder. Its thick, caramel-like consistency holds the crumbs together while adding a creamy sweetness.
- Vanilla Extract: Enhances overall flavor complexity and balances the bitterness of cocoa.
- Pinch of Salt: Crucial for balancing sweetness and intensifying other flavors.
- Chocolate Topping (Optional but recommended): Melted dark, milk, or white chocolate adds a glossy finish and extra decadence.
- Extras (Optional): Chopped nuts, shredded coconut, dried fruit, or even crushed Oreos can add texture and visual appeal.
Step-by-Step Recipe
- Prepare Your Pan: Line a 9-inch springform pan or loaf tin with parchment paper, leaving an overhang on the sides for easy removal later.
- Crumble the Biscuits: Place about 300g (10–12 oz) of digestive biscuits into a large resealable bag. Use a rolling pin to crush them into fine crumbs. Alternatively, use a food processor for speed and uniformity.
- Mix Dry Ingredients: In a large bowl, combine the biscuit crumbs with ½ cup (40g) unsweetened cocoa powder. Stir well to distribute evenly.
- Melt Butter and Combine: In a saucepan over low heat, melt 150g (⅔ cup) unsalted butter. Remove from heat and stir in one 14-ounce (397g) can of sweetened condensed milk, 1 teaspoon vanilla extract, and a pinch of salt until smooth.
- Combine Wet and Dry Mixtures: Pour the melted butter mixture into the biscuit and cocoa mixture. Stir thoroughly until all the crumbs are evenly coated and resemble wet sand. If too dry, add another tablespoon of condensed milk; if too wet, sprinkle in more biscuit crumbs.
- Press Into Pan: Transfer the mixture to the prepared pan. Use the back of a spoon or a flat-bottomed glass wrapped in plastic wrap to press down firmly and evenly. A compact, solid base ensures the cake holds together when sliced.
- Chill: Refrigerate for at least 4 hours, preferably overnight, to allow the cake to set completely.
- Add Chocolate Topping (Optional): Once chilled, melt 200g (7 oz) of your favorite chocolate (dark, milk, or white) with 1 tablespoon of vegetable oil or shortening for shine. Pour over the top of the cake and spread evenly. Return to the fridge for 30 minutes to set the topping.
- Slice and Serve: Remove from the pan using the parchment overhang. Slice with a sharp knife dipped in hot water for clean cuts. Garnish with shaved chocolate, sprinkles, or fresh berries if desired.
Tips for Success
- Consistency is Key: The mixture should clump together when pressed between your fingers but not be greasy. Adjust with more crumbs or condensed milk as needed.
- Use Cold Butter for Easier Slicing: Keep the cake refrigerated until serving. Warm slices tend to crumble.
- Double Wrap for Freezing: This cake freezes beautifully for up to 3 months. Wrap tightly in plastic wrap and then aluminum foil to prevent freezer burn.
- Don’t Skip the Chill Time: Rushing the setting process leads to a loose, crumbly texture. Patience rewards you with a firm, sliceable cake.
- Customize Your Pan Size: For a thinner cake, use a larger pan. For a thicker, denser version, stick to a smaller mold. Adjust pressing pressure accordingly.
- Temper Expectations: While called a “cake,” it’s more akin to a dense fudge-like bar. Embrace its unique texture rather than expecting sponge-like softness.
Variations and Customizations
This versatile recipe lends itself to endless creativity. Here are some popular twists:
- Peanut Butter Swirl: Add ½ cup of creamy peanut butter to the butter mixture before combining with crumbs. You can also swirl extra peanut butter on top before chilling.
- Oreo Version: Replace digestive biscuits with Oreo cookies (filling included). The result is sweeter and creamier, with a distinct cookie flavor.
- Coconut Dream: Mix in ½ cup of toasted shredded coconut for a tropical flair. Pair with dark chocolate for contrast.
- Nutty Crunch: Fold in chopped walnuts, pecans, or almonds for added crunch and protein.
- White Chocolate Raspberry: Top with white chocolate and scatter freeze-dried raspberries on top before setting.
- Gluten-Free Option: Use gluten-free digestive biscuits or graham crackers to make this dessert safe for those with sensitivities.
- Vegan Adaptation: Substitute dairy-free margarine for butter, use vegan condensed milk (available commercially or homemade), and choose plant-based chocolate.
- Layered Look: Create alternating layers using plain biscuit crumbs and chocolate crumbs for a striking visual effect.
- Holiday Themes: Add red and green sprinkles for Christmas, pastel candies for Easter, or edible glitter for birthdays.
Health Considerations and Nutritional Value
While undeniably delicious, the traditional No-Bake Chocolate Biscuit Cake is high in sugar, saturated fat, and calories due to condensed milk, butter, and chocolate. However, mindful modifications can make it a slightly healthier indulgence:
- Reduce Sugar: Use reduced-sugar condensed milk or swap in a natural sweetener blend carefully formulated for cooking (note: may alter texture).
- Healthy Fats: Though butter is central to flavor, substituting part of it with unsweetened applesauce (up to ¼) can reduce fat content—but don’t exceed this or the texture suffers.
- Fiber Boost: Choose whole grain or high-fiber biscuits to increase dietary fiber, aiding digestion and satiety.
- Portion Control: Cut small squares—this cake is rich, so a little goes a long way. Store leftovers out of immediate reach to avoid overindulgence.
- Antioxidant Benefits: Using dark chocolate (70% cocoa or higher) increases flavonoid content, which may support heart health in moderation.
On average, one medium slice (about 1/12 of the cake) contains approximately:
- Calories: 320–380
- Total Fat: 18–22g (mostly saturated)
- Carbohydrates: 40–45g
- Sugars: 30–35g
- Protein: 4–6g
- Fiber: 2–3g
Enjoy occasionally as part of a balanced diet. Not ideal for diabetics or those on strict low-fat regimens unless significantly modified.
Ingredients
- 300g (about 12–15) digestive biscuits (or graham crackers)
- 150g (⅔ cup) unsalted butter
- 1 can (397g / 14 oz) sweetened condensed milk
- 40g (½ cup) unsweetened cocoa powder
- 1 tsp vanilla extract
- Pinch of salt
- 200g (7 oz) chocolate (dark, milk, or white), for topping
- 1 tbsp vegetable oil or coconut oil (optional, for smoother topping)
Directions
- Line a 9-inch springform pan or loaf tin with parchment paper.
- Crumble the biscuits into fine crumbs using a rolling pin or food processor.
- In a mixing bowl, combine biscuit crumbs and cocoa powder. Mix well.
- In a saucepan, melt butter over low heat. Remove from heat and stir in condensed milk, vanilla, and salt until smooth.
- Pour the wet mixture into the dry ingredients. Stir until fully combined and the texture resembles damp sand.
- Transfer to the lined pan and press down firmly and evenly with the back of a spoon or glass.
- Refrigerate for at least 4 hours or overnight until fully set.
- (Optional) Melt chocolate with oil and pour over the chilled base. Spread evenly and return to fridge for 30 minutes.
- Remove from pan using parchment overhang. Slice with a warm knife and serve chilled.
FAQ
Can I make this cake without condensed milk?
Yes, though it will change the texture and sweetness. Alternatives include date paste blended with milk, maple syrup with heavy cream reduction, or commercial substitutes—but expect variation in binding and richness.
Why is my cake too soft?
Likely causes: insufficient chilling time, too much condensed milk, or inadequate pressing. Always chill for at least 4 hours, ideally overnight.
Can I use milk chocolate instead of cocoa powder?
You can, but it may make the mixture overly sweet and oily. Stick to cocoa powder for balance, and save milk chocolate for the topping.
How long does it last in the fridge?
Up to 1 week when stored in an airtight container. Layer with parchment paper between slices to prevent sticking.
Is freezing possible?
Absolutely. Freeze whole or in slices for up to 3 months. Thaw in the refrigerator for 30–60 minutes before serving.
Can I make it nut-free?
Yes, ensure your biscuits and chocolate are certified nut-free, especially important for allergies.
What can I use instead of butter?
Dairy-free margarine or coconut oil work well. Coconut oil adds a subtle flavor; refined versions are more neutral.
Summary
The No-Bake Chocolate Biscuit Cake is a rich, no-fuss dessert that combines chocolatey depth with a crunchy biscuit base—all without turning on your oven. Perfect for any occasion, it’s customizable, make-ahead friendly, and adored by all ages.