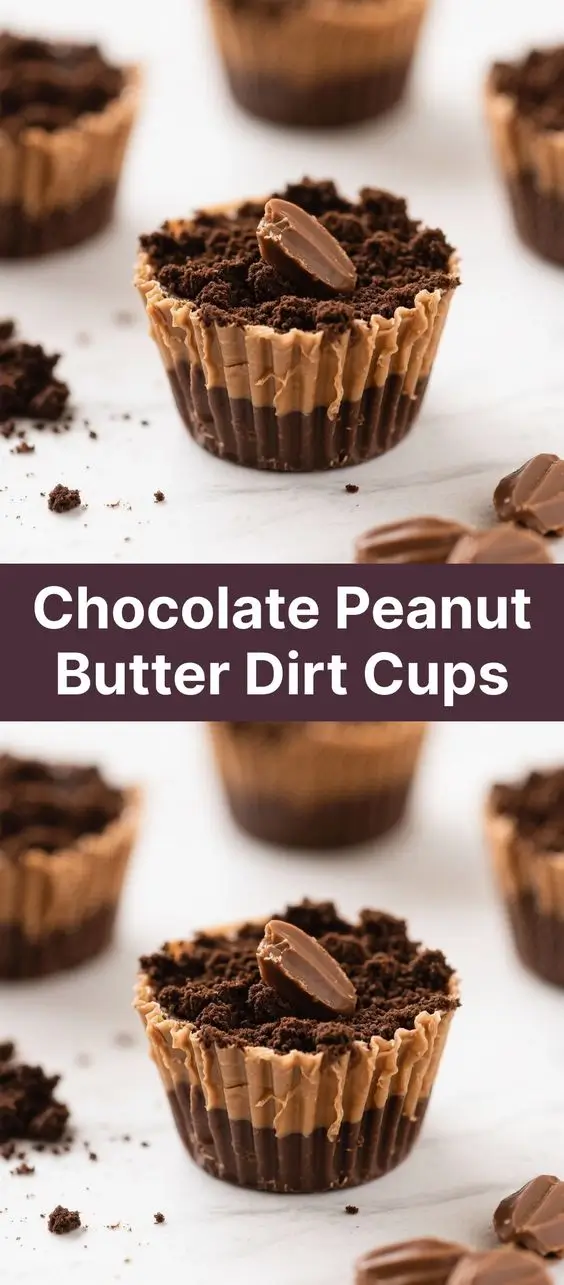
Chocolate Peanut Butter Dirt Cups: A Decadent Delight You Can’t Resist
The History of Chocolate Peanut Butter Dirt Cups
The concept of “dirt cups” traces its roots back to American childhood traditions, where playful and imaginative names were given to desserts that resembled garden soil—usually due to the use of crushed cookies or chocolate. The original version, often known as “ants on a log” or later “dirt pudding,” became popular in school cafeterias and summer camps during the 1970s and 1980s. These early versions typically featured cream cheese or pudding layered with crushed Oreos and gummy worms for fun.
As dessert trends evolved and home bakers sought richer, more indulgent flavors, peanut butter entered the scene as a creamy, satisfying twist. Combining peanut butter with chocolate created a match made in heaven—one deeply rooted in American taste preferences. The modern Chocolate Peanut Butter Dirt Cups emerged from this evolution, blending no-bake simplicity with gourmet flair. These miniature desserts are now staples at parties, potlucks, and holiday gatherings, especially among fans of Reese’s-style flavor profiles.
With the rise of food blogs and social media platforms like Pinterest and Instagram, dirt cups have undergone countless transformations. From vegan adaptations to gluten-free versions and even boozy adult twists, these little treats continue to captivate dessert lovers worldwide. But it’s the classic chocolate peanut butter combination that remains the most beloved—a nostalgic nod to childhood with an undeniably luxurious upgrade.
Ingredients Breakdown: What Makes These Dirt Cups So Irresistible?
The magic of Chocolate Peanut Butter Dirt Cups lies not only in their whimsical appearance but also in the careful balance of textures and flavors. Each ingredient plays a crucial role in creating a harmonious, indulgent experience. Let’s take a deep dive into what goes into each cup:
- Chocolate Wafer Cookies (or Oreo-type cookies): These form the “dirt” layer, providing a crunchy, sweet base that mimics real soil. The cocoa content adds depth, while the fine crumb texture holds well when pressed into liners.
- Cream Cheese: Acts as a stabilizing agent and adds richness and tanginess that cuts through the sweetness. It helps bind the crust and gives structure to the peanut butter filling.
- Peanut Butter (creamy, unsweetened preferred): The star of the show. High-quality peanut butter delivers a nutty, savory-sweet core that complements the chocolate perfectly. Opting for natural peanut butter ensures fewer additives and a cleaner flavor profile.
- Powdered Sugar: Adds sweetness and smoothness to the peanut butter mixture, helping it achieve a fluffy, spreadable consistency without being greasy.
- Heavy Cream or Whipping Cream: Used to whip the topping, adding lightness and airiness. When combined with powdered sugar and vanilla, it transforms into a cloud-like crown atop each cup.
- Vanilla Extract: Enhances overall flavor complexity in both the filling and the whipped topping. Pure extract is recommended over imitation for best results.
- Semisweet Chocolate Chips or Chunks: Melted and used either as a drizzle or incorporated into the crust for extra chocolate intensity. They provide a glossy finish and rich mouthfeel.
- Mini Chocolate Chips or Sprinkles (optional): For additional texture and visual appeal—especially loved by kids.
- Gummy Worms (optional): The playful touch that turns these into true “dirt” cups. While entirely optional, they add fun factor for themed parties or kid-friendly events.
Each component works together to deliver a multi-layered dessert that balances creamy, crunchy, sweet, and slightly salty notes—an absolute symphony in every bite.
Step-by-Step Recipe: How to Make Perfect Chocolate Peanut Butter Dirt Cups
Creating these delectable treats is easier than you might think! With minimal cooking and mostly no-bake steps, you can whip up a batch in under an hour (plus chilling time). Follow this detailed guide for foolproof results every time:
Ingredients
- 24 chocolate sandwich cookies (like Oreos), finely crushed (about 2 cups crumbs)
- 6 tablespoons unsalted butter, melted
- 8 oz cream cheese, softened to room temperature
- 1 cup creamy peanut butter (preferably natural)
- 1/2 cup powdered sugar, sifted
- 1 teaspoon pure vanilla extract
- 1 cup heavy whipping cream, cold
- 2 tablespoons powdered sugar (for whipped cream)
- 1/2 teaspoon vanilla extract (for whipped cream)
- 1/2 cup mini chocolate chips (plus extra for garnish)
- Gummy worms (optional, for decoration)
Directions
- Prepare the Crust: In a medium bowl, combine the crushed chocolate cookies and melted butter. Mix until all crumbs are evenly coated and resemble wet sand.
- Press Into Liners: Line a muffin tin with paper or silicone cupcake liners. Evenly divide the cookie mixture among 12 cups (about 2 tablespoons per cup). Use the back of a spoon or a small glass to firmly press the mixture into the bottom to create a compact crust. Place in the refrigerator to chill for at least 15 minutes.
- Make the Peanut Butter Filling: In a large mixing bowl, beat the softened cream cheese until smooth and creamy using a hand mixer or stand mixer. Add the peanut butter, 1/2 cup powdered sugar, and 1 teaspoon vanilla extract. Beat on medium speed until fully combined and fluffy, about 2–3 minutes. Scrape down the sides as needed.
- Filling the Cups: Remove the chilled crusts from the fridge. Spoon the peanut butter mixture evenly over the crusts, spreading gently to cover completely. Return to the refrigerator while preparing the topping.
- Whip the Cream: In another clean bowl, pour in the cold heavy cream. Using a whisk attachment, begin beating on medium-high speed. Once soft peaks begin to form, add the 2 tablespoons powdered sugar and 1/2 teaspoon vanilla extract. Continue beating until stiff peaks form—be careful not to overbeat or the cream may turn grainy.
- Top the Cups: Transfer the whipped cream to a piping bag fitted with a star tip (optional) or simply spoon it onto each cup. Swirl decoratively or keep it simple. Sprinkle mini chocolate chips over the top for added crunch and visual effect.
- Add Final Touches: If desired, tuck a gummy worm into each cup for a playful “dirt” effect. You can also drizzle melted chocolate over the tops for extra decadence.
- Chill Before Serving: Refrigerate the assembled dirt cups for at least 1 hour to allow all layers to set properly. This step ensures clean bites and optimal texture.
- Serve and Enjoy: Remove from the fridge just before serving. Serve chilled for best taste and consistency.
Tips for Making the Best Chocolate Peanut Butter Dirt Cups
To elevate your dirt cups from good to extraordinary, consider these professional tips and insider tricks:
- Use Room Temperature Ingredients: Ensure cream cheese and eggs (if used in variations) are at room temperature for smoother blending and no lumps.
- Don’t Skip the Chill Time: Allowing the crust to chill before filling prevents sogginess and improves structural integrity.
- Avoid Overmixing the Whipped Cream: Stop once stiff peaks form. Over-whipping turns cream into butter!
- Customize Cookie Crumbs: Try using chocolate graham crackers, Nutter Butters, or homemade gluten-free chocolate cookies for unique flavor bases.
- Double the Recipe: These disappear fast! Doubling ensures leftovers won’t be an issue—at least not for long.
- Freeze for Later: Assembled (but unfrosted) cups can be frozen for up to 2 months. Thaw in the fridge overnight and add fresh whipped cream before serving.
- Keep Them Cold: Store in the refrigerator at all times due to the dairy-based ingredients. Consume within 5 days for freshness.
- Use Silicone Liners: They make removal much easier and are reusable, eco-friendly, and prevent sticking.
- Pipe Like a Pro: Use a resealable plastic bag with the corner snipped off if you don’t have a piping bag. It’s just as effective!
- Balancing Sweetness: If your peanut butter is already sweetened, reduce the powdered sugar slightly to avoid overly sweet fillings.
Variations and Customizations: Make It Your Own
One of the greatest things about Chocolate Peanut Butter Dirt Cups is how easily they adapt to different tastes, dietary needs, and occasions. Here are some creative spins to inspire your next batch:
Flavor Twists
- Nutella Version: Replace peanut butter with Nutella for a hazelnut-chocolate twist. Pair with crushed hazelnut cookies for the crust.
- Almond Butter Alternative: Ideal for those avoiding peanuts. Almond butter offers a milder, slightly sweeter profile.
- Cookie Butter (Biscoff): Use Biscoff spread instead of peanut butter for a warm cinnamon-spiced variation.
- Mocha Dirt Cups: Add 1 tablespoon instant espresso powder to the chocolate crust or mix into the whipped cream for coffee lovers.
Dietary Adaptations
- Gluten-Free: Use certified gluten-free chocolate cookies or make your own crust from almond flour, cocoa powder, and butter.
- Vegan: Substitute cream cheese with vegan cream cheese (e.g., Kite Hill or Tofutti), use plant-based butter, and replace heavy cream with chilled coconut cream. Choose dairy-free chocolate chips.
- Low-Sugar/Keto-Friendly: Use sugar-free cookies, monk fruit-sweetened peanut butter, and erythritol-based powdered sugar alternatives. Opt for keto-approved chocolate chips.
- Paleo: Create a date-nut crust using walnuts, dates, and raw cacao, then fill with natural peanut butter and coconut cream topping.
Fun Themes & Occasions
- Halloween: Go full spooky with black licorice “worms,” orange sprinkles, and spiderweb chocolate drizzles.
- St. Patrick’s Day: Dye the whipped cream green with natural spirulina or matcha, and sprinkle with gold edible dust.
- Kids’ Birthday Party: Let children decorate their own cups with candies, sprinkles, and toy bugs for interactive fun.
- Valentine’s Day: Use heart-shaped liners, red-tinted whipped cream, and chocolate-dipped strawberries as garnishes.
- Adult-Only Version: Add 1–2 tablespoons Baileys, bourbon, or Kahlúa to the peanut butter filling for a spiked treat.
Health Considerations and Nutritional Value
While Chocolate Peanut Butter Dirt Cups are undeniably indulgent, understanding their nutritional content helps you enjoy them mindfully. Below is an approximate breakdown per serving (one cup, based on 12 servings):
| Nutrient | Amount Per Serving |
|---|---|
| Calories | ~320 kcal |
| Total Fat | 24g |
| Saturated Fat | 10g |
| Cholesterol | 30mg |
| Sodium | 280mg |
| Total Carbohydrates | 25g |
| Dietary Fiber | 2g |
| Sugars | 18g |
| Protein | 6g |
Key Notes:
- Fat Content: Primarily comes from peanut butter, butter, and cream. While high in fat, much of it is unsaturated and heart-healthy when consumed in moderation.
- Sugar Levels: Relatively high due to cookies, powdered sugar, and optional toppings. Reducing sugar or using alternatives can lower this significantly.
- Protein Boost: Peanut butter contributes a decent amount of protein, making these more satisfying than typical sugary desserts.
- Allergens: Contains peanuts, dairy, wheat (unless substituted), and soy (depending on brands used). Always check labels if serving guests with allergies.
- Moderation is Key: These are best enjoyed occasionally as part of a balanced diet. One cup satisfies cravings without overindulgence.
Frequently Asked Questions (FAQ)
Can I make Chocolate Peanut Butter Dirt Cups ahead of time?
Yes! You can prepare them up to 2 days in advance. Store covered in the refrigerator. Add whipped cream and garnishes just before serving for best texture.
Can I freeze these dirt cups?
Absolutely. Assemble without the whipped cream topping, place in an airtight container, and freeze for up to 2 months. Thaw in the fridge overnight, then top with freshly whipped cream before serving.
What can I use instead of Oreos?
You can use any chocolate wafer-style cookie, including generic brands, gluten-free cookies, or even homemade chocolate crumb crust made from ground nuts and cocoa.
Is there a way to make them less sweet?
Yes. Use unsweetened peanut butter, reduce powdered sugar, choose low-sugar cookies, and skip candy garnishes. Natural sweeteners like stevia or monk fruit can also help.
Why did my whipped cream deflate?
This usually happens if the cream wasn’t cold enough, the bowl wasn’t chilled, or it was under-beaten. Always use cold equipment and ingredients. Stabilize with a bit of cornstarch or gelatin if needed.
Can I use store-bought whipped topping?
You can, though homemade tastes fresher and contains fewer additives. If using Cool Whip or similar, fold in mini chocolate chips just before topping.
Are these safe for people with nut allergies?
No, unless you substitute the peanut butter with sunflower seed butter or soy nut butter. Always label accordingly when serving groups.
How do I transport them safely?
Place in a single layer in a sealed container with parchment between layers if stacking. Keep refrigerated or chilled with ice packs during transit.
Summary
Chocolate Peanut Butter Dirt Cups are a rich, no-bake dessert that combines a crunchy chocolate crust, creamy peanut butter filling, and airy whipped topping—finished with a playful sprinkle of “dirt” and optional gummy worms. Easy to customize and perfect for any occasion, they’re a crowd-pleasing favorite that blends nostalgia with gourmet indulgence.