Peanut Butter Chocolate Mug Brownie: A Decadent Single-Serve Delight
The History of the Mug Brownie and Its Rise to Fame
The concept of the mug brownie emerged from the broader trend of “mug meals,” which gained popularity in the early 2000s as a quick, convenient solution for individuals seeking warm, comforting desserts with minimal effort and cleanup. With the rise of microwave ovens in homes, dorm rooms, and offices, people began experimenting with single-serve recipes that could be prepared in under five minutes using just a coffee mug. The peanut butter chocolate mug brownie, in particular, evolved as a fan-favorite variation of the classic chocolate mug brownie, combining two universally beloved flavors—rich cocoa and creamy peanut butter—into one indulgent treat.
Its roots can be traced back to food bloggers and home cooks who shared their microwave dessert hacks on platforms like Pinterest, Tumblr, and later Instagram and TikTok. These bite-sized brownies became especially popular among college students, busy professionals, and late-night snackers craving something sweet without baking an entire batch. Over time, the recipe has been refined, optimized, and adapted across countless blogs, cookbooks, and social media channels, becoming a staple of instant dessert culture. Today, the peanut butter chocolate mug brownie stands as a symbol of culinary ingenuity—proof that decadence doesn’t have to come at the cost of time or effort.
Ingredients Breakdown: What Makes This Mug Brownie So Irresistible?
The magic of the peanut butter chocolate mug brownie lies in its carefully balanced ingredients, each playing a crucial role in creating a moist, fudgy texture with bold flavor. Here’s a detailed look at what goes into this single-serving masterpiece:
- All-Purpose Flour: Provides structure to the brownie, helping it hold together while still remaining soft and tender. For a gluten-free version, almond flour or oat flour can be substituted.
- Cocoa Powder (Unsweetened): The heart of any good brownie, cocoa powder delivers deep chocolate flavor. Dutch-processed cocoa offers a smoother, richer taste, but natural unsweetened cocoa works perfectly too.
- Baking Powder: A small amount helps the brownie rise slightly, giving it a cake-like lift while maintaining its dense, fudgy core.
- Granulated Sugar: Adds sweetness and contributes to the crackly top that forms during microwaving. You can use coconut sugar or a sugar substitute like erythritol for a lower glycemic option.
- Salt: Enhances all the other flavors, balancing sweetness and intensifying the chocolate and peanut butter notes.
- Large Egg (or Flax Egg): Binds the ingredients together and adds moisture. For a vegan version, mix 1 tablespoon ground flaxseed with 3 tablespoons water and let it sit for 5 minutes.
- Vegetable Oil (or Melted Butter): Keeps the brownie rich and moist. Oil tends to yield a softer crumb, while butter adds a more complex, bakery-style flavor.
- Milk (Dairy or Plant-Based): Helps create the right batter consistency. Almond milk, oat milk, soy milk, or regular dairy milk all work well.
- Vanilla Extract: Adds depth and warmth to the overall flavor profile, rounding out the sweetness.
- Peanut Butter (Creamy or Crunchy): The star ingredient! Swirled into the batter or layered in the center, it creates gooey pockets of nutty goodness. Natural peanut butter without added sugar enhances the richness, while conventional brands add extra sweetness.
- Chocolate Chips (Optional but Recommended): Semi-sweet, dark, or milk chocolate chips melt into molten pockets, elevating the chocolate intensity. Mini chips distribute more evenly.
Step-by-Step Recipe: How to Make the Perfect Peanut Butter Chocolate Mug Brownie
Follow these easy steps to create a restaurant-quality dessert in under 10 minutes—all in one mug!
- Gather Your Tools and Ingredients: You’ll need a large microwave-safe mug (at least 12 oz capacity), a small mixing bowl, a whisk or fork, and all your ingredients measured and ready.
- Preheat (Indirectly): While you don’t preheat the microwave, ensure your ingredients are at room temperature for even mixing—especially the egg and milk.
- Mix Dry Ingredients: In the mug, combine 4 tablespoons all-purpose flour, 2 tablespoons unsweetened cocoa powder, 2 tablespoons granulated sugar, 1/4 teaspoon baking powder, and a pinch of salt. Whisk thoroughly to remove lumps.
- Add Wet Ingredients: Pour in 2 tablespoons milk, 1 large egg, 1 tablespoon vegetable oil, 1/2 teaspoon vanilla extract, and 1 tablespoon water (if needed to thin the batter). Mix until smooth and no dry streaks remain.
- Incorporate Peanut Butter: Add 2 tablespoons of creamy peanut butter. You can either fold it gently into the batter for a marbled effect or pour the batter around a central dollop of peanut butter for a molten core.
- Add Chocolate Chips (Optional): Sprinkle 1–2 tablespoons of chocolate chips on top or fold them in lightly for extra melty goodness.
- Microwave: Place the mug in the microwave and cook on high for 60 to 90 seconds. Start checking at 60 seconds—look for the edges pulling away slightly and the center being just set (it will continue cooking from residual heat).
- Cool Slightly: Let the mug brownie rest for 1–2 minutes. It will be extremely hot and will firm up slightly as it cools.
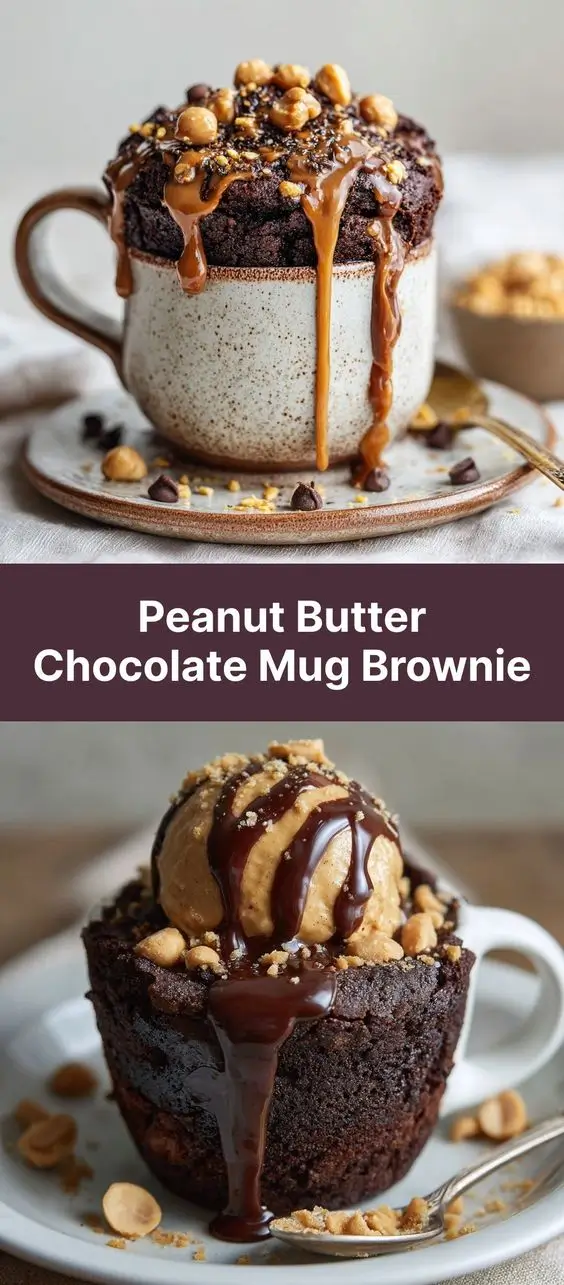
- Serve Warm: Enjoy straight from the mug, topped with powdered sugar, a drizzle of melted peanut butter, whipped cream, or a scoop of vanilla ice cream for ultimate indulgence.
Tips for the Best Peanut Butter Chocolate Mug Brownie Every Time
- Use a Large Mug: Always choose a mug with at least 12 oz capacity to prevent overflow during cooking.
- Don’t Overmix: Once you add the dry ingredients, stir just until combined. Overmixing can develop gluten and make the brownie tough.
- Watch the Microwave Time: Microwaves vary in strength. If your brownie isn’t fully cooked at 60 seconds, add 10-second increments until done. Overcooking leads to dryness.
- Check the Center: The brownie should look slightly underdone in the middle when you take it out—it continues to cook as it sits.
- Let It Rest: Allow the brownie to cool for 1–2 minutes before eating. Not only does it finish setting, but it also prevents mouth burns.
- Swirl, Don’t Stir: To achieve a marbled peanut butter effect, use a toothpick or knife to gently swirl the peanut butter into the batter without fully blending.
- Elevate with Toppings: A dusting of powdered sugar, a drizzle of chocolate sauce, crushed peanuts, or a scoop of low-fat Greek yogurt can enhance both flavor and presentation.
- Double-Check Ingredients: Ensure your baking powder is fresh for optimal rise. Old leavening agents may result in a flat, dense brownie.
Variations and Customizations: Make It Your Own
One of the greatest advantages of the peanut butter chocolate mug brownie is its versatility. Whether you’re catering to dietary restrictions or simply want to experiment with new flavors, here are some delicious variations:
- Gluten-Free: Replace all-purpose flour with a 1:1 gluten-free baking blend or almond flour (use 3 tablespoons to avoid density).
- Vegan: Use a flax egg (1 tbsp ground flax + 3 tbsp water), plant-based milk, and replace honey-sweetened peanut butter with a sugar-free version. Use dairy-free chocolate chips.
- Low-Sugar/Keto: Substitute sugar with erythritol or monk fruit sweetener, use keto-friendly peanut butter (no added sugar), and opt for unsweetened cocoa and almond flour.
- Nut-Free: Replace peanut butter with sunflower seed butter or soy nut butter for a similar creamy texture without the nuts.
- Double Chocolate: Add an extra tablespoon of cocoa powder and increase chocolate chips to 3 tablespoons for an ultra-rich experience.
- Cookie Butter Swirl: Swap half the peanut butter with Biscoff or speculoos spread for a spiced, caramelized twist.
- Sea Salt & Dark Chocolate: Use dark cocoa powder, 70% dark chocolate chips, and finish with a sprinkle of flaky sea salt for a gourmet touch.
- Protein Boost: Add 1 scoop of chocolate or vanilla protein powder and adjust liquid with an extra tablespoon of milk to maintain consistency.
- S’mores Style: Top with mini marshmallows and graham cracker crumbs before microwaving for 10 extra seconds to melt.
- Mint Chocolate: Add 1/4 teaspoon peppermint extract along with the vanilla for a refreshing twist.
Health Considerations and Nutritional Value
While the peanut butter chocolate mug brownie is undeniably indulgent, it can be adapted to fit various nutritional goals. Here’s a breakdown of the standard version (without optional add-ons):
| Nutrient | Amount (Approximate) |
|---|---|
| Calories | 380–420 kcal |
| Total Fat | 20–24g |
| Saturated Fat | 6–8g |
| Cholesterol | 60mg |
| Sodium | 200–250mg |
| Total Carbohydrates | 45–50g |
| Dietary Fiber | 3–4g |
| Sugars | 25–30g |
| Protein | 8–10g |
Health Notes:
- Healthy Fats: Peanut butter contains monounsaturated fats, which are heart-healthy and help keep you full longer.
- Protein Source: The combination of egg and peanut butter provides a moderate protein boost, making this dessert more satisfying than many sweets.
- Antioxidants: Cocoa powder is rich in flavonoids, which have antioxidant properties and may support cardiovascular health.
- Portion Control: Being a single-serving dessert, it naturally limits overeating compared to a full pan of brownies.
- Modifications: For those managing diabetes, weight, or cholesterol, consider using reduced-sugar ingredients, egg whites instead of whole eggs, and natural nut butters without hydrogenated oils.
Ingredients
- 4 tablespoons all-purpose flour (or gluten-free alternative)
- 2 tablespoons unsweetened cocoa powder
- 2 tablespoons granulated sugar (or sweetener of choice)
- 1/4 teaspoon baking powder
- Pinch of salt
- 1 large egg (or 1 flax egg for vegan)
- 2 tablespoons milk (dairy or plant-based)
- 1 tablespoon vegetable oil (or melted butter)
- 1/2 teaspoon vanilla extract
- 2 tablespoons creamy peanut butter (plus extra for topping)
- 1–2 tablespoons chocolate chips (optional)
- 1 tablespoon water (if needed for consistency)
Directions
- In a large microwave-safe mug, combine flour, cocoa powder, sugar, baking powder, and salt. Mix well until no lumps remain.
- Add the egg, milk, oil, vanilla extract, and water. Stir with a fork or small whisk until the batter is smooth and fully combined.
- Fold in the peanut butter gently to create swirls, or place a dollop in the center and pour the batter around it for a molten core.
- Top with chocolate chips if desired.
- Microwave on high for 60 to 90 seconds, depending on your microwave’s power. Begin checking at 60 seconds—the brownie should be just set in the center with a slight jiggle.
- Allow to cool for 1–2 minutes. The texture will firm up slightly as it rests.
- Serve warm, optionally topped with powdered sugar, extra peanut butter, whipped cream, or ice cream.
FAQ
Q: Can I make this mug brownie without a microwave?
A: While the recipe is designed for microwave use, you can bake it in a ramekin in a preheated oven at 350°F (175°C) for 12–15 minutes.
Q: Why did my mug brownie turn out dry?
A: Overcooking is the most common cause. Try reducing the time by 10–15 seconds or using a lower-wattage setting.
Q: Can I prepare the dry ingredients ahead of time?
A: Yes! Pre-mix the dry ingredients in a small jar or bag and store for up to a month. Just add wet ingredients when ready.
Q: Is it safe to eat raw egg in the batter?
A: The microwave fully cooks the egg. However, if concerned, use pasteurized eggs or a flax egg for safety.
Q: Can I double the recipe?
A: It’s best to make one at a time. Doubling may lead to uneven cooking. Use two mugs instead.
Q: Can I freeze leftover mug brownie?
A: Since it’s single-serving, leftovers are rare. But if needed, wrap tightly and freeze for up to 1 week. Reheat in microwave for 30–45 seconds.
Q: My batter overflowed. What went wrong?
A: You likely used a mug that’s too small. Always use a 12 oz or larger mug to allow room for rising.
Summary
The peanut butter chocolate mug brownie is a rich, fudgy, single-serve dessert that combines the best of chocolate and peanut butter in under 10 minutes—with just one mug and no baking required.
Perfect for cravings, late nights, or impressing guests, this customizable treat is endlessly adaptable to dietary needs and tastes, making indulgence simple, quick, and utterly delicious.