No Bake Oreo Cheesecake Cups: A Decadent, Easy-to-Make Dessert
Introduction
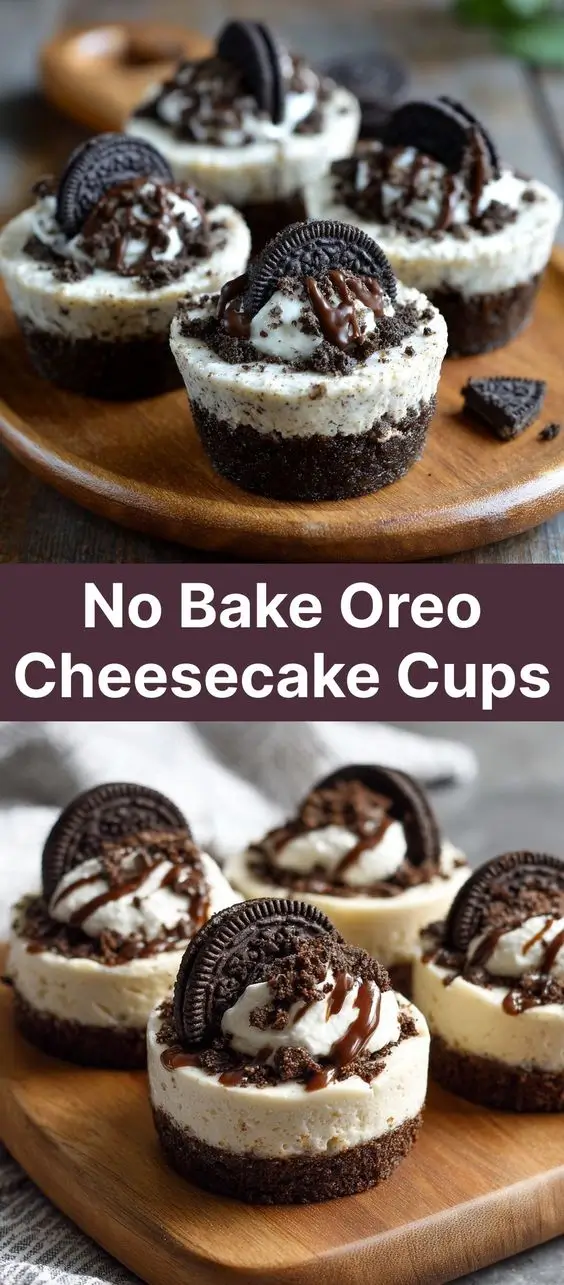
No Bake Oreo Cheesecake Cups are the ultimate dessert for anyone who loves rich, creamy textures with a crunchy chocolate twist. These individual-sized treats combine the smoothness of classic cheesecake with the bold flavor of Oreo cookies—all without turning on your oven. Perfect for summer gatherings, potlucks, or late-night cravings, these no-bake delights come together quickly and deliver big on taste. Whether you’re hosting a party or simply want an effortless yet impressive sweet treat, No Bake Oreo Cheesecake Cups are guaranteed to satisfy every sweet tooth.
The History
The concept of cheesecake dates back thousands of years, with origins in ancient Greece, where it was served to athletes during the first Olympic games as an energy-boosting food. Over centuries, cheesecake evolved across Europe and eventually made its way to America, where cream cheese became the base ingredient, giving rise to the modern New York-style cheesecake. The addition of Oreos into cheesecake recipes began gaining popularity in the mid-to-late 20th century, coinciding with the rise of packaged cookies and no-bake desserts.
Oreo cookies, first introduced by Nabisco in 1912, quickly became a household favorite. Their distinctive chocolate-vanilla creme filling and crisp texture made them ideal for pie crusts, cake mixes, and frozen desserts. By the 1980s and 1990s, recipes combining Oreos and cream cheese started appearing in community cookbooks and women’s magazines. With the growing trend toward convenient, no-fuss desserts, No Bake Oreo Cheesecake Cups emerged as a crowd-pleasing fusion of two beloved American classics—perfect for kids and adults alike.
Ingredients Breakdown
Creating perfect No Bake Oreo Cheesecake Cups starts with understanding each component and how they contribute to the final product. Here’s a detailed look at each ingredient:
- Oreo Cookies (36 total): Used both in the crust and mixed into the filling, these provide a signature chocolate crunch and sweetness. Regular Oreos work best, but gluten-free or double-stuffed versions can be substituted based on dietary needs.
- Cream Cheese (16 oz / 450g): Full-fat brick-style cream cheese ensures a rich, velvety texture. It should be softened to room temperature before use to avoid lumps.
- Heavy Whipping Cream (1 cup): Adds lightness and fluffiness when whipped. This helps the filling hold its shape and gives it that luxurious mouthfeel.
- Powdered Sugar (½ cup): Sweetens the mixture while dissolving seamlessly into the cream cheese without adding graininess.
- Vanilla Extract (1 tsp): Enhances flavor depth and complements the sweetness of the cookies and cream.
- Salted Butter (3 tbsp): Binds the crust crumbs together and adds richness. Melted before mixing with crushed Oreos.
Optional garnishes include additional whipped cream, mini Oreo halves, chocolate shavings, or drizzled melted chocolate for presentation.
Step-by-Step Recipe
- Prepare the Crust: Place 12 Oreo cookies (remove the filling if desired, though not necessary) into a zip-top bag or food processor. Crush them into fine crumbs using a rolling pin or pulse until uniform. Transfer the crumbs to a bowl and mix in 3 tablespoons of melted salted butter until the texture resembles wet sand.
- Form the Base: Divide the Oreo crumb mixture evenly among 12 cupcake liners placed in a muffin tin. Press down firmly using the back of a spoon or a small glass to create a compact, even layer. Place the tin in the refrigerator to chill while preparing the filling.
- Soften Cream Cheese: Ensure the cream cheese is at room temperature. Beat it in a large mixing bowl using a hand mixer or stand mixer on medium speed for 1–2 minutes until smooth and creamy.
- Add Sweetener and Flavor: Gradually add ½ cup powdered sugar and 1 teaspoon vanilla extract. Mix until fully incorporated and fluffy, scraping down the sides as needed.
- Whip the Cream: In a separate clean bowl, pour 1 cup of cold heavy whipping cream. Using chilled beaters, whip on high speed until stiff peaks form—this usually takes 3–4 minutes. Be careful not to over-whip, or the cream may turn grainy.
- Combine Fillings: Gently fold one-third of the whipped cream into the cream cheese mixture to lighten it, then add the remaining whipped cream. Fold gently using a spatula until completely combined and no white streaks remain.
- Incorporate Oreos: Crush 24 additional Oreo cookies into small chunks—not too fine—to retain texture. Fold about three-quarters of the pieces into the cheesecake mixture, reserving some for topping.
- Fill the Cups: Remove the chilled crusts from the fridge. Spoon or pipe the cheesecake filling evenly into each cup, mounding slightly in the center.
- Chill Thoroughly: Cover the muffin tin loosely with plastic wrap and refrigerate for at least 4 hours, preferably overnight, to allow the filling to set completely.
- Garnish and Serve: Before serving, top each cup with a dollop of whipped cream, a half Oreo cookie, or a sprinkle of crushed Oreo crumbs for an elegant finish.
Tips
- Room Temperature Ingredients: Always bring cream cheese and eggs (if used in variations) to room temperature to prevent lumps and ensure a silky texture.
- Use Cold Equipment for Whipping Cream: Chill your mixing bowl and beaters in the freezer for 10–15 minutes before whipping cream for optimal volume.
- Avoid Overmixing: When folding in whipped cream, use a gentle hand to preserve airiness. Overmixing deflates the mixture and results in a denser texture.
- Consistent Crust Pressure: Press the crust firmly and evenly into each liner to prevent crumbling when eating.
- Freeze for Faster Setting: If short on time, freeze the cups for 1–2 hours instead of refrigerating. However, refrigeration yields a creamier consistency.
- Peel Liners Carefully: Use parchment or foil liners for easier removal. Peel them off just before serving to maintain appearance.
- Double the Batch: These disappear fast! Consider making extra and storing them in the freezer for up to 2 months.
Variations and Customizations
No Bake Oreo Cheesecake Cups are highly adaptable. Try these fun twists to suit different tastes and occasions:
- Gluten-Free Version: Use gluten-free chocolate sandwich cookies like KinniToos or Milano-style cookies to make the recipe safe for those with gluten sensitivities.
- Dairy-Free Option: Substitute dairy-free cream cheese (such as Kite Hill or Tofutti) and coconut cream (chilled overnight, whipped) for a plant-based alternative.
- Flavored Oreos: Experiment with seasonal Oreo varieties—Pumpkin Spice for fall, Peppermint for winter holidays, Birthday Cake for birthdays, or Golden Oreos for a vanilla twist.
- Fruit Swirls: Add swirls of raspberry puree, strawberry jam, or blueberry compote before chilling for a fruity contrast.
- Chocolate Lover’s Dream: Melt dark or milk chocolate and drizzle inside the cup before adding the crust, or mix cocoa powder into the filling.
- Peanut Butter Twist: Swirl in creamy peanut butter or add chopped Reese’s pieces for a nutty flavor combo.
- Mini M&M Edition: Replace half the Oreos in the filling with mini M&Ms for colorful, candy-filled bites.
- Protein Boost: Stir in unflavored or vanilla protein powder (1–2 scoops) and adjust cream as needed for thickness.
- Alcohol-Infused: For adult versions, add 1–2 tablespoons of Baileys, Kahlúa, or Godiva liqueur to the filling for a boozy kick.
- Layered Look: Create a tricolor effect by alternating layers of plain cheesecake, Oreo filling, and chocolate pudding.
Health Considerations and Nutritional Value
While undeniably delicious, No Bake Oreo Cheesecake Cups are considered an indulgent dessert due to their high sugar, fat, and calorie content. Here’s a general nutritional breakdown per serving (based on 12 servings):
| Nutrient | Amount per Cup |
|---|---|
| Calories | ~320 kcal |
| Total Fat | 22g |
| Saturated Fat | 10g |
| Cholesterol | 40mg |
| Sodium | 280mg |
| Total Carbohydrates | 28g |
| Dietary Fiber | 1g |
| Sugars | 18g |
| Protein | 4g |
Considerations:
- High in Saturated Fat: From cream cheese, butter, and heavy cream. Those monitoring heart health should enjoy these in moderation.
- Sugar Content: Contains added sugars from Oreos and powdered sugar. Diabetics may need to limit intake or explore sugar substitutes.
- Lactose Intolerance: Traditional ingredients contain dairy. Lactose-free alternatives are available for most components.
- Portion Control: Being served in individual portions helps manage serving size naturally.
- Balanced Indulgence: Best enjoyed occasionally as part of a balanced diet rich in whole grains, fruits, vegetables, and lean proteins.
Ingredients
- 36 Oreo cookies (divided)
- 3 tablespoons salted butter, melted
- 16 oz (2 packages) full-fat cream cheese, softened
- ½ cup powdered sugar
- 1 teaspoon pure vanilla extract
- 1 cup heavy whipping cream, cold
- Optional: whipped cream, chocolate drizzle, extra Oreo crumbs for garnish
Directions
- Crush 12 Oreo cookies into fine crumbs using a food processor or sealed plastic bag and rolling pin. Mix with melted butter until well combined.
- Line a 12-cup muffin tin with cupcake liners. Divide the Oreo crust mixture evenly among the cups and press down firmly to form a flat, compact base. Refrigerate for 15 minutes.
- In a large bowl, beat softened cream cheese on medium speed until smooth and creamy (about 2 minutes).
- Add powdered sugar and vanilla extract. Continue beating until fully blended and lightened in color.
- In a separate bowl, whip cold heavy cream until stiff peaks form.
- Gently fold one-third of the whipped cream into the cream cheese mixture to loosen it, then carefully fold in the remaining whipped cream until smooth and airy.
- Crush 24 Oreo cookies into small chunks. Fold three-quarters of them into the cheesecake mixture, reserving the rest for topping.
- Spoon or pipe the filling over the chilled crusts, filling each cup nearly to the top.
- Cover with plastic wrap and refrigerate for at least 4 hours, or overnight for best results.
- Before serving, garnish with additional whipped cream, a half Oreo, or a sprinkle of crushed cookies.
- Serve chilled. Store leftovers in the refrigerator for up to 5 days or freeze for up to 2 months.
FAQ
Can I make No Bake Oreo Cheesecake Cups ahead of time?
Yes! These actually taste better when made 1–2 days in advance. The flavors meld and the texture firms up beautifully in the fridge.
Can I freeze them?
Absolutely. Place unfrosted cups in an airtight container or freezer bag. They’ll keep for up to 2 months. Thaw in the refrigerator for 2–3 hours before serving.
Why is my filling runny?
This usually happens if the cream cheese wasn’t softened properly, the heavy cream wasn’t whipped enough, or the mixture wasn’t chilled long enough. Always use stiff peaks and allow adequate refrigeration time.
Can I use Cool Whip instead of whipping cream?
Yes. Substitute 1 tub (8 oz) of whipped topping for the heavy cream. Fold it in the same way. Note: the texture will be lighter and less rich.
Do I have to use full-fat cream cheese?
For best texture and flavor, yes. Low-fat or non-fat versions tend to release water and result in a softer, sometimes watery filling.
Can I make them without Oreos in the filling?
Of course! You can skip mixing Oreos into the filling and just use them for the crust. This creates a cleaner cheesecake bite with a chocolate base.
How do I remove the wrappers neatly?
Let the cups sit at room temperature for 5 minutes, then gently peel down the liner. Foil or parchment liners work best for clean presentation.
Are they safe for kids?
Yes! These are kid-friendly and often a hit at school events, birthday parties, and bake sales. Just ensure no allergies to dairy or wheat.
Summary
No Bake Oreo Cheesecake Cups are creamy, crunchy, and utterly irresistible—combining the best of cheesecake and cookies into one easy, no-oven-required dessert. Perfect for any occasion, they’re simple to customize and always a crowd-pleaser.